HP Scanjet 7450c HP Scanjet 7400C Series Scanner Windows - (English) User Manu - Page 35
Back to TOC, Scanning from HP PrecisionScan Pro
 |
View all HP Scanjet 7450c manuals
Add to My Manuals
Save this manual to your list of manuals |
Page 35 highlights
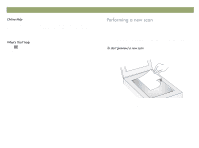
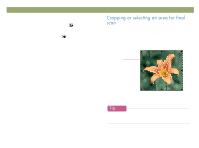
Back to TOC Do one of the following: Move the cursor over the area you want and click. When the cursor looks like this: , click on one corner of the area you want and drag the cursor to the opposite corner to draw a rectangular selection area. On the Edit menu, click Select All. The entire scanner bed, including blank areas, is selected. Click on a handle of the selection border and drag to resize. Move the cursor over the selection area. When the cursor looks like this: , click and drag the selection border to the new location. Do one of the following: Press ESC. On the Edit menu, click Unselect All. Draw a selection border around a different area of the image. Scanning from HP PrecisionScan Pro 35 Zoom in on the selection area to look at it more closely or make changes to it. Zoom out to view the entire preview image, or so you can select a different area of the image to view. Zooming in on the selection area before making changes or performing a final scan provides the best final results. The zoom commands are not available if you have not created a selection area. Zooming in and out does not change which part of the image becomes the final scan, nor does it change the final output size (physical output dimensions). To change which part of the image becomes the final scanned image, see "Cropping or selecting an area for final scan" on page 34. To resize the image, see "Resizing (output dimensions)" on page 38. After creating a selection area, do one of the following: On the View menu, click Zoom in. Click . Do one of the following: On the View menu, click Zoom out to return to the original view of the image. Click .
-
 1
1 -
2
-
3
-
4
-
5
-
6
-
7
-
8
-
9
-
10
-
11
-
12
-
13
-
14
-
15
-
16
-
17
-
18
-
19
-
20
-
21
-
22
-
23
-
24
-
25
-
26
-
27
-
28
-
29
-
 30
30 -
 31
31 -
 32
32 -
 33
33 -
 34
34 -
 35
35 -
 36
36 -
 37
37 -
 38
38 -
 39
39 -
 40
40 -
41
-
42
-
43
-
44
-
45
-
46
-
47
-
48
-
49
-
50
-
51
-
52
-
53
-
54
-
55
-
56
-
57
-
58
-
59
-
60
-
61
-
62
-
63
-
64
-
65
-
66
-
67
-
68
-
69
-
70
-
71
-
72
-
73
-
74
-
75
-
76
-
77
-
78
-
79
-
80
-
81
-
82
-
83
-
84
-
85
-
86
-
87
-
88
-
89
-
90
-
91
-
92
-
93
-
94
-
95
-
96
-
97
-
98
-
99
-
100
-
101
-
102
-
103
-
104
-
105
-
106
-
107
-
108
-
109
-
110
-
111
-
112
-
113
-
114
-
115
-
116
-
117
-
118
-
119
-
120
-
121
-
122
-
123
-
124
-
125
-
126
-
127
-
128
-
129
-
130
-
131
-
132
-
133
-
134
-
135
-
136
 |
 |