HP Scanjet 7450c HP Scanjet 7400C Series Scanner Windows - (English) User Manu - Page 26
Automatic Cropping, Color, Quality, Destination, E-mail File - drivers
 |
View all HP Scanjet 7450c manuals
Add to My Manuals
Save this manual to your list of manuals |
Page 26 highlights
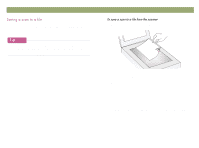
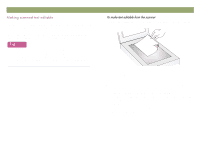
26 Scanning from scanner buttons This tab contains the scanning options that are applied to items you scan using the E-MAIL and E-MAIL PHOTO scanner buttons together. Automatic Cropping When Yes is selected, the scanner includes only the item or items on the scanner glass in the resulting scanned image. When No is selected, the scanner includes the entire area of the scanner glass, including blank areas, in the resulting scanned image. Color When Yes is selected, scanned images retain their color. When No is selected, scanned images will be black and white. No (black and white) allows items to scan more quickly and creates smaller file sizes. Quality Choose one: Small file size with lower quality creates scans at 75 dpi. Normal creates scans at 100 dpi. Large file size with high quality creates scans at 150 dpi. For color photos, output type will be True Color. For black-and-white photos, output type will be Grayscale. Back to TOC Destination Select the e-mail program into which scanned images will be placed as files when scanning is completed. If no compatible e-mail programs are installed on the computer, you cannot scan directly to e-mail. Instead, select E-mail File here in the Destination field. Then when you press E-MAIL on the scanner, you will be prompted to save the scanned image as a file, which you can manually attach to an e-mail message as you normally do. If the e-mail program you want does not appear in the list, you can try to reinstall the e-mail program on the computer, which often allows the scanning software to detect the e-mail program correctly. If this is a newly released e-mail program, check the page for this scanner on the HP website for new drivers to support the e-mail program. Otherwise, visit the page for this scanner on the HP website to check for known conflicts with the program you want.
-
 1
1 -
2
-
3
-
4
-
5
-
6
-
7
-
8
-
9
-
10
-
11
-
12
-
13
-
14
-
15
-
16
-
17
-
18
-
19
-
20
-
 21
21 -
 22
22 -
 23
23 -
 24
24 -
 25
25 -
 26
26 -
 27
27 -
 28
28 -
 29
29 -
 30
30 -
 31
31 -
32
-
33
-
34
-
35
-
36
-
37
-
38
-
39
-
40
-
41
-
42
-
43
-
44
-
45
-
46
-
47
-
48
-
49
-
50
-
51
-
52
-
53
-
54
-
55
-
56
-
57
-
58
-
59
-
60
-
61
-
62
-
63
-
64
-
65
-
66
-
67
-
68
-
69
-
70
-
71
-
72
-
73
-
74
-
75
-
76
-
77
-
78
-
79
-
80
-
81
-
82
-
83
-
84
-
85
-
86
-
87
-
88
-
89
-
90
-
91
-
92
-
93
-
94
-
95
-
96
-
97
-
98
-
99
-
100
-
101
-
102
-
103
-
104
-
105
-
106
-
107
-
108
-
109
-
110
-
111
-
112
-
113
-
114
-
115
-
116
-
117
-
118
-
119
-
120
-
121
-
122
-
123
-
124
-
125
-
126
-
127
-
128
-
129
-
130
-
131
-
132
-
133
-
134
-
135
-
136
 |
 |