HP Scanjet 7450c HP Scanjet 7400C Series Scanner Windows - (English) User Manu - Page 58
Wkhu²ihdwxuhv²dqg²wlsv
 |
View all HP Scanjet 7450c manuals
Add to My Manuals
Save this manual to your list of manuals |
Page 58 highlights
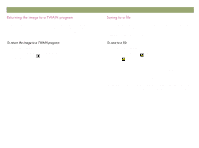
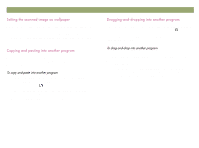
58 Scanning from HP PrecisionScan Pro Back to TOC Scanned images you drag-and-drop to the Windows Desktop or a folder in Windows Explorer become a bitmap file. The bitmap file is given a generic name such as "scan.bmp." Subsequent images scanned to the Desktop or that folder replace the current one. Therefore, if you want to save a scanned image, rename it before you drag-and-drop another image to that location. 1 Make sure you can see both the HP PrecisionScan Pro software and the Desktop or the folder you want in Windows Explorer. 2 In the HP PrecisionScan Pro software, place the cursor over the scanned image. 3 Press CTRL and click over the selection area. 4 While holding down the mouse button, drag the scanned image to the Desktop or folder and release the mouse button. Wait until the scanner performs the final scan. The other sections in "Scanning from HP PrecisionScan Pro" provide the most common information you need to scan items every day. In this section, you can find information about: which settings to use to get the best image quality. (See "Tips for best image quality" on page 59.) how to save a group of settings you use all the time and use them with future scans when you select them. (See "Saving settings" on page 59.) how to change the default settings the scanner uses to scan all items. (See "Setting preferences" on page 60.) how to start scanning from programs compliant with TWAIN. (See "Scanning from other programs (TWAIN)" on page 63.) For information about results to expect from the OCR program, see "What to expect from OCR programs" on page 23.
-
 1
1 -
2
-
3
-
4
-
5
-
6
-
7
-
8
-
9
-
10
-
11
-
12
-
13
-
14
-
15
-
16
-
17
-
18
-
19
-
20
-
21
-
22
-
23
-
24
-
25
-
26
-
27
-
28
-
29
-
30
-
31
-
32
-
33
-
34
-
35
-
36
-
37
-
38
-
39
-
40
-
41
-
42
-
43
-
44
-
45
-
46
-
47
-
48
-
49
-
50
-
51
-
52
-
 53
53 -
 54
54 -
 55
55 -
 56
56 -
 57
57 -
 58
58 -
 59
59 -
 60
60 -
 61
61 -
 62
62 -
 63
63 -
64
-
65
-
66
-
67
-
68
-
69
-
70
-
71
-
72
-
73
-
74
-
75
-
76
-
77
-
78
-
79
-
80
-
81
-
82
-
83
-
84
-
85
-
86
-
87
-
88
-
89
-
90
-
91
-
92
-
93
-
94
-
95
-
96
-
97
-
98
-
99
-
100
-
101
-
102
-
103
-
104
-
105
-
106
-
107
-
108
-
109
-
110
-
111
-
112
-
113
-
114
-
115
-
116
-
117
-
118
-
119
-
120
-
121
-
122
-
123
-
124
-
125
-
126
-
127
-
128
-
129
-
130
-
131
-
132
-
133
-
134
-
135
-
136
 |
 |