HP Scanjet 7450c HP Scanjet 7400C Series Scanner Windows - (English) User Manu - Page 86
the HP PrecisionScan Pro software. See
 |
View all HP Scanjet 7450c manuals
Add to My Manuals
Save this manual to your list of manuals |
Page 86 highlights
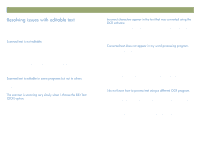
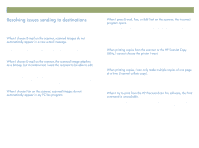
86 Troubleshooting usage and maintaining Setting the resolution to a higher number does not necessarily improve quality. The software sets the resolution automatically based on the type of item you scanned. Keep or return to the default. See "Changing resolution" on page 38 or "Tips for best image quality" on page 59 for guidelines. If you sent the image to another program, the program might not support the resolution you set in the HP PrecisionScan Pro software. Determine the setting the program uses and set the resolution in the HP PrecisionScan Pro software to that resolution. The other program did not accept the image size information. Scan the image at a lower resolution. When you scan at a resolution the program accepts, it will display or print the image at the correct size. In the HP PrecisionScan Pro software, set the physical width and height of the image in the Resize dialog box. See "Resizing (output dimensions)" on page 38. Scan settings for this image might be set incorrectly. Use the Guided Steps for help choosing an output type. See also "Tips for best image quality" on page 59. Back to TOC Use this section to help resolve issues with printed pages. Printers cannot print right up to the edge of the paper. To get the image to fit inside the printable area, you must slightly reduce the size of the image in the HP PrecisionScan Pro software and then reprint the image. If you are copying an item printed on colored paper, there might not be enough contrast between the ink and paper colors. Adjust the highlights, shadows, midtones, and resolution settings from the HP PrecisionScan Pro software. See "Scanning from HP PrecisionScan Pro" on page 31. Or, adjust the contrast from the HP ScanJet Copy Utility. Also, if possible for text, use originals printed with black ink on white paper. The printer might be out of toner or ink. Print a different file from another program to the printer to see if the issue lies with the printer.
-
 1
1 -
2
-
3
-
4
-
5
-
6
-
7
-
8
-
9
-
10
-
11
-
12
-
13
-
14
-
15
-
16
-
17
-
18
-
19
-
20
-
21
-
22
-
23
-
24
-
25
-
26
-
27
-
28
-
29
-
30
-
31
-
32
-
33
-
34
-
35
-
36
-
37
-
38
-
39
-
40
-
41
-
42
-
43
-
44
-
45
-
46
-
47
-
48
-
49
-
50
-
51
-
52
-
53
-
54
-
55
-
56
-
57
-
58
-
59
-
60
-
61
-
62
-
63
-
64
-
65
-
66
-
67
-
68
-
69
-
70
-
71
-
72
-
73
-
74
-
75
-
76
-
77
-
78
-
79
-
80
-
 81
81 -
 82
82 -
 83
83 -
 84
84 -
 85
85 -
 86
86 -
 87
87 -
 88
88 -
 89
89 -
 90
90 -
 91
91 -
92
-
93
-
94
-
95
-
96
-
97
-
98
-
99
-
100
-
101
-
102
-
103
-
104
-
105
-
106
-
107
-
108
-
109
-
110
-
111
-
112
-
113
-
114
-
115
-
116
-
117
-
118
-
119
-
120
-
121
-
122
-
123
-
124
-
125
-
126
-
127
-
128
-
129
-
130
-
131
-
132
-
133
-
134
-
135
-
136
 |
 |