HP Scanjet 7450c HP Scanjet 7400C Series Scanner Windows - (English) User Manu - Page 85
Best Quality Sharpening is selected. Check the setting. See
 |
View all HP Scanjet 7450c manuals
Add to My Manuals
Save this manual to your list of manuals |
Page 85 highlights
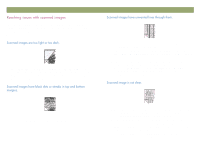
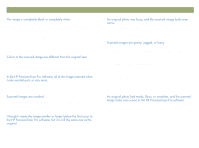
Back to TOC The item might not be placed correctly on the scanner glass or in the ADF. Make sure that the item you are trying to scan is placed face down on the glass, or face up in the ADF. If you are using the ADF, there might be a page on the scanner glass. Raise the ADF unit and remove any pages on the scanner glass. If you are using the ADF, the ADF window might need to be replaced. See "Replacing the ADF Window" on page 102. Scanners, monitors, printers, and different operating systems interpret color differently. Use the hue and saturation settings in the HP PrecisionScan Pro software to adjust the colors. The selection area might not be selected correctly. Make sure the selection border is surrounding the area you want in the final scan. The item might have been placed crookedly or shifted when you closed the lid. Straighten the original on the scanner glass and scan again. You might have zoomed in or out, which does not change the size of the image. Change the output size. See "Resizing (output dimensions)" on page 38. Troubleshooting usage and maintaining 85 The sharpening level needs to be increased. In the HP PrecisionScan Pro software, adjust the sharpening. See "Sharpening an image" on page 40. You resized the image in a program other than the HP PrecisionScan Pro software. Resize the image in the HP PrecisionScan Pro software before you send it to the other program. (See "Resizing (output dimensions)" on page 38.) Or, if the original was a black-and-white drawing, use the Black & White Scalable output type for the scanned image. (See "Selecting output type" on page 36.) In the HP PrecisionScan Pro software, the resolution is set too low. Set the resolution to a higher number, or return to the default setting. See "Changing resolution" on page 38. In the HP PrecisionScan Pro software, too much or too little sharpening was applied. Adjust the sharpening. See "Sharpening an image" on page 40. You sharpened the image manually. Return to the default setting. See "Sharpening an image" on page 40. Best Quality Sharpening is selected. Check the setting. See "Setting preferences" on page 60.
-
 1
1 -
2
-
3
-
4
-
5
-
6
-
7
-
8
-
9
-
10
-
11
-
12
-
13
-
14
-
15
-
16
-
17
-
18
-
19
-
20
-
21
-
22
-
23
-
24
-
25
-
26
-
27
-
28
-
29
-
30
-
31
-
32
-
33
-
34
-
35
-
36
-
37
-
38
-
39
-
40
-
41
-
42
-
43
-
44
-
45
-
46
-
47
-
48
-
49
-
50
-
51
-
52
-
53
-
54
-
55
-
56
-
57
-
58
-
59
-
60
-
61
-
62
-
63
-
64
-
65
-
66
-
67
-
68
-
69
-
70
-
71
-
72
-
73
-
74
-
75
-
76
-
77
-
78
-
79
-
 80
80 -
 81
81 -
 82
82 -
 83
83 -
 84
84 -
 85
85 -
 86
86 -
 87
87 -
 88
88 -
 89
89 -
 90
90 -
91
-
92
-
93
-
94
-
95
-
96
-
97
-
98
-
99
-
100
-
101
-
102
-
103
-
104
-
105
-
106
-
107
-
108
-
109
-
110
-
111
-
112
-
113
-
114
-
115
-
116
-
117
-
118
-
119
-
120
-
121
-
122
-
123
-
124
-
125
-
126
-
127
-
128
-
129
-
130
-
131
-
132
-
133
-
134
-
135
-
136
 |
 |