Panasonic KX-P7310 Laser Printer - Page 233
NetWare, PSERVER Mode, Setup, Create NetWare Queue, then click
 |
UPC - 092281830131
View all Panasonic KX-P7310 manuals
Add to My Manuals
Save this manual to your list of manuals |
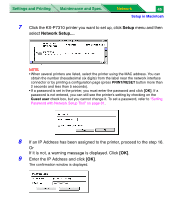
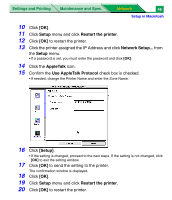
Page 233 highlights
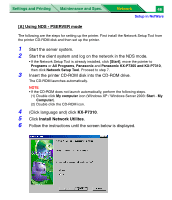
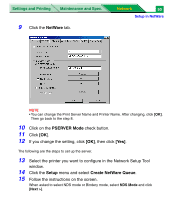
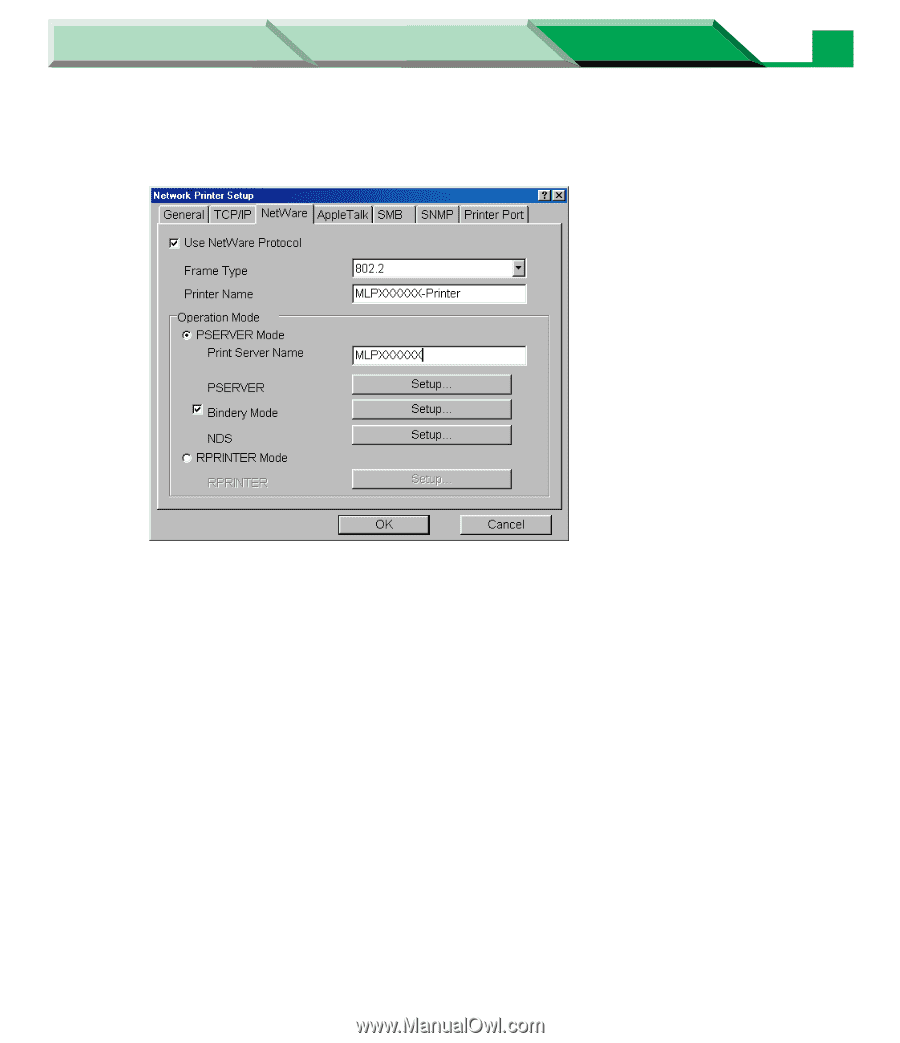
Settings and Printing Maintenance and Spec. 9 Click the NetWare tab. Network 50 Setup in NetWare NOTE • You can change the Print Server Name and Printer Name. After changing, click [OK]. Then go back to the step 8. 10 Click on the PSERVER Mode check button. 11 Click [OK]. 12 If you change the setting, click [OK], then click [Yes]. The following are the steps to set up the server. 13 Select the printer you want to configure in the Network Setup Tool window. 14 Click the Setup menu and select Create NetWare Queue. 15 Follow the instructions on the screen. When asked to select NDS mode or Bindery mode, select NDS Mode and click [Next >].
-
 1
1 -
2
-
3
-
4
-
5
-
6
-
7
-
8
-
9
-
10
-
11
-
12
-
13
-
14
-
15
-
16
-
17
-
18
-
19
-
20
-
21
-
22
-
23
-
24
-
25
-
26
-
27
-
28
-
29
-
30
-
31
-
32
-
33
-
34
-
35
-
36
-
37
-
38
-
39
-
40
-
41
-
42
-
43
-
44
-
45
-
46
-
47
-
48
-
49
-
50
-
51
-
52
-
53
-
54
-
55
-
56
-
57
-
58
-
59
-
60
-
61
-
62
-
63
-
64
-
65
-
66
-
67
-
68
-
69
-
70
-
71
-
72
-
73
-
74
-
75
-
76
-
77
-
78
-
79
-
80
-
81
-
82
-
83
-
84
-
85
-
86
-
87
-
88
-
89
-
90
-
91
-
92
-
93
-
94
-
95
-
96
-
97
-
98
-
99
-
100
-
101
-
102
-
103
-
104
-
105
-
106
-
107
-
108
-
109
-
110
-
111
-
112
-
113
-
114
-
115
-
116
-
117
-
118
-
119
-
120
-
121
-
122
-
123
-
124
-
125
-
126
-
127
-
128
-
129
-
130
-
131
-
132
-
133
-
134
-
135
-
136
-
137
-
138
-
139
-
140
-
141
-
142
-
143
-
144
-
145
-
146
-
147
-
148
-
149
-
150
-
151
-
152
-
153
-
154
-
155
-
156
-
157
-
158
-
159
-
160
-
161
-
162
-
163
-
164
-
165
-
166
-
167
-
168
-
169
-
170
-
171
-
172
-
173
-
174
-
175
-
176
-
177
-
178
-
179
-
180
-
181
-
182
-
183
-
184
-
185
-
186
-
187
-
188
-
189
-
190
-
191
-
192
-
193
-
194
-
195
-
196
-
197
-
198
-
199
-
200
-
201
-
202
-
203
-
204
-
205
-
206
-
207
-
208
-
209
-
210
-
211
-
212
-
213
-
214
-
215
-
216
-
217
-
218
-
219
-
220
-
221
-
222
-
223
-
224
-
225
-
226
-
227
-
 228
228 -
 229
229 -
 230
230 -
 231
231 -
 232
232 -
 233
233 -
 234
234 -
 235
235 -
 236
236 -
 237
237 -
 238
238 -
239
-
240
-
241
-
242
-
243
-
244
-
245
-
246
-
247
-
248
-
249
-
250
-
251
-
252
-
253
-
254
-
255
-
256
-
257
-
258
-
259
-
260
-
261
-
262
-
263
-
264
-
265
-
266
-
267
-
268
-
269
-
270
-
271
-
272
-
273
-
274
-
275
-
276
-
277
 |
 |
Settings and Printing
Network
Network
Maintenance and Spec.
Setup in NetWare
50
9
Click the
NetWare
tab.
NOTE
•You can change the Print Server Name and Printer Name. After changing, click
[OK]
.
Then go back to the step 8.
10
Click on the
PSERVER Mode
check button.
11
Click
[OK
].
12
If you change the setting, click
[OK]
, then click
[Yes]
.
The following are the steps to set up the server.
13
Select the printer you want to configure in the Network Setup Tool
window.
14
Click the
Setup
menu and select
Create NetWare Queue
.
15
Follow the instructions on the screen.
When asked to select NDS mode or Bindery mode, select
NDS Mode
and click
[Next >]
.