Samsung GT-N5110 User Manual Generic Gt-n5110 English User Manual Ver.mca_f5 ( - Page 127
S Voice, Add Additional S Planner Accounts, S Planner Settings
 |
View all Samsung GT-N5110 manuals
Add to My Manuals
Save this manual to your list of manuals |
Page 127 highlights
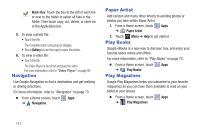
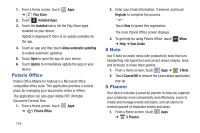
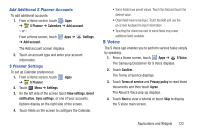
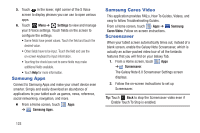
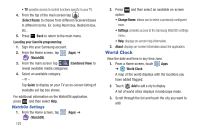
Add Additional S Planner Accounts To add additional accounts: 1. From a Home screen, touch Apps ➔ S Planner ➔ Calendars ➔ Add account. - or - From a Home screen, touch ➔ Add account. Apps ➔ Settings The Add account screen displays. 2. Touch an account type and enter your account information. S Planner Settings To set up Calendar preferences: 1. From a Home screen, touch Apps ➔ S Planner. 2. Touch Menu ➔ Settings. 3. On the left side of the screen touch View settings, Event notification, Sync settings, or one of your accounts. Options display on the right side of the screen. 4. Touch fields on the screen to configure the Calendar. • Some fields have preset values. Touch the field and touch the desired value. • Other fields have to be input. Touch the field and use the on-screen keyboard to input information. • Touching the check box next to some fields may make additional fields available. S Voice The S Voice app enables you to perform various tasks simply by speaking. 1. From a Home screen, touch Apps ➔ S Voice. The Samsung Disclaimer for S Voice displays. 2. Touch Confirm. The Terms of Service displays. 3. Touch Terms of service and Privacy policy to read those documents and then touch Agree. The About S Voice pop-up displays. 4. Touch Next to view a tutorial or touch Skip to display the S Voice main screen. Applications and Widgets 122
-
 1
1 -
2
-
3
-
4
-
5
-
6
-
7
-
8
-
9
-
10
-
11
-
12
-
13
-
14
-
15
-
16
-
17
-
18
-
19
-
20
-
21
-
22
-
23
-
24
-
25
-
26
-
27
-
28
-
29
-
30
-
31
-
32
-
33
-
34
-
35
-
36
-
37
-
38
-
39
-
40
-
41
-
42
-
43
-
44
-
45
-
46
-
47
-
48
-
49
-
50
-
51
-
52
-
53
-
54
-
55
-
56
-
57
-
58
-
59
-
60
-
61
-
62
-
63
-
64
-
65
-
66
-
67
-
68
-
69
-
70
-
71
-
72
-
73
-
74
-
75
-
76
-
77
-
78
-
79
-
80
-
81
-
82
-
83
-
84
-
85
-
86
-
87
-
88
-
89
-
90
-
91
-
92
-
93
-
94
-
95
-
96
-
97
-
98
-
99
-
100
-
101
-
102
-
103
-
104
-
105
-
106
-
107
-
108
-
109
-
110
-
111
-
112
-
113
-
114
-
115
-
116
-
117
-
118
-
119
-
120
-
121
-
 122
122 -
 123
123 -
 124
124 -
 125
125 -
 126
126 -
 127
127 -
 128
128 -
 129
129 -
 130
130 -
 131
131 -
 132
132 -
133
-
134
-
135
-
136
-
137
-
138
-
139
-
140
-
141
-
142
-
143
-
144
-
145
-
146
-
147
-
148
-
149
-
150
-
151
-
152
-
153
-
154
-
155
-
156
-
157
-
158
-
159
-
160
-
161
-
162
-
163
-
164
-
165
-
166
-
167
-
168
-
169
-
170
-
171
-
172
-
173
-
174
-
175
-
176
-
177
-
178
-
179
-
180
-
181
-
182
-
183
-
184
-
185
-
186
-
187
-
188
-
189
-
190
-
191
-
192
-
193
-
194
-
195
-
196
-
197
-
198
-
199
-
200
-
201
-
202
-
203
-
204
-
205
-
206
 |
 |
