Samsung GT-N5110 User Manual Generic Gt-n5110 English User Manual Ver.mca_f5 ( - Page 91
Viewing Photos with the Image Viewer, Outdoor visibility, Contextual filenames, Save as flipped - brightness won t adjust
 |
View all Samsung GT-N5110 manuals
Add to My Manuals
Save this manual to your list of manuals |
Page 91 highlights
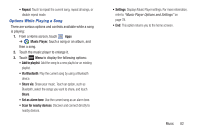
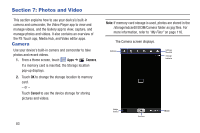
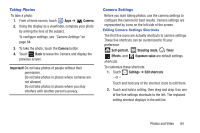
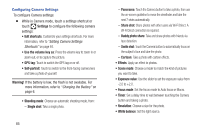
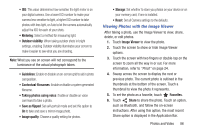
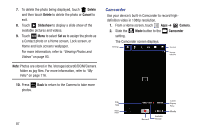
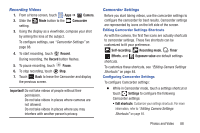
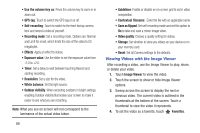
• ISO: This value determines how sensitive the light meter is on your digital camera. Use a lower ISO number to make your camera less sensitive to light, a higher ISO number to take photos with less light, or Auto to let the camera automatically adjust the ISO for each of your shots. • Metering: Select a method for measuring light. • Outdoor visibility: When taking outdoor shots in bright settings, enabling Outdoor visibility Illuminates your screen to make it easier to see what you are shooting. Note: What you see on screen will not correspond to the luminance of the actual photograph taken. • Guidelines: Enable or disable an on-screen grid to aid in photo composition. • Contextual filenames: Enable or disable a system generated filename. • Taking photos using voice: Enable or disable an voice command to take a photo. • Save as flipped: Set self-portrait mode and set this option to On to take and save a mirror-image photo. • Image quality: Choose a quality setting for photos. • Storage: Set whether to store you photos on your device or on your memory card, if one is installed. • Reset: Set all Camera settings to the defaults. Viewing Photos with the Image Viewer After taking a photo, use the Image Viewer to view, share, delete, or edit photos. 1. Touch Image Viewer to view the photo. 2. Touch the screen to show or hide Image Viewer options. 3. Touch the screen with two fingers or double-tap on the screen to zoom all the way in or out. For more information, refer to "Pinch" on page 24. 4. Sweep across the screen to display the next or previous photo. The current photo is outlined in the thumbnails at the bottom of the screen. Touch a thumbnail to view the photo it represents. 5. To set the photo as a favorite, touch Favorites. 6. Touch Share to share the photo. Touch an option, such as Bluetooth, and follow the on-screen instructions. After using this option, the most recent Share option is displayed in the Application Bar. Photos and Video 86
-
 1
1 -
2
-
3
-
4
-
5
-
6
-
7
-
8
-
9
-
10
-
11
-
12
-
13
-
14
-
15
-
16
-
17
-
18
-
19
-
20
-
21
-
22
-
23
-
24
-
25
-
26
-
27
-
28
-
29
-
30
-
31
-
32
-
33
-
34
-
35
-
36
-
37
-
38
-
39
-
40
-
41
-
42
-
43
-
44
-
45
-
46
-
47
-
48
-
49
-
50
-
51
-
52
-
53
-
54
-
55
-
56
-
57
-
58
-
59
-
60
-
61
-
62
-
63
-
64
-
65
-
66
-
67
-
68
-
69
-
70
-
71
-
72
-
73
-
74
-
75
-
76
-
77
-
78
-
79
-
80
-
81
-
82
-
83
-
84
-
85
-
 86
86 -
 87
87 -
 88
88 -
 89
89 -
 90
90 -
 91
91 -
 92
92 -
 93
93 -
 94
94 -
 95
95 -
 96
96 -
97
-
98
-
99
-
100
-
101
-
102
-
103
-
104
-
105
-
106
-
107
-
108
-
109
-
110
-
111
-
112
-
113
-
114
-
115
-
116
-
117
-
118
-
119
-
120
-
121
-
122
-
123
-
124
-
125
-
126
-
127
-
128
-
129
-
130
-
131
-
132
-
133
-
134
-
135
-
136
-
137
-
138
-
139
-
140
-
141
-
142
-
143
-
144
-
145
-
146
-
147
-
148
-
149
-
150
-
151
-
152
-
153
-
154
-
155
-
156
-
157
-
158
-
159
-
160
-
161
-
162
-
163
-
164
-
165
-
166
-
167
-
168
-
169
-
170
-
171
-
172
-
173
-
174
-
175
-
176
-
177
-
178
-
179
-
180
-
181
-
182
-
183
-
184
-
185
-
186
-
187
-
188
-
189
-
190
-
191
-
192
-
193
-
194
-
195
-
196
-
197
-
198
-
199
-
200
-
201
-
202
-
203
-
204
-
205
-
206
 |
 |