Samsung SCH-R930 User Manual Ver.fc02-f6 (English(north America)) - Page 55
Windows Live, Groups, Ringtone
 |
View all Samsung SCH-R930 manuals
Add to My Manuals
Save this manual to your list of manuals |
Page 55 highlights
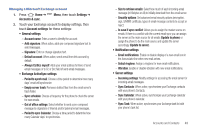
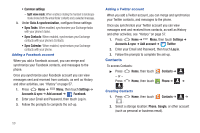
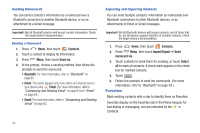
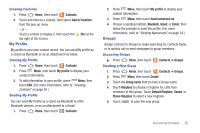
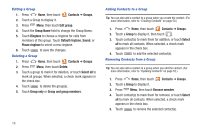
3. Touch the Select Photo box to choose a picture to identify the contact. (For more information, refer to "Gallery" on page 88.) 4. Touch the First name and Last name fields then enter a name for the contact using the displayed keypad. After entering a last name touch to enter a Name prefix, Middle name, Name suffix, Phonetic given name, Phonetic middle name, or Phonetic family name. 5. Tap the image icon and select a photo for this contact. Selections are: Album, or Take photo. 6. Touch Phone number to enter a phone number, then touch the label button (for example, Mobile) to choose a label from Home, Mobile, Work, Work Fax, Pager, Other, or Custom to create a custom label. • Tap on the QWERTY keyboard to remove a previously entered phone number. • Tap to enter an additional phone number • Tap to remove a previously entered phone number. 7. Touch Email to enter an email address, then touch the label button (for example, Work) to choose a label from Work, Home, Mobile, Other, or Custom to create a custom label. To add another address, touch . 8. Touch IM to enter an instant message address, then touch the label button to choose a label, from Google Talk, AIM, Windows Live, Yahoo!, Skype, QQ, ICQ, Jabber, or Custom to create a custom label. To add another IM, touch . 9. Enter additional information such as: Groups, Ringtone, Postal address, Organization or More fields to input additional category information. • Touch Groups to assign the contact to a group. (For more information, refer to "Groups" on page 55.) • The More field contains the following options: Notes, Nickname, Website, Internet call, Birthday, and Anniversary. • Use your finger to slide the page up or down to see additional fields and categories. 10. Tap Save to complete and store the new entry. Creating Contacts from Call log Save a phone number from a recent call record to create a new contact, or update an existing contact.(For more information, refer to "Creating or Updating Contacts Using Call Log" on page 38.) Accounts and Contacts 51
-
 1
1 -
2
-
3
-
4
-
5
-
6
-
7
-
8
-
9
-
10
-
11
-
12
-
13
-
14
-
15
-
16
-
17
-
18
-
19
-
20
-
21
-
22
-
23
-
24
-
25
-
26
-
27
-
28
-
29
-
30
-
31
-
32
-
33
-
34
-
35
-
36
-
37
-
38
-
39
-
40
-
41
-
42
-
43
-
44
-
45
-
46
-
47
-
48
-
49
-
 50
50 -
 51
51 -
 52
52 -
 53
53 -
 54
54 -
 55
55 -
 56
56 -
 57
57 -
 58
58 -
 59
59 -
 60
60 -
61
-
62
-
63
-
64
-
65
-
66
-
67
-
68
-
69
-
70
-
71
-
72
-
73
-
74
-
75
-
76
-
77
-
78
-
79
-
80
-
81
-
82
-
83
-
84
-
85
-
86
-
87
-
88
-
89
-
90
-
91
-
92
-
93
-
94
-
95
-
96
-
97
-
98
-
99
-
100
-
101
-
102
-
103
-
104
-
105
-
106
-
107
-
108
-
109
-
110
-
111
-
112
-
113
-
114
-
115
-
116
-
117
-
118
-
119
-
120
-
121
-
122
-
123
-
124
-
125
-
126
-
127
-
128
-
129
-
130
-
131
-
132
-
133
-
134
-
135
-
136
-
137
-
138
-
139
-
140
-
141
-
142
-
143
-
144
-
145
-
146
-
147
-
148
-
149
-
150
-
151
-
152
-
153
-
154
-
155
-
156
-
157
-
158
-
159
-
160
-
161
-
162
-
163
-
164
-
165
-
166
-
167
-
168
-
169
-
170
-
171
-
172
-
173
-
174
-
175
-
176
-
177
 |
 |