Samsung SCH-R930 User Manual Ver.fc02-f6 (English(north America)) - Page 57
Contacts, Display options, Only contacts with phones, Sort by, Display contacts by, Phone
 |
View all Samsung SCH-R930 manuals
Add to My Manuals
Save this manual to your list of manuals |
Page 57 highlights
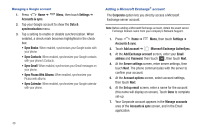
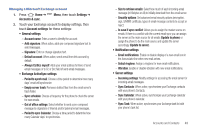
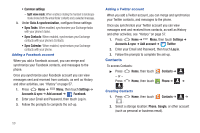
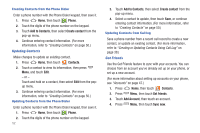
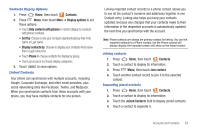
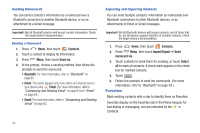
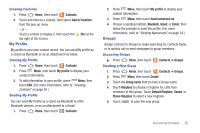
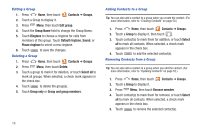
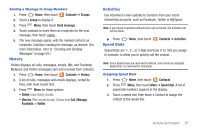
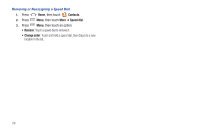
Contacts Display Options 1. Press Home, then touch Contacts. 2. Press Menu, then touch More ➔ Display options to set these options: • Touch Only contacts with phones to restrict display to contacts with phone numbers. • Sort by: Choose to list your Contacts alphabetically by their First name or Last name. • Display contacts by: Choose to display your Contacts First name first or Last name first. • Touch Phone to choose contacts for display by group. • Touch an account to choose display categories. 3. Touch Done to save options. Linked Contacts Your phone can synchronize with multiple accounts, including Google, Corporate Exchange, and other email providers, plus social networking sites like Facebook, Twitter, and MySpace. When you synchronize contacts from these accounts with your phone, you may have multiple contacts for one person. Linking imported contact records to a phone contact allows you to see all the contact's numbers and addresses together in one Contact entry. Linking also helps you keep your contacts updated, because any changes that your contacts make to their information in the respective accounts is automatically updated the next time you synchronize with the account. Note: Phone contacts are always the primary contact for linking. You can link imported contacts to a Phone contact, but the Phone contact will always display; the imported contact will show as the linked contact. Joining contacts 1. Press Home, then touch Contacts. 2. Touch a contact to display its information. 3. Press Menu, then touch Join contact. 4. Touch another contact record to join it to the selected contact. Separating joined contacts 1. Press Home, then touch Contacts. 2. Touch a contact to display its information. 3. Touch the Joined Contacts field to display joined contacts. 4. Touch a contact to separate it. Accounts and Contacts 53
-
 1
1 -
2
-
3
-
4
-
5
-
6
-
7
-
8
-
9
-
10
-
11
-
12
-
13
-
14
-
15
-
16
-
17
-
18
-
19
-
20
-
21
-
22
-
23
-
24
-
25
-
26
-
27
-
28
-
29
-
30
-
31
-
32
-
33
-
34
-
35
-
36
-
37
-
38
-
39
-
40
-
41
-
42
-
43
-
44
-
45
-
46
-
47
-
48
-
49
-
50
-
51
-
 52
52 -
 53
53 -
 54
54 -
 55
55 -
 56
56 -
 57
57 -
 58
58 -
 59
59 -
 60
60 -
 61
61 -
 62
62 -
63
-
64
-
65
-
66
-
67
-
68
-
69
-
70
-
71
-
72
-
73
-
74
-
75
-
76
-
77
-
78
-
79
-
80
-
81
-
82
-
83
-
84
-
85
-
86
-
87
-
88
-
89
-
90
-
91
-
92
-
93
-
94
-
95
-
96
-
97
-
98
-
99
-
100
-
101
-
102
-
103
-
104
-
105
-
106
-
107
-
108
-
109
-
110
-
111
-
112
-
113
-
114
-
115
-
116
-
117
-
118
-
119
-
120
-
121
-
122
-
123
-
124
-
125
-
126
-
127
-
128
-
129
-
130
-
131
-
132
-
133
-
134
-
135
-
136
-
137
-
138
-
139
-
140
-
141
-
142
-
143
-
144
-
145
-
146
-
147
-
148
-
149
-
150
-
151
-
152
-
153
-
154
-
155
-
156
-
157
-
158
-
159
-
160
-
161
-
162
-
163
-
164
-
165
-
166
-
167
-
168
-
169
-
170
-
171
-
172
-
173
-
174
-
175
-
176
-
177
 |
 |