Ricoh 1160L User Guide - Page 102
Guidelines for Maintenance, Clearing Memory, User Tools, Start/Enter, FAX NUMBER/NAME, DIAL/SCHEDULE
 |
View all Ricoh 1160L manuals
Add to My Manuals
Save this manual to your list of manuals |
Page 102 highlights
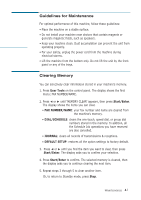
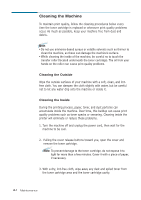
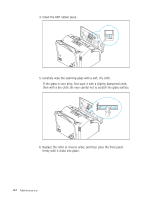
Guidelines for Maintenance For optimal performance of this machine, follow these guidelines: • Place the machine on a stable surface. • Do not install your machine near devices that contain magnets or generate magnetic fields, such as speakers. • Keep your machine clean. Dust accumulation can prevent the unit from operating properly. • For your safety, unplug the power cord from the machine during electrical storms. • Lift the machine from the bottom only. Do not lift the unit by the front panel or any of the trays. Clearing Memory You can selectively clear information stored in your machine's memory. 1. Press User Tools on the control panel. The display shows the first menu; FAX NUMBER/NAME. 2. Press ➛ or ❿ until 'MEMORY CLEAR' appears, then press Start/Enter. The display shows the items you can clear. • FAX NUMBER/NAME: your fax number and name are cleared from the machine's memory. • DIAL/SCHEDULE: clears the one-touch, speed dial, or group dial numbers stored in the memory. In addition, all the Schedule Job operations you have reserved are also cancelled. • JOURNAL: clears all records of transmissions & receptions. • DEFAULT SETUP: restores all the option settings to factory default. 3. Press ➛ or ❿ until you find the item you want to clear, then press Start/Enter. The display asks you to confirm your selection. 4. Press Start/Enter to confirm. The selected memory is cleared, then the display asks you to continue clearing the next item. 5. Repeat steps 3 through 5 to clear another item. Or, to return to Standby mode, press Stop. Maintenance 4.1
-
 1
1 -
2
-
3
-
4
-
5
-
6
-
7
-
8
-
9
-
10
-
11
-
12
-
13
-
14
-
15
-
16
-
17
-
18
-
19
-
20
-
21
-
22
-
23
-
24
-
25
-
26
-
27
-
28
-
29
-
30
-
31
-
32
-
33
-
34
-
35
-
36
-
37
-
38
-
39
-
40
-
41
-
42
-
43
-
44
-
45
-
46
-
47
-
48
-
49
-
50
-
51
-
52
-
53
-
54
-
55
-
56
-
57
-
58
-
59
-
60
-
61
-
62
-
63
-
64
-
65
-
66
-
67
-
68
-
69
-
70
-
71
-
72
-
73
-
74
-
75
-
76
-
77
-
78
-
79
-
80
-
81
-
82
-
83
-
84
-
85
-
86
-
87
-
88
-
89
-
90
-
91
-
92
-
93
-
94
-
95
-
96
-
 97
97 -
 98
98 -
 99
99 -
 100
100 -
 101
101 -
 102
102 -
 103
103 -
 104
104 -
 105
105 -
 106
106 -
 107
107 -
108
-
109
-
110
-
111
-
112
-
113
-
114
-
115
-
116
-
117
-
118
-
119
-
120
-
121
-
122
-
123
-
124
-
125
-
126
-
127
-
128
-
129
-
130
-
131
-
132
-
133
-
134
-
135
-
136
-
137
-
138
-
139
-
140
-
141
-
142
-
143
-
144
-
145
 |
 |