Ricoh 1160L User Guide - Page 125
AaBbCc, If the amount of background toner shading becomes
 |
View all Ricoh 1160L manuals
Add to My Manuals
Save this manual to your list of manuals |
Page 125 highlights
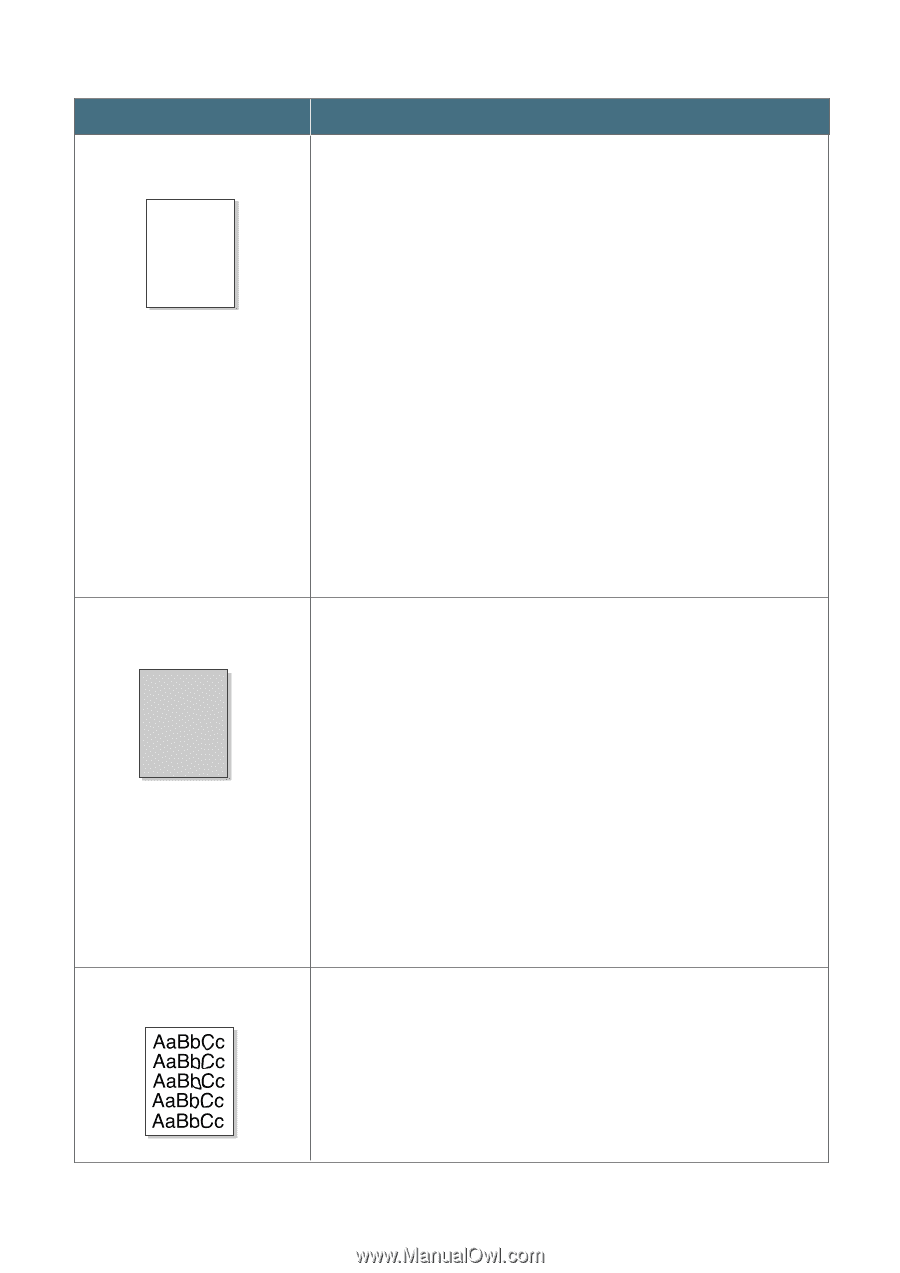
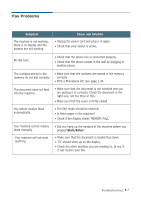
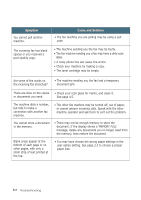
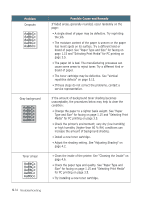
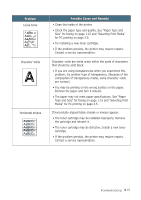
Problem Dropouts AaBbCc AaBbCc AaBbCc AaBbCc AaBbCc AaBbCc AaBbCc AaBbCc AaBbCc AaBbCc Gray background AaBbCc AaBbCc AaBbCc AaBbCc AaBbCc AaBbCc AaBbCc AaBbCc AaBbCc AaBbCc Toner smear Possible Cause and Remedy If faded areas, generally rounded, occur randomly on the page: AaB•bACscingle sheet of paper may be defective. Try reprinting AaBbtChec job. AaBbCc AaB•bTChce moisture content of the paper is uneven or the paper AaBbhCacs moist spots on its surface. Try a different kind or brand of paper. See "Paper Type and Size" for faxing on page 1.15 and "Selecting Print Media" for PC printing on page 3.5. • The paper lot is bad. The manufacturing processes can cause some areas to reject toner. Try a different kind or brand of paper. • The toner cartridge may be defective. See "Vertical repetitive defects" on page 5.13. AaBbCc • If these steps do not correct AthaeBpbrCobclems, contact a service representative. AaBbCc AaBbCc AaBbCc If the amount of background toner shading becomes unacceptable, the procedures below may help to clear the condition: • Change the paper to a lighter basis weight. See "Paper Type and Size" for faxing on page 1.15 and "Selecting Print Media" for PC printing on page 3.5. • Check the printer's environment; very dry (low humidity) or high humidity (higher than 80 % RH) conditions can increase the amount of background shading. • Install a newAtaoBnebrCccartridge. • Adjust the page 4.2. shAAaaadBBinbbgCCsccetting. AaBbCc See "Adjusting Shading" on AaBbCc • Clean the inside of the printer. See "Cleaning the Inside" on page 4.6. • Check the paper type and quality. See "Paper Type and Size" for faxing on page 1.15 and "Selecting Print Media" for PC printing on page 3.5. • Try installing a new toner cartridge. 5.12 Troubleshooting
-
 1
1 -
2
-
3
-
4
-
5
-
6
-
7
-
8
-
9
-
10
-
11
-
12
-
13
-
14
-
15
-
16
-
17
-
18
-
19
-
20
-
21
-
22
-
23
-
24
-
25
-
26
-
27
-
28
-
29
-
30
-
31
-
32
-
33
-
34
-
35
-
36
-
37
-
38
-
39
-
40
-
41
-
42
-
43
-
44
-
45
-
46
-
47
-
48
-
49
-
50
-
51
-
52
-
53
-
54
-
55
-
56
-
57
-
58
-
59
-
60
-
61
-
62
-
63
-
64
-
65
-
66
-
67
-
68
-
69
-
70
-
71
-
72
-
73
-
74
-
75
-
76
-
77
-
78
-
79
-
80
-
81
-
82
-
83
-
84
-
85
-
86
-
87
-
88
-
89
-
90
-
91
-
92
-
93
-
94
-
95
-
96
-
97
-
98
-
99
-
100
-
101
-
102
-
103
-
104
-
105
-
106
-
107
-
108
-
109
-
110
-
111
-
112
-
113
-
114
-
115
-
116
-
117
-
118
-
119
-
 120
120 -
 121
121 -
 122
122 -
 123
123 -
 124
124 -
 125
125 -
 126
126 -
 127
127 -
 128
128 -
 129
129 -
 130
130 -
131
-
132
-
133
-
134
-
135
-
136
-
137
-
138
-
139
-
140
-
141
-
142
-
143
-
144
-
145
 |
 |