Dell PowerConnect Brocade M6505 Brocade 7.1.0 Web Tools Administrator's Guide - Page 72
Assigning slots for a license key, Removing a license from a switch, Switch Administration, License
 |
View all Dell PowerConnect Brocade M6505 manuals
Add to My Manuals
Save this manual to your list of manuals |
Page 72 highlights
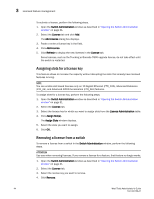
3 Licensed feature management To activate a license, perform the following steps. 1. Open the Switch Administration window as described in "Opening the Switch Administration window" on page 31. 2. Select the License tab and click Add. The Add License dialog box displays. 3. Paste or enter a license key in the field. 4. Click Add License. 5. Click Refresh to display the new licenses in the License tab. Some licenses, such as the Trunking or Brocade 7800 upgrade license, do not take effect until the switch is restarted. Assigning slots for a license key This feature allows to increase the capacity without disrupting the slots that already have licensed features running. NOTE You can enable slot based licenses only on 10 Gigabit Ethernet (FTR_10G), Advanced Extension (FTR_AE), and Advanced FICON Acceleration (FTR_AFA) features. To assign slots for a license key, perform the following steps. 1. Open the Switch Administration window as described in "Opening the Switch Administration window" on page 31. 2. Select the License tab. 3. Select the license key for which you want to assign slots from the License Administration table. 4. Click Assign Slot(s). The Assign Slots window displays. 5. Select the slots you want to assign. 6. Click OK. Removing a license from a switch To remove a license from a switch in the Switch Administration window, perform the following steps. ATTENTION Use care when removing licenses. If you remove a license for a feature, that feature no longer works. 1. Open the Switch Administration window as described in "Opening the Switch Administration window" on page 31. 2. Select the License tab. 3. Select the license key you want to remove. 4. Click Remove. 44 Web Tools Administrator's Guide 53-1002756-01
-
 1
1 -
2
-
3
-
4
-
5
-
6
-
7
-
8
-
9
-
10
-
11
-
12
-
13
-
14
-
15
-
16
-
17
-
18
-
19
-
20
-
21
-
22
-
23
-
24
-
25
-
26
-
27
-
28
-
29
-
30
-
31
-
32
-
33
-
34
-
35
-
36
-
37
-
38
-
39
-
40
-
41
-
42
-
43
-
44
-
45
-
46
-
47
-
48
-
49
-
50
-
51
-
52
-
53
-
54
-
55
-
56
-
57
-
58
-
59
-
60
-
61
-
62
-
63
-
64
-
65
-
66
-
 67
67 -
 68
68 -
 69
69 -
 70
70 -
 71
71 -
 72
72 -
 73
73 -
 74
74 -
 75
75 -
 76
76 -
 77
77 -
78
-
79
-
80
-
81
-
82
-
83
-
84
-
85
-
86
-
87
-
88
-
89
-
90
-
91
-
92
-
93
-
94
-
95
-
96
-
97
-
98
-
99
-
100
-
101
-
102
-
103
-
104
-
105
-
106
-
107
-
108
-
109
-
110
-
111
-
112
-
113
-
114
-
115
-
116
-
117
-
118
-
119
-
120
-
121
-
122
-
123
-
124
-
125
-
126
-
127
-
128
-
129
-
130
-
131
-
132
-
133
-
134
-
135
-
136
-
137
-
138
-
139
-
140
-
141
-
142
-
143
-
144
-
145
-
146
-
147
-
148
-
149
-
150
-
151
-
152
-
153
-
154
-
155
-
156
-
157
-
158
-
159
-
160
-
161
-
162
-
163
-
164
-
165
-
166
-
167
-
168
-
169
-
170
-
171
-
172
-
173
-
174
-
175
-
176
-
177
-
178
-
179
-
180
-
181
-
182
-
183
-
184
-
185
-
186
-
187
-
188
-
189
-
190
-
191
-
192
-
193
-
194
-
195
-
196
-
197
-
198
-
199
-
200
-
201
-
202
-
203
-
204
-
205
-
206
-
207
-
208
-
209
-
210
-
211
-
212
-
213
-
214
-
215
-
216
-
217
-
218
-
219
-
220
-
221
-
222
-
223
-
224
-
225
-
226
-
227
-
228
-
229
-
230
-
231
-
232
-
233
-
234
-
235
-
236
-
237
-
238
-
239
-
240
-
241
-
242
-
243
-
244
-
245
-
246
-
247
-
248
-
249
-
250
-
251
-
252
-
253
-
254
-
255
-
256
-
257
-
258
-
259
-
260
-
261
-
262
-
263
-
264
-
265
-
266
-
267
-
268
 |
 |
