Epson Stylus Pro 5500 User Manual - Page 26
edge of the paper resting against the right side of the paper tray.
 |
View all Epson Stylus Pro 5500 manuals
Add to My Manuals
Save this manual to your list of manuals |
Page 26 highlights
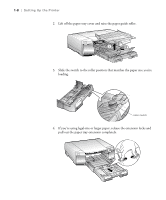
Setting Up the Printer | 1-9 5. Slide both edge guides out as far as they will go. Note Make sure the paper is loaded printable side down and the stack lies flat on the bottom of the tray. 6. Fan a stack of paper and then even the edges. 7. Load the stack of paper with the printable surface down and the right edge of the paper resting against the right side of the paper tray. Don't load paper above the arrow mark inside the left edge guide. 1-9
-
 1
1 -
2
-
3
-
4
-
5
-
6
-
7
-
8
-
9
-
10
-
11
-
12
-
13
-
14
-
15
-
16
-
17
-
18
-
19
-
20
-
 21
21 -
 22
22 -
 23
23 -
 24
24 -
 25
25 -
 26
26 -
 27
27 -
 28
28 -
 29
29 -
 30
30 -
 31
31 -
32
-
33
-
34
-
35
-
36
-
37
-
38
-
39
-
40
-
41
-
42
-
43
-
44
-
45
-
46
-
47
-
48
-
49
-
50
-
51
-
52
-
53
-
54
-
55
-
56
-
57
-
58
-
59
-
60
-
61
-
62
-
63
-
64
-
65
-
66
-
67
-
68
-
69
-
70
-
71
-
72
-
73
-
74
-
75
-
76
-
77
-
78
-
79
-
80
-
81
-
82
-
83
-
84
-
85
-
86
-
87
-
88
-
89
-
90
-
91
-
92
-
93
-
94
-
95
-
96
-
97
-
98
-
99
-
100
-
101
-
102
-
103
-
104
-
105
-
106
-
107
-
108
-
109
-
110
-
111
-
112
-
113
-
114
-
115
-
116
-
117
-
118
-
119
-
120
 |
 |
1-9
Setting Up the Printer
|
1-9
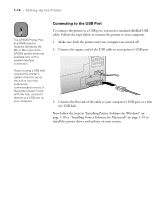
5.
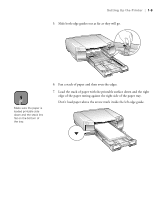
Slide both edge guides out as far as they will go.
6.
Fan a stack of paper and then even the edges.
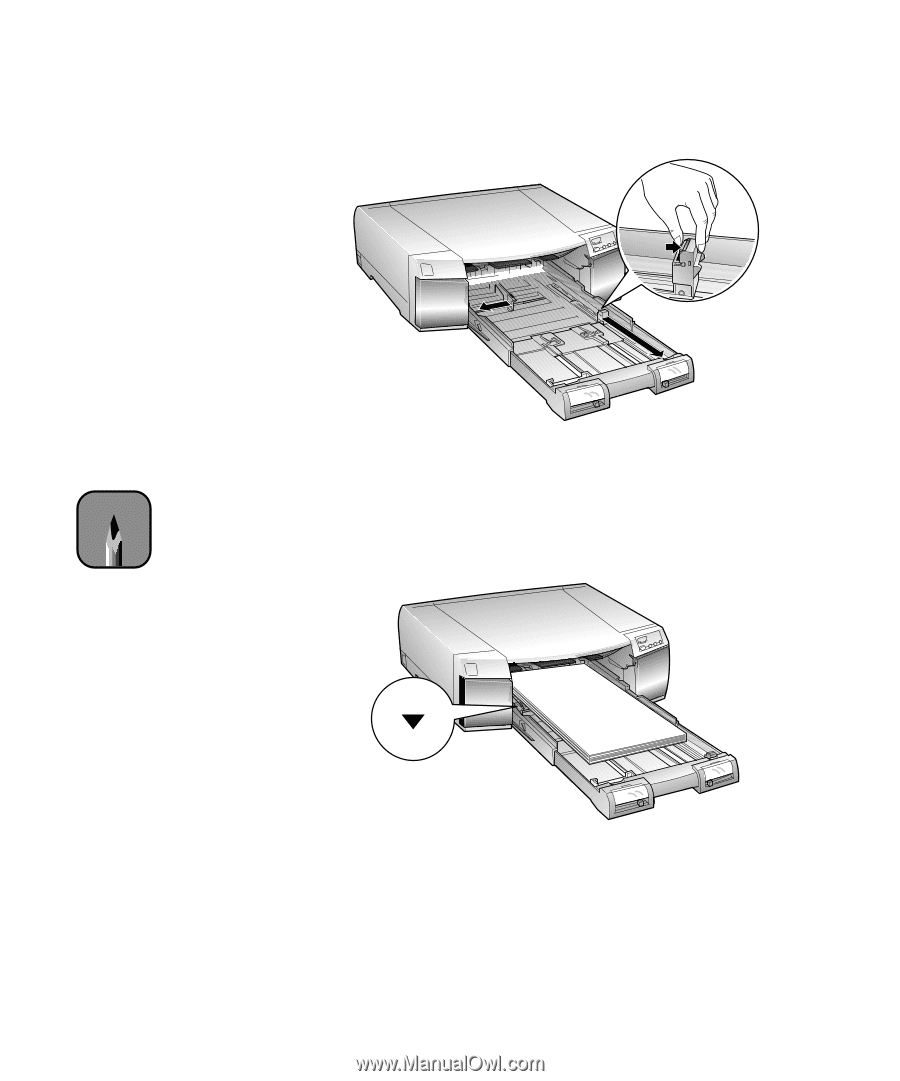
7.
Load the stack of paper with the printable surface down and the right
edge of the paper resting against the right side of the paper tray.
Don
’
t load paper above the arrow mark inside the left edge guide.
Note
Make sure the paper is
loaded printable side
down and the stack lies
flat on the bottom of
the tray.