Epson Stylus Pro 5500 User Manual - Page 34
Setting Up Your Printer on
 |
View all Epson Stylus Pro 5500 manuals
Add to My Manuals
Save this manual to your list of manuals |
Page 34 highlights
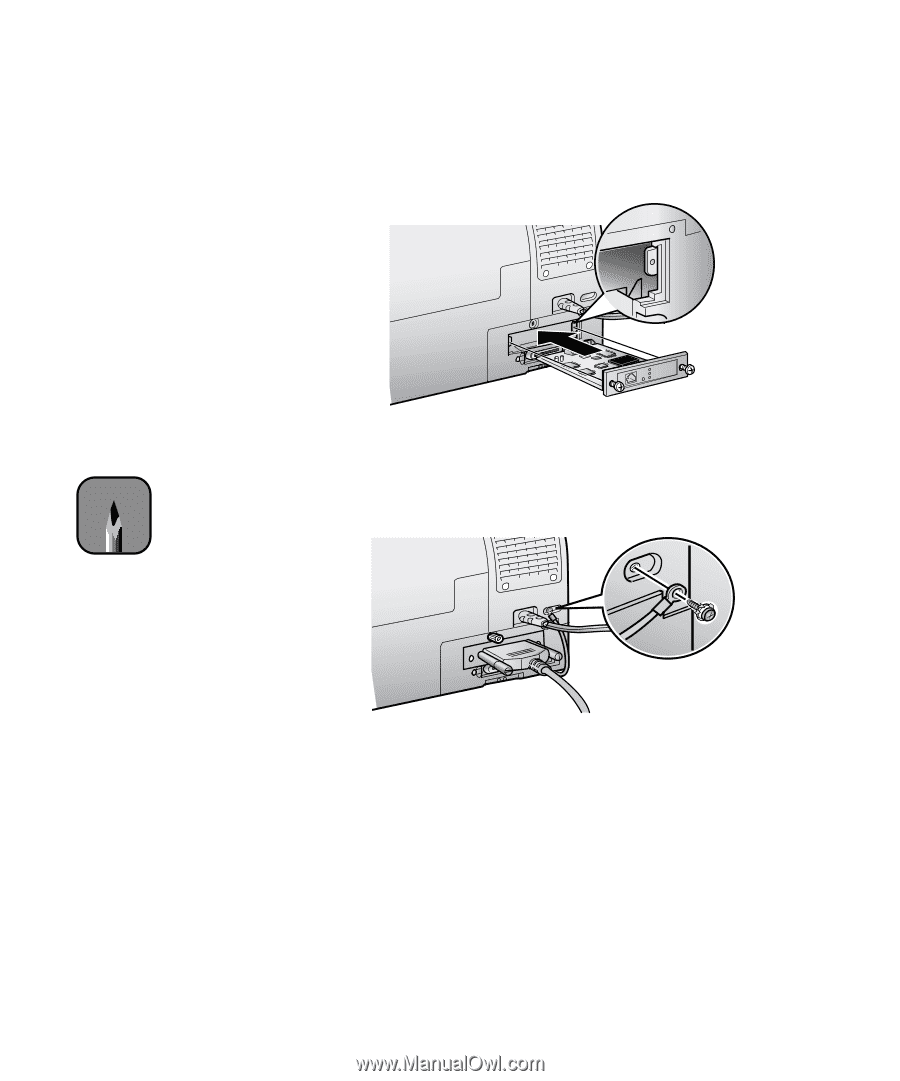
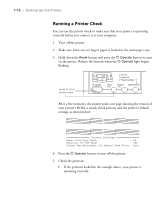
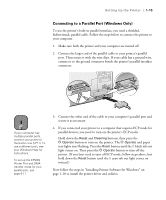
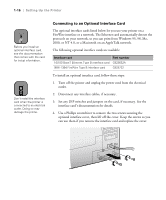
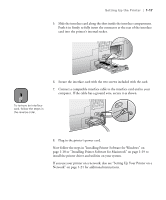
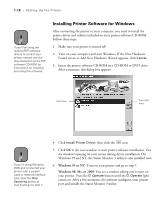
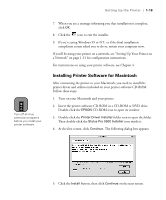
Setting Up the Printer | 1-17 5. Slide the interface card along the slots inside the interface compartment. Push it in firmly to fully insert the connector at the rear of the interface card into the printer's internal socket. 6. Secure the interface card with the two screws included with the card. Note 7. Connect a compatible interface cable to the interface card and to your computer. If the cable has a ground wire, secure it as shown. To remove an interface card, follow the steps in the reverse order. 8. Plug in the printer's power cord. Now follow the steps in "Installing Printer Software for Windows" on page 1-18 or "Installing Printer Software for Macintosh" on page 1-19 to install the printer driver and utilities on your system. If you use your printer on a network, also see "Setting Up Your Printer on a Network" on page 1-21 for additional instructions. 1-17
-
 1
1 -
2
-
3
-
4
-
5
-
6
-
7
-
8
-
9
-
10
-
11
-
12
-
13
-
14
-
15
-
16
-
17
-
18
-
19
-
20
-
21
-
22
-
23
-
24
-
25
-
26
-
27
-
28
-
 29
29 -
 30
30 -
 31
31 -
 32
32 -
 33
33 -
 34
34 -
 35
35 -
 36
36 -
 37
37 -
 38
38 -
 39
39 -
40
-
41
-
42
-
43
-
44
-
45
-
46
-
47
-
48
-
49
-
50
-
51
-
52
-
53
-
54
-
55
-
56
-
57
-
58
-
59
-
60
-
61
-
62
-
63
-
64
-
65
-
66
-
67
-
68
-
69
-
70
-
71
-
72
-
73
-
74
-
75
-
76
-
77
-
78
-
79
-
80
-
81
-
82
-
83
-
84
-
85
-
86
-
87
-
88
-
89
-
90
-
91
-
92
-
93
-
94
-
95
-
96
-
97
-
98
-
99
-
100
-
101
-
102
-
103
-
104
-
105
-
106
-
107
-
108
-
109
-
110
-
111
-
112
-
113
-
114
-
115
-
116
-
117
-
118
-
119
-
120
 |
 |