Epson Stylus Pro 5500 User Manual - Page 87
Using the Head Cleaning Utility, Macintosh, Windows
 |
View all Epson Stylus Pro 5500 manuals
Add to My Manuals
Save this manual to your list of manuals |
Page 87 highlights
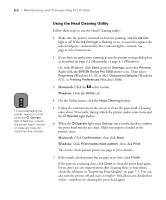
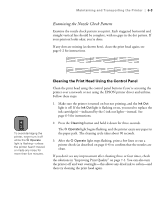
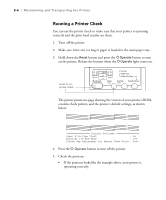
6-2 | Maintaining and Transporting the Printer Caution To avoid damaging the printer, never turn it off while the P Operate light is flashing-unless the printer hasn't moved or made any noise for more than five minutes. Using the Head Cleaning Utility Follow these steps to run the Head Cleaning utility: 1. Make sure the printer is turned on but not printing, and the Ink Out light is off. If the Ink Out light is flashing or on, you need to replace the ink cartridge(s)-indicated by the H ink out lights-instead. See page 6-5 for instructions. 2. If you have an application running, access the printer settings dialog box as described on page 3-2 (Macintosh) or page 4-1 (Windows). Or, with Windows, click Start, point to Settings, and select Printers. Right-click the EPSON Stylus Pro 5500 printer icon. Then select Properties (Windows 95, 98, or Me), Document Defaults (Windows NT), or Printing Preferences (Windows 2000). 3. Macintosh: Click the utility button. Windows: Click the Utility tab. 4. On the Utility menu, click the Head Cleaning button. 5. Follow the instructions on the screen to clean the print head. Cleaning takes about 90 seconds, during which the printer makes some noise and the POperate light flashes. 6. When the POperate light stops flashing, run a nozzle check to confirm the print head nozzles are clean. Make sure paper is loaded in the printer, then: Macintosh: Click Confirmation, then click Next. Windows: Click Print nozzle check pattern, then click Print. The nozzle check pattern prints (see page 6-3 for details). 7. If the nozzle check pattern has no gaps in its dots, click Finish. If the pattern is missing dots, click Clean to clean the print head again. If you don't see any improvement after cleaning three or four times, check the solutions in "Improving Print Quality" on page 7-1. You can also turn the printer off and wait overnight-this allows any dried ink to soften-and then try cleaning the print head again. 6-2
-
 1
1 -
2
-
3
-
4
-
5
-
6
-
7
-
8
-
9
-
10
-
11
-
12
-
13
-
14
-
15
-
16
-
17
-
18
-
19
-
20
-
21
-
22
-
23
-
24
-
25
-
26
-
27
-
28
-
29
-
30
-
31
-
32
-
33
-
34
-
35
-
36
-
37
-
38
-
39
-
40
-
41
-
42
-
43
-
44
-
45
-
46
-
47
-
48
-
49
-
50
-
51
-
52
-
53
-
54
-
55
-
56
-
57
-
58
-
59
-
60
-
61
-
62
-
63
-
64
-
65
-
66
-
67
-
68
-
69
-
70
-
71
-
72
-
73
-
74
-
75
-
76
-
77
-
78
-
79
-
80
-
81
-
 82
82 -
 83
83 -
 84
84 -
 85
85 -
 86
86 -
 87
87 -
 88
88 -
 89
89 -
 90
90 -
 91
91 -
 92
92 -
93
-
94
-
95
-
96
-
97
-
98
-
99
-
100
-
101
-
102
-
103
-
104
-
105
-
106
-
107
-
108
-
109
-
110
-
111
-
112
-
113
-
114
-
115
-
116
-
117
-
118
-
119
-
120
 |
 |
