Epson SureColor S50670 User Manual - Page 51
See Positioning Media of Different Widths on Printable side
 |
View all Epson SureColor S50670 manuals
Add to My Manuals
Save this manual to your list of manuals |
Page 51 highlights
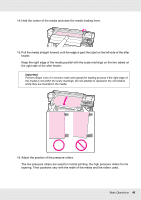
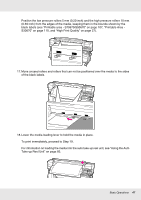
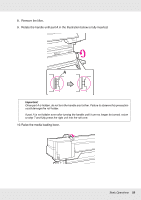
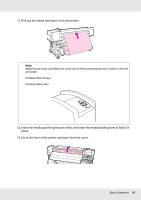
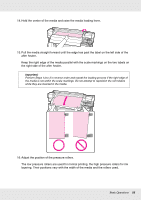
Printable side in Note: Be sure the option selected for Roll Type in the Customize Settings menu matches how the media is rolled. Roll Type defaults to Printable Side Out. Be sure to select Printable Side In after loading media rolled printable side in. For more information, see "Roll Type" on page 98. 4. Place the left edge of the media in any of the black squares on the bar in back of the printer and the right edge on any of the holes on the back of the printer. The recommended positions for media of different widths are shown below. See "Positioning Media of Different Widths" on page 107. Note: If the label with black squares is not in place, affix the label as described in the Setup Guide. Basic Operations 51
-
 1
1 -
2
-
3
-
4
-
5
-
6
-
7
-
8
-
9
-
10
-
11
-
12
-
13
-
14
-
15
-
16
-
17
-
18
-
19
-
20
-
21
-
22
-
23
-
24
-
25
-
26
-
27
-
28
-
29
-
30
-
31
-
32
-
33
-
34
-
35
-
36
-
37
-
38
-
39
-
40
-
41
-
42
-
43
-
44
-
45
-
 46
46 -
 47
47 -
 48
48 -
 49
49 -
 50
50 -
 51
51 -
 52
52 -
 53
53 -
 54
54 -
 55
55 -
 56
56 -
57
-
58
-
59
-
60
-
61
-
62
-
63
-
64
-
65
-
66
-
67
-
68
-
69
-
70
-
71
-
72
-
73
-
74
-
75
-
76
-
77
-
78
-
79
-
80
-
81
-
82
-
83
-
84
-
85
-
86
-
87
-
88
-
89
-
90
-
91
-
92
-
93
-
94
-
95
-
96
-
97
-
98
-
99
-
100
-
101
-
102
-
103
-
104
-
105
-
106
-
107
-
108
-
109
-
110
-
111
-
112
-
113
-
114
-
115
-
116
-
117
-
118
-
119
-
120
-
121
-
122
-
123
-
124
-
125
-
126
-
127
-
128
-
129
-
130
-
131
-
132
-
133
-
134
-
135
-
136
-
137
-
138
-
139
-
140
-
141
-
142
-
143
-
144
-
145
-
146
-
147
-
148
-
149
-
150
-
151
-
152
-
153
-
154
-
155
-
156
-
157
-
158
-
159
-
160
-
161
-
162
-
163
-
164
-
165
-
166
-
167
-
168
-
169
-
170
-
171
-
172
-
173
-
174
-
175
-
176
-
177
-
178
-
179
-
180
-
181
-
182
-
183
-
184
-
185
-
186
-
187
-
188
-
189
-
190
-
191
-
192
 |
 |
Basic Operations
51
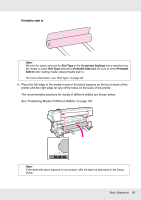
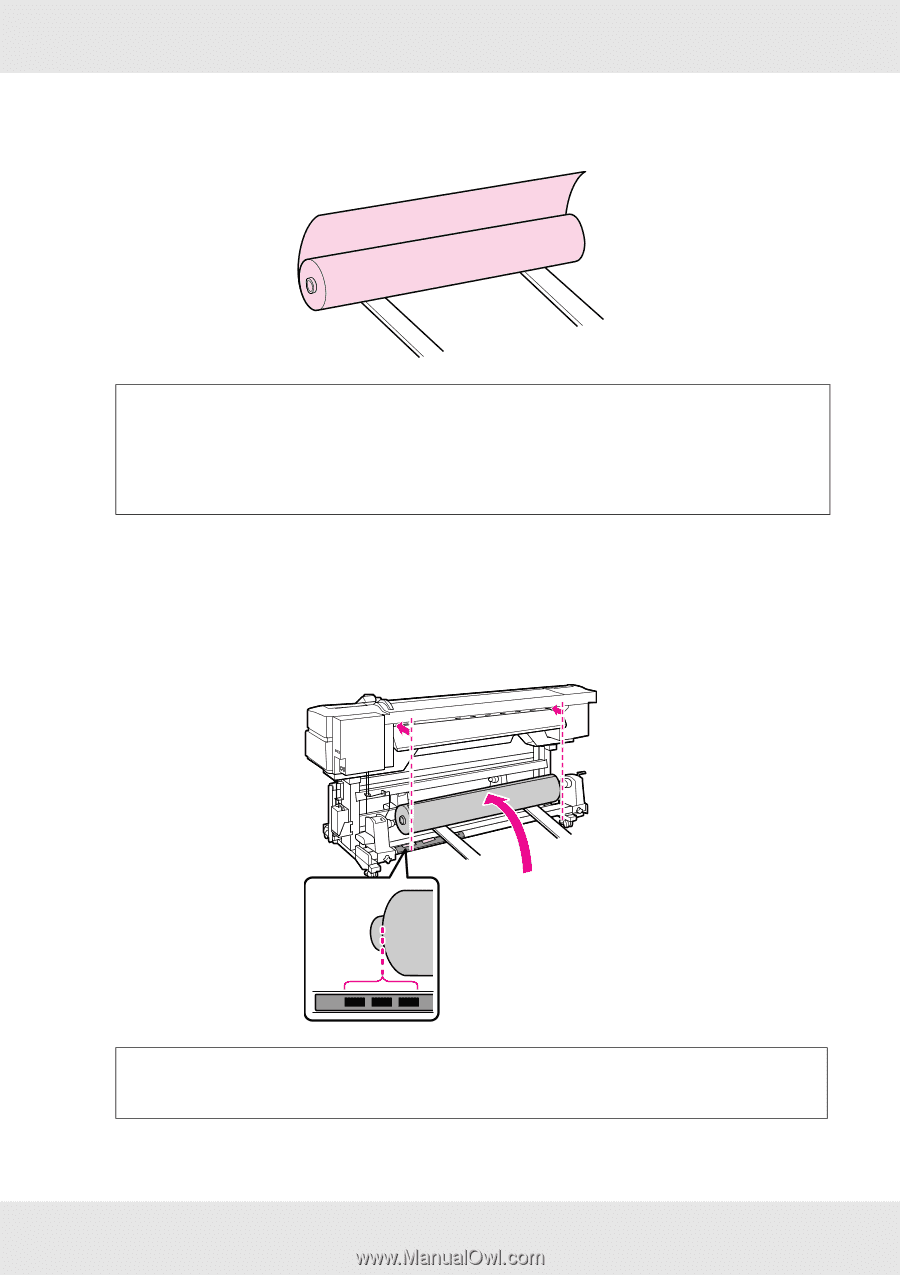
Printable side in
4.
Place the left edge of the media in any of the black squares on the bar in back of the
printer and the right edge on any of the holes on the back of the printer.
The recommended positions for media of different widths are shown below.
See “Positioning Media of Different Widths” on page 107.
Note:
Be sure the option selected for
Roll Type
in the
Customize Settings
menu matches how
the media is rolled.
Roll Type
defaults to
Printable Side Out
. Be sure to select
Printable
Side In
after loading media rolled printable side in.
For more information, see “Roll Type” on page 98.
Note:
If the label with black squares is not in place, affix the label as described in the Setup
Guide.