Epson SureColor S50670 User Manual - Page 94
Setting Name, Feed Adjustment, Manual
 |
View all Epson SureColor S50670 manuals
Add to My Manuals
Save this manual to your list of manuals |
Page 94 highlights
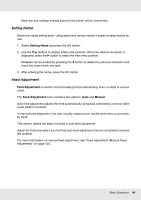
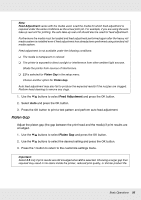
Note that any settings already saved to the printer will be overwritten. Setting Name Name the media setting bank. Using distinctive names makes it easier to select banks for use. 1. Select Setting Name and press the Z button. 2. Use the d/u buttons to display letters and symbols. When the desired character is displayed, press the r button to select the next entry position. Mistakes can be erased by pressing the l button to delete the previous character and move the cursor back one spot. 3. After entering the name, press the Z button. Feed Adjustment Feed Adjustment is used to correct banding (horizontal banding, lines, or strips of uneven color). The Feed Adjustment menu contains two options: Auto and Manual. Auto feed adjustment adjusts the feed automatically using data collected by a sensor while a test pattern is printed. In manual feed adjustment, the user visually inspects print results and enters a correction by hand. This section details the steps involved in auto feed adjustment. Adjust the feed manually if you feel that auto feed adjustment has not completely resolved the problem. For more information on manual feed adjustment, see "Feed Adjustment (Manual Feed Adjustment)" on page 103. Basic Operations 94
-
 1
1 -
2
-
3
-
4
-
5
-
6
-
7
-
8
-
9
-
10
-
11
-
12
-
13
-
14
-
15
-
16
-
17
-
18
-
19
-
20
-
21
-
22
-
23
-
24
-
25
-
26
-
27
-
28
-
29
-
30
-
31
-
32
-
33
-
34
-
35
-
36
-
37
-
38
-
39
-
40
-
41
-
42
-
43
-
44
-
45
-
46
-
47
-
48
-
49
-
50
-
51
-
52
-
53
-
54
-
55
-
56
-
57
-
58
-
59
-
60
-
61
-
62
-
63
-
64
-
65
-
66
-
67
-
68
-
69
-
70
-
71
-
72
-
73
-
74
-
75
-
76
-
77
-
78
-
79
-
80
-
81
-
82
-
83
-
84
-
85
-
86
-
87
-
88
-
 89
89 -
 90
90 -
 91
91 -
 92
92 -
 93
93 -
 94
94 -
 95
95 -
 96
96 -
 97
97 -
 98
98 -
 99
99 -
100
-
101
-
102
-
103
-
104
-
105
-
106
-
107
-
108
-
109
-
110
-
111
-
112
-
113
-
114
-
115
-
116
-
117
-
118
-
119
-
120
-
121
-
122
-
123
-
124
-
125
-
126
-
127
-
128
-
129
-
130
-
131
-
132
-
133
-
134
-
135
-
136
-
137
-
138
-
139
-
140
-
141
-
142
-
143
-
144
-
145
-
146
-
147
-
148
-
149
-
150
-
151
-
152
-
153
-
154
-
155
-
156
-
157
-
158
-
159
-
160
-
161
-
162
-
163
-
164
-
165
-
166
-
167
-
168
-
169
-
170
-
171
-
172
-
173
-
174
-
175
-
176
-
177
-
178
-
179
-
180
-
181
-
182
-
183
-
184
-
185
-
186
-
187
-
188
-
189
-
190
-
191
-
192
 |
 |