Epson SureColor S50670 User Manual - Page 95
Platen Gap, Feed Adjustment
 |
View all Epson SureColor S50670 manuals
Add to My Manuals
Save this manual to your list of manuals |
Page 95 highlights
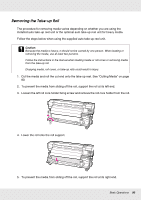
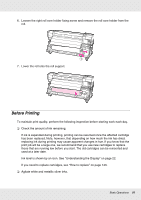
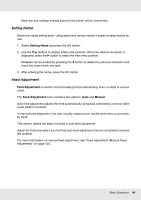
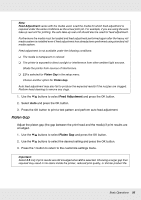
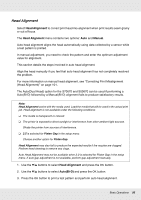
Note: Feed Adjustment varies with the media used. Load the media for which feed adjustment is required under the same conditions as the actual print job. For example, if you are using the auto take-up reel unit for printing, the auto take-up reel unit should also be used for feed adjustment. Furthermore the media must be loaded and feed adjustment performed again after the heavy roll media system is installed even if feed adjustment has already been performed using standard roll media system. Feed adjustment is not available under the following conditions: ❏ The media is transparent or colored. ❏ The printer is exposed to direct sunlight or interference from other ambient light sources. Shade the printer from sources of interference. ❏ 2.5 is selected for Platen Gap in the setup menu. Choose another option for Platen Gap. Auto feed adjustment may also fail to produce the expected results if the nozzles are clogged. Perform head cleaning to remove any clogs. 1. Use the d/u buttons to select Feed Adjustment and press the Z button. 2. Select Auto and press the Z button. 3. Press the Z button to print a test pattern and perform auto feed adjustment. Platen Gap Adjust the platen gap (the gap between the print head and the media) if print results are smudged. 1. Use the d/u buttons to select Platen Gap and press the Z button. 2. Use the d/u buttons to select the desired setting and press the Z button. 3. Press the y button to return to the customize settings menu. Important: Select 2.5 only if print results are still smudged when 2.0 is selected. Choosing a larger gap than required may result in ink stains inside the printer, reduced print quality, or shorter product life. Basic Operations 95
-
 1
1 -
2
-
3
-
4
-
5
-
6
-
7
-
8
-
9
-
10
-
11
-
12
-
13
-
14
-
15
-
16
-
17
-
18
-
19
-
20
-
21
-
22
-
23
-
24
-
25
-
26
-
27
-
28
-
29
-
30
-
31
-
32
-
33
-
34
-
35
-
36
-
37
-
38
-
39
-
40
-
41
-
42
-
43
-
44
-
45
-
46
-
47
-
48
-
49
-
50
-
51
-
52
-
53
-
54
-
55
-
56
-
57
-
58
-
59
-
60
-
61
-
62
-
63
-
64
-
65
-
66
-
67
-
68
-
69
-
70
-
71
-
72
-
73
-
74
-
75
-
76
-
77
-
78
-
79
-
80
-
81
-
82
-
83
-
84
-
85
-
86
-
87
-
88
-
89
-
 90
90 -
 91
91 -
 92
92 -
 93
93 -
 94
94 -
 95
95 -
 96
96 -
 97
97 -
 98
98 -
 99
99 -
 100
100 -
101
-
102
-
103
-
104
-
105
-
106
-
107
-
108
-
109
-
110
-
111
-
112
-
113
-
114
-
115
-
116
-
117
-
118
-
119
-
120
-
121
-
122
-
123
-
124
-
125
-
126
-
127
-
128
-
129
-
130
-
131
-
132
-
133
-
134
-
135
-
136
-
137
-
138
-
139
-
140
-
141
-
142
-
143
-
144
-
145
-
146
-
147
-
148
-
149
-
150
-
151
-
152
-
153
-
154
-
155
-
156
-
157
-
158
-
159
-
160
-
161
-
162
-
163
-
164
-
165
-
166
-
167
-
168
-
169
-
170
-
171
-
172
-
173
-
174
-
175
-
176
-
177
-
178
-
179
-
180
-
181
-
182
-
183
-
184
-
185
-
186
-
187
-
188
-
189
-
190
-
191
-
192
 |
 |