Epson SureColor S50670 User Manual - Page 96
Head Alignment, Manual, AutoBi-D
 |
View all Epson SureColor S50670 manuals
Add to My Manuals
Save this manual to your list of manuals |
Page 96 highlights
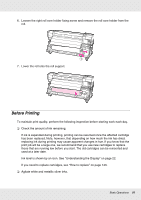
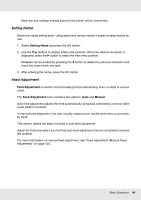
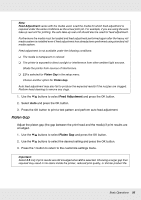
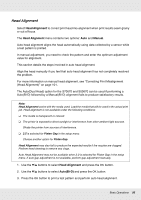
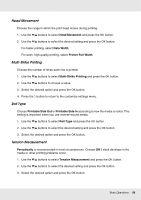
Head Alignment Select Head Alignment to correct print head mis-alignment when print results seem grainy or out of focus. The Head Alignment menu contains two options: Auto and Manual. Auto head alignment aligns the head automatically using data collected by a sensor while a test pattern is printed. In manual adjustment, you need to check the pattern and enter the optimum adjustment value for alignment. This section details the steps involved in auto head alignment. Align the head manually if you feel that auto head alignment has not completely resolved the problem. For more information on manual head alignment, see "Correcting Print Misalignment (Head Alignment)" on page 101. The Auto(Dual Head) option for the S70670 and S50670 can be used if performing a Auto(Bi-D) followed by a Manual(Bi-D) alignment fails to produce satisfactory results. Note: Head Alignment varies with the media used. Load the media that will be used in the actual print job. Head alignment is not available under the following conditions: ❏ The media is transparent or colored. ❏ The printer is exposed to direct sunlight or interference from other ambient light sources. Shade the printer from sources of interference. ❏ 2.5 is selected for Platen Gap in the setup menu. Choose another option for Platen Gap. Head Alignment may also fail to produce the expected results if the nozzles are clogged. Perform head cleaning to remove any clogs. Auto Head Alignment may not be available when 2.0 is selected for Platen Gap in the setup menu. If auto gap adjustment is not available, perform gap adjustment manually. 1. Use the d/u buttons to select Head Alignment and press the Z button. 2. Use the d/u buttons to select Auto(Bi-D) and press the Z button. 3. Press the Z button to print a test pattern and perform auto head alignment. Basic Operations 96
-
 1
1 -
2
-
3
-
4
-
5
-
6
-
7
-
8
-
9
-
10
-
11
-
12
-
13
-
14
-
15
-
16
-
17
-
18
-
19
-
20
-
21
-
22
-
23
-
24
-
25
-
26
-
27
-
28
-
29
-
30
-
31
-
32
-
33
-
34
-
35
-
36
-
37
-
38
-
39
-
40
-
41
-
42
-
43
-
44
-
45
-
46
-
47
-
48
-
49
-
50
-
51
-
52
-
53
-
54
-
55
-
56
-
57
-
58
-
59
-
60
-
61
-
62
-
63
-
64
-
65
-
66
-
67
-
68
-
69
-
70
-
71
-
72
-
73
-
74
-
75
-
76
-
77
-
78
-
79
-
80
-
81
-
82
-
83
-
84
-
85
-
86
-
87
-
88
-
89
-
90
-
 91
91 -
 92
92 -
 93
93 -
 94
94 -
 95
95 -
 96
96 -
 97
97 -
 98
98 -
 99
99 -
 100
100 -
 101
101 -
102
-
103
-
104
-
105
-
106
-
107
-
108
-
109
-
110
-
111
-
112
-
113
-
114
-
115
-
116
-
117
-
118
-
119
-
120
-
121
-
122
-
123
-
124
-
125
-
126
-
127
-
128
-
129
-
130
-
131
-
132
-
133
-
134
-
135
-
136
-
137
-
138
-
139
-
140
-
141
-
142
-
143
-
144
-
145
-
146
-
147
-
148
-
149
-
150
-
151
-
152
-
153
-
154
-
155
-
156
-
157
-
158
-
159
-
160
-
161
-
162
-
163
-
164
-
165
-
166
-
167
-
168
-
169
-
170
-
171
-
172
-
173
-
174
-
175
-
176
-
177
-
178
-
179
-
180
-
181
-
182
-
183
-
184
-
185
-
186
-
187
-
188
-
189
-
190
-
191
-
192
 |
 |
