Epson SureColor S50670 User Manual - Page 98
Head Movement, Multi-Strike Printing, Roll Type, Tension Measurement, Data Width, Printer Full Width
 |
View all Epson SureColor S50670 manuals
Add to My Manuals
Save this manual to your list of manuals |
Page 98 highlights
Head Movement Choose the range in which the print head moves during printing. 1. Use the d/u buttons to select Head Movement and press the Z button. 2. Use the d/u buttons to select the desired setting and press the Z button. For faster printing, select Data Width. For even, high-quality printing, select Printer Full Width. Multi-Strike Printing Choose the number of times each line is printed. 1. Use the d/u buttons to select Multi-Strike Printing and press the Z button. 2. Use the d/u buttons to choose a value. 3. Select the desired option and press the Z button. 4. Press the y button to return to the customize settings menu. Roll Type Choose Printable Side Out or Printable Side In according to how the media is rolled. This setting is important when you use reverse-wound media. 1. Use the d/u buttons to select Roll Type and press the Z button. 2. Use the d/u buttons to select the desired setting and press the Z button. 3. Select the desired option and press the Z button. Tension Measurement Periodically is recommended in most circumstances. Choose Off if slack develops in the media or other printing problems occur. 1. Use the d/u buttons to select Tension Measurement and press the Z button. 2. Use the d/u buttons to select the desired setting and press the Z button. 3. Select the desired option and press the Z button. Basic Operations 98
-
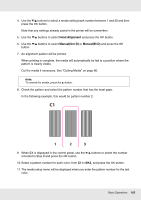
 1
1 -
2
-
3
-
4
-
5
-
6
-
7
-
8
-
9
-
10
-
11
-
12
-
13
-
14
-
15
-
16
-
17
-
18
-
19
-
20
-
21
-
22
-
23
-
24
-
25
-
26
-
27
-
28
-
29
-
30
-
31
-
32
-
33
-
34
-
35
-
36
-
37
-
38
-
39
-
40
-
41
-
42
-
43
-
44
-
45
-
46
-
47
-
48
-
49
-
50
-
51
-
52
-
53
-
54
-
55
-
56
-
57
-
58
-
59
-
60
-
61
-
62
-
63
-
64
-
65
-
66
-
67
-
68
-
69
-
70
-
71
-
72
-
73
-
74
-
75
-
76
-
77
-
78
-
79
-
80
-
81
-
82
-
83
-
84
-
85
-
86
-
87
-
88
-
89
-
90
-
91
-
92
-
 93
93 -
 94
94 -
 95
95 -
 96
96 -
 97
97 -
 98
98 -
 99
99 -
 100
100 -
 101
101 -
 102
102 -
 103
103 -
104
-
105
-
106
-
107
-
108
-
109
-
110
-
111
-
112
-
113
-
114
-
115
-
116
-
117
-
118
-
119
-
120
-
121
-
122
-
123
-
124
-
125
-
126
-
127
-
128
-
129
-
130
-
131
-
132
-
133
-
134
-
135
-
136
-
137
-
138
-
139
-
140
-
141
-
142
-
143
-
144
-
145
-
146
-
147
-
148
-
149
-
150
-
151
-
152
-
153
-
154
-
155
-
156
-
157
-
158
-
159
-
160
-
161
-
162
-
163
-
164
-
165
-
166
-
167
-
168
-
169
-
170
-
171
-
172
-
173
-
174
-
175
-
176
-
177
-
178
-
179
-
180
-
181
-
182
-
183
-
184
-
185
-
186
-
187
-
188
-
189
-
190
-
191
-
192
 |
 |
