Lexmark X422 X422 MFP User's Reference - Page 126
Solving print quality problems
 |
View all Lexmark X422 manuals
Add to My Manuals
Save this manual to your list of manuals |
Page 126 highlights
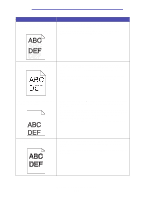
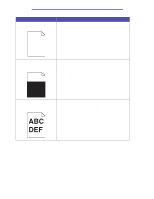
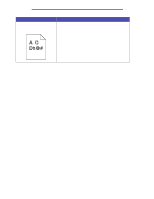
Troubleshooting Solving print quality problems You may be able to correct many print quality problems by replacing a supply or maintenance item that has reached the end of its intended life. Use the following table to find solutions to print quality problems you encounter. If you cannot fix the problem, contact the place where you bought your MFP. Problem Light or blurred characters. Toner smudges appear on the front or back of the page. Solution • If Toner Low appears, remove the print cartridge. To utilize the remaining toner, shake the print cartridge gently, and then reinstall it. See page 108 in Replacing the print cartridge for an illustration of how to shake the print cartridge. • Increase the Toner Darkness setting. • If you are printing on transparencies, card stock, or labels, be sure you selected the correct Paper Type in the print driver, MarkVision Professional, the control panel, or the Web pages. • If you are printing on an uneven print surface, adjust the Paper Weight and Paper Texture settings. • Use recommended paper and other print media. Refer to the Card Stock & Label Guide available on the Lexmark Web site at www.lexmark.com for detailed specifications. • Make sure print media you load in the sources is not damp. • You may be out of toner or have a defective print cartridge. Replace the print cartridge. See Replacing the print cartridge for instructions. • Make sure the print media is straight and unwrinkled. • Toner is on the transfer roller. To help prevent this, do not load print media that is smaller than the page size of the job to be printed. Specify the correct page size in your driver. • To clean the transfer roller, open and close the MFP upper front door. The MFP automatically runs its setup cycle. • Replace the used print cartridge with a new one. See Replacing the print cartridge for instructions. Solving print quality problems 126
-
 1
1 -
2
-
3
-
4
-
5
-
6
-
7
-
8
-
9
-
10
-
11
-
12
-
13
-
14
-
15
-
16
-
17
-
18
-
19
-
20
-
21
-
22
-
23
-
24
-
25
-
26
-
27
-
28
-
29
-
30
-
31
-
32
-
33
-
34
-
35
-
36
-
37
-
38
-
39
-
40
-
41
-
42
-
43
-
44
-
45
-
46
-
47
-
48
-
49
-
50
-
51
-
52
-
53
-
54
-
55
-
56
-
57
-
58
-
59
-
60
-
61
-
62
-
63
-
64
-
65
-
66
-
67
-
68
-
69
-
70
-
71
-
72
-
73
-
74
-
75
-
76
-
77
-
78
-
79
-
80
-
81
-
82
-
83
-
84
-
85
-
86
-
87
-
88
-
89
-
90
-
91
-
92
-
93
-
94
-
95
-
96
-
97
-
98
-
99
-
100
-
101
-
102
-
103
-
104
-
105
-
106
-
107
-
108
-
109
-
110
-
111
-
112
-
113
-
114
-
115
-
116
-
117
-
118
-
119
-
120
-
 121
121 -
 122
122 -
 123
123 -
 124
124 -
 125
125 -
 126
126 -
 127
127 -
 128
128 -
 129
129 -
 130
130 -
 131
131 -
132
-
133
-
134
-
135
-
136
-
137
-
138
-
139
-
140
-
141
-
142
-
143
-
144
-
145
-
146
-
147
-
148
-
149
-
150
-
151
-
152
-
153
-
154
-
155
-
156
-
157
-
158
-
159
-
160
-
161
-
162
-
163
-
164
-
165
-
166
-
167
-
168
-
169
-
170
-
171
-
172
-
173
-
174
-
175
-
176
-
177
-
178
-
179
-
180
-
181
-
182
-
183
-
184
-
185
-
186
-
187
-
188
-
189
-
190
-
191
-
192
-
193
-
194
-
195
-
196
-
197
-
198
-
199
-
200
-
201
-
202
-
203
-
204
-
205
-
206
-
207
-
208
-
209
-
210
-
211
-
212
-
213
-
214
-
215
-
216
-
217
-
218
-
219
-
220
-
221
-
222
-
223
-
224
-
225
-
226
-
227
-
228
-
229
-
230
-
231
-
232
-
233
-
234
-
235
-
236
-
237
-
238
-
239
-
240
-
241
-
242
-
243
-
244
-
245
-
246
-
247
-
248
-
249
-
250
 |
 |
