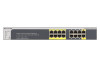
Netgear GS516TP Software Administration Manual - Page 32
APPLY, To con the time through SNTP, Table 2., SNTP Global Status fields.
 |
View all Netgear GS516TP manuals
Add to My Manuals
Save this manual to your list of manuals |
Page 32 highlights
GS516TP Gigabit Smart Switches 3. In the Date field, enter the date in the DD/MM/YYYY format. 4. In the Time field, enter the time in HH:MM:SS format. Note: If you do not enter a date and time, the switch calculates the date and time using the CPU's clock cycle. When the clock source is set to Local, the Time Zone Offset field is disabled. 5. Click APPLY to send the updated configuration to the switch. Configuration changes take effect immediately. To configure the time through SNTP: 1. Next to the Clock Source, select SNTP. When the clock source is set to SNTP, the Date and Time fields are disabled. The switch gets the date and time from the network. 2. In the Time Zone Offset list, select the Coordinated Universal Time (UTC) time zone in which the switch is located, expressed as the number of hours. 3. Use the SNTP Server Configuration screen to configure the SNTP server settings. 4. Click APPLY to send the updated configuration to the switch. Configuration changes take effect immediately. The SNTP Global Status table on the Time Configuration screen displays information about the system's SNTP client. The following table describes the SNTP Global Status fields. Table 2. SNTP Global Status fields. Field Version Supported Mode Last Update Time Server IP Address Address Type Server Stratum Server Mode Description Specifies the SNTP version the client supports. Specifies the SNTP modes the client supports. Multiple modes may be supported by a client. Specifies the local date and time (UTC) the SNTP client last updated the system clock. Specifies the IP address of the server for the last received valid packet. If no message has been received from any server, an empty string is shown. Specifies the address type of the SNTP server address for the last received valid packet. Specifies the claimed stratum of the server for the last received valid packet. Specifies the mode of the server for the last received valid packet. 32
-
 1
1 -
2
-
3
-
4
-
5
-
6
-
7
-
8
-
9
-
10
-
11
-
12
-
13
-
14
-
15
-
16
-
17
-
18
-
19
-
20
-
21
-
22
-
23
-
24
-
25
-
26
-
 27
27 -
 28
28 -
 29
29 -
 30
30 -
 31
31 -
 32
32 -
 33
33 -
 34
34 -
 35
35 -
 36
36 -
 37
37 -
38
-
39
-
40
-
41
-
42
-
43
-
44
-
45
-
46
-
47
-
48
-
49
-
50
-
51
-
52
-
53
-
54
-
55
-
56
-
57
-
58
-
59
-
60
-
61
-
62
-
63
-
64
-
65
-
66
-
67
-
68
-
69
-
70
-
71
-
72
-
73
-
74
-
75
-
76
-
77
-
78
-
79
-
80
-
81
-
82
-
83
-
84
-
85
-
86
-
87
-
88
-
89
-
90
-
91
-
92
-
93
-
94
-
95
-
96
-
97
-
98
-
99
-
100
-
101
-
102
-
103
-
104
-
105
-
106
-
107
-
108
-
109
-
110
-
111
-
112
-
113
-
114
-
115
-
116
-
117
-
118
-
119
-
120
-
121
-
122
-
123
-
124
-
125
-
126
-
127
-
128
-
129
-
130
-
131
-
132
-
133
-
134
-
135
-
136
-
137
-
138
-
139
-
140
-
141
-
142
-
143
-
144
-
145
-
146
-
147
-
148
-
149
-
150
-
151
-
152
-
153
-
154
-
155
-
156
-
157
-
158
-
159
-
160
-
161
-
162
-
163
-
164
-
165
-
166
-
167
-
168
-
169
-
170
-
171
-
172
-
173
-
174
-
175
-
176
-
177
-
178
-
179
-
180
-
181
-
182
-
183
-
184
-
185
-
186
-
187
-
188
-
189
-
190
-
191
-
192
-
193
-
194
-
195
-
196
-
197
-
198
-
199
-
200
-
201
-
202
-
203
-
204
-
205
-
206
-
207
-
208
 |
 |
