Netgear GS516TP Software Administration Manual - Page 65
VLAN Membership Configuration, Switching > VLAN > Advanced > VLAN Membership
 |
View all Netgear GS516TP manuals
Add to My Manuals
Save this manual to your list of manuals |
Page 65 highlights
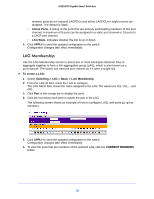
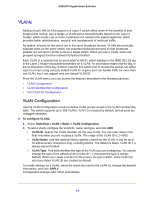
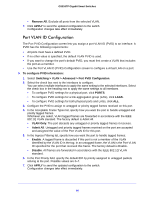
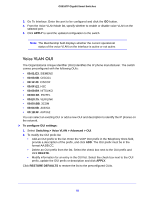
GS516TP Gigabit Smart Switches To reset VLAN settings on the switch to the factory defaults: 1. Select the Reset Configuration check box 2. Click OK in the pop-up message to confirm the operation. If the Management VLAN is set to a non-default VLAN (VLAN 1), it is automatically set to 1 after you reset the VLAN configuration. VLAN Membership Configuration Use this screen to configure VLAN port membership for a particular VLAN. You can select the Group Operation through this screen. To configure VLAN membership: 1. Select Switching > VLAN > Advanced > VLAN Membership. 2. From the VLAN ID list, select the VLAN to which you want to add ports. 3. Click the orange bar below the VLAN Type field to display the physical ports on the switch. 4. Click the lower orange bar to display the LAGs on the switch. 5. To select the ports or LAGs to add to the VLAN, click the square below each port or LAG. You can add each interface as a tagged (T) or untagged (U) VLAN member. A blank square means that the port is not a member of the VLAN. • Tagged. Frames transmitted from this port are tagged with the port VLAN ID. • Untagged. Frames transmitted from this port are untagged. Each port can be an untagged member of only one VLAN. By default, all ports are untagged members of VLAN 1. In the following screen, ports 6, 7, and 8 are being added as tagged members to VLAN 2. 6. From the Group Operations list, select an identical configuration for all the ports. The possible values are: • Tag All. All frames transmitted for this VLAN are tagged. All the ports are included in the VLAN. • Untag All. All frames transmitted from this VLAN are untagged. All the ports are included in the VLAN. 65
-
 1
1 -
2
-
3
-
4
-
5
-
6
-
7
-
8
-
9
-
10
-
11
-
12
-
13
-
14
-
15
-
16
-
17
-
18
-
19
-
20
-
21
-
22
-
23
-
24
-
25
-
26
-
27
-
28
-
29
-
30
-
31
-
32
-
33
-
34
-
35
-
36
-
37
-
38
-
39
-
40
-
41
-
42
-
43
-
44
-
45
-
46
-
47
-
48
-
49
-
50
-
51
-
52
-
53
-
54
-
55
-
56
-
57
-
58
-
59
-
 60
60 -
 61
61 -
 62
62 -
 63
63 -
 64
64 -
 65
65 -
 66
66 -
 67
67 -
 68
68 -
 69
69 -
 70
70 -
71
-
72
-
73
-
74
-
75
-
76
-
77
-
78
-
79
-
80
-
81
-
82
-
83
-
84
-
85
-
86
-
87
-
88
-
89
-
90
-
91
-
92
-
93
-
94
-
95
-
96
-
97
-
98
-
99
-
100
-
101
-
102
-
103
-
104
-
105
-
106
-
107
-
108
-
109
-
110
-
111
-
112
-
113
-
114
-
115
-
116
-
117
-
118
-
119
-
120
-
121
-
122
-
123
-
124
-
125
-
126
-
127
-
128
-
129
-
130
-
131
-
132
-
133
-
134
-
135
-
136
-
137
-
138
-
139
-
140
-
141
-
142
-
143
-
144
-
145
-
146
-
147
-
148
-
149
-
150
-
151
-
152
-
153
-
154
-
155
-
156
-
157
-
158
-
159
-
160
-
161
-
162
-
163
-
164
-
165
-
166
-
167
-
168
-
169
-
170
-
171
-
172
-
173
-
174
-
175
-
176
-
177
-
178
-
179
-
180
-
181
-
182
-
183
-
184
-
185
-
186
-
187
-
188
-
189
-
190
-
191
-
192
-
193
-
194
-
195
-
196
-
197
-
198
-
199
-
200
-
201
-
202
-
203
-
204
-
205
-
206
-
207
-
208
 |
 |
