Nokia 9000i Nokia 9000i User Guide in English - Page 10
Getting started - charger
 |
View all Nokia 9000i manuals
Add to My Manuals
Save this manual to your list of manuals |
Page 10 highlights
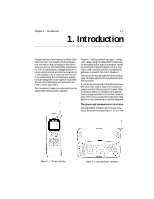
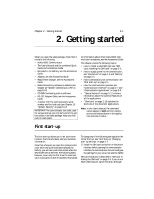
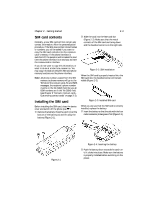
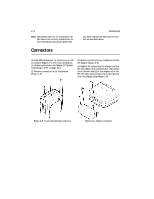
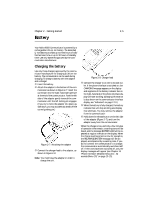
Chapter 2 - Getting started 2-1 2. Getting started When you open the sales package, check that it contains the following: • Nokia 9000i Communicator • This User's Manual and the combined Quick Guide and Accessories Guide • Extended Li-Ion Battery, see the Accessories Guide • Adapter, see the Accessories Guide • Rapid Travel Charger, see the Accessories Guide • Nokia Connectivity software on diskette (see Chapter 10 "System: Connecting to a PC" on page 10-6) • CD-ROM containing add-on software • RS-232 Adapter Cable, see the Accessories Guide • A sticker with the communicator's serial number and the lock code (see Chapter 10 "System: Security" on page 10-2) IMPORTANT! The communicator lock code, used for various settings, can only be found on the yellow sticker in the sales package. Keep your lock code in a safe place. For information about other Nokia 9000i Communicator accessories, see the Accessories Guide. This chapter covers the following topics: • How to install a valid SIM card, see "SIM card: Installing the SIM card" on page 2-3. • How to supply power to the communicator, see "Connectors" on page 2-4 and "Battery" on page 2-5. • How to personalize your communicator, see "First start-up" on page 2-1. • How the communicator operates, see "Communicator interface" on page 2-7 and "Communicator applications" on page 2-9. • "Special features" on page 2-12 contains information about the common features of all the applications. • "Shortcuts" on page 2-13 explains the shortcuts of the document applications. Note: In this User's Manual, the command names appear in bold and item names, entries and values shown in the application area are in italics. First start-up The first start-up allows you to set your home location, the time and date, and your personal information. Note that whenever you open the communicator cover after having removed and replaced the battery, you will see a welcome screen while the device performs a self-test. The following steps, however, occur only the first time the communicator is activated, or after it has been reformatted. To change any of the following settings after the initial start-up, see "First start-up: Changing start-up settings" on page 2-2. • Install the SIM card and switch on the phone interface before opening the communicator interface. In most locations, this will configure the settings for your voice mail and the SMSC. SIM card installation is described in "SIM card: Installing the SIM card" on page 2-3. If you do not have a SIM card yet, ignore this step. Although
-
 1
1 -
2
-
3
-
4
-
 5
5 -
 6
6 -
 7
7 -
 8
8 -
 9
9 -
 10
10 -
 11
11 -
 12
12 -
 13
13 -
 14
14 -
 15
15 -
16
-
17
-
18
-
19
-
20
-
21
-
22
-
23
-
24
-
25
-
26
-
27
-
28
-
29
-
30
-
31
-
32
-
33
-
34
-
35
-
36
-
37
-
38
-
39
-
40
-
41
-
42
-
43
-
44
-
45
-
46
-
47
-
48
-
49
-
50
-
51
-
52
-
53
-
54
-
55
-
56
-
57
-
58
-
59
-
60
-
61
-
62
-
63
-
64
-
65
-
66
-
67
-
68
-
69
-
70
-
71
-
72
-
73
-
74
-
75
-
76
-
77
-
78
-
79
-
80
-
81
-
82
-
83
-
84
-
85
-
86
-
87
-
88
-
89
-
90
-
91
-
92
-
93
-
94
-
95
-
96
-
97
-
98
-
99
-
100
-
101
-
102
-
103
-
104
-
105
-
106
-
107
-
108
-
109
-
110
-
111
-
112
-
113
-
114
-
115
-
116
-
117
-
118
-
119
-
120
-
121
-
122
-
123
-
124
-
125
-
126
-
127
-
128
-
129
-
130
-
131
 |
 |