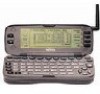
Nokia 9000i Nokia 9000i User Guide in English - Page 26
Contact cards
 |
View all Nokia 9000i manuals
Add to My Manuals
Save this manual to your list of manuals |
Page 26 highlights
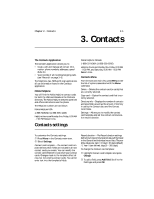
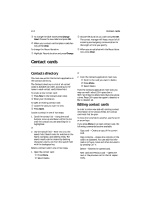
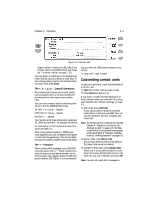
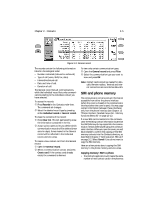
3-2 Contact cards ƒ To change the label name press Change label. Choose the new label and press OK. „ When your contact card template is satisfactory, press Close. To change the Record duration: • Highlight Record duration and press Change. , Choose the duration you want and press OK. The contact manager will keep a record of all incoming and outgoing communication for the length of time you specify. ƒ When you are satisfied with the Record duration, press Close. Contact cards Contacts directory The main view within the Contacts application is the Contacts directory. The Contacts directory is a list of all contact cards in alphabetical order, according to the name in each contact card's Name field. To create a new contact card: • Press New in the Contacts main view. , Enter your information. To open an existing contact card: • Locate the card you want to view. , Press Open. Locate a contact in one of two ways: 1. Scroll the contact list - Using the scroll buttons, move up and down within the list until the contact you are searching for is highlighted. or 2. Use the search field - Enter text into the search field. Search looks for matches in the Name, Company, and Address fields. The search results can be cleared by deleting characters one by one from the search field with the backspace key. Delete a contact card in one of two ways 1. Open the contact card: • Press Menu. , Select Delete. or 2. From the Contacts application main view: • Scroll to the card you want to delete. , Press Menu. ƒ Select Delete. From the Contacts application main view you may use multi-select (Ctrl+space bar or Shift+scroll key) to delete more than one card at a time. Press Ctrl+space bar again to deselect or Esc to deselect all. Editing contact cards In order to enter new and edit existing contact information in the various fields, the contact card must first be open. To move from one field to another, use the scroll or arrow keys. If you press Menu in an open contact card, the following commands become available: Copy card - Creates a copy of the current card. Copy contents - Copies the contents of the card to a clipboard. You can add this information to faxes, notes and other documents by pressing Ctrl-V. Delete - Deletes the opened card. Next card and Previous card - Opens the next or the previous card in the list respectively.
-
 1
1 -
2
-
3
-
4
-
5
-
6
-
7
-
8
-
9
-
10
-
11
-
12
-
13
-
14
-
15
-
16
-
17
-
18
-
19
-
20
-
 21
21 -
 22
22 -
 23
23 -
 24
24 -
 25
25 -
 26
26 -
 27
27 -
 28
28 -
 29
29 -
 30
30 -
 31
31 -
32
-
33
-
34
-
35
-
36
-
37
-
38
-
39
-
40
-
41
-
42
-
43
-
44
-
45
-
46
-
47
-
48
-
49
-
50
-
51
-
52
-
53
-
54
-
55
-
56
-
57
-
58
-
59
-
60
-
61
-
62
-
63
-
64
-
65
-
66
-
67
-
68
-
69
-
70
-
71
-
72
-
73
-
74
-
75
-
76
-
77
-
78
-
79
-
80
-
81
-
82
-
83
-
84
-
85
-
86
-
87
-
88
-
89
-
90
-
91
-
92
-
93
-
94
-
95
-
96
-
97
-
98
-
99
-
100
-
101
-
102
-
103
-
104
-
105
-
106
-
107
-
108
-
109
-
110
-
111
-
112
-
113
-
114
-
115
-
116
-
117
-
118
-
119
-
120
-
121
-
122
-
123
-
124
-
125
-
126
-
127
-
128
-
129
-
130
-
131
 |
 |
