Nokia 9000i Nokia 9000i User Guide in English - Page 14
Battery - warn
 |
View all Nokia 9000i manuals
Add to My Manuals
Save this manual to your list of manuals |
Page 14 highlights
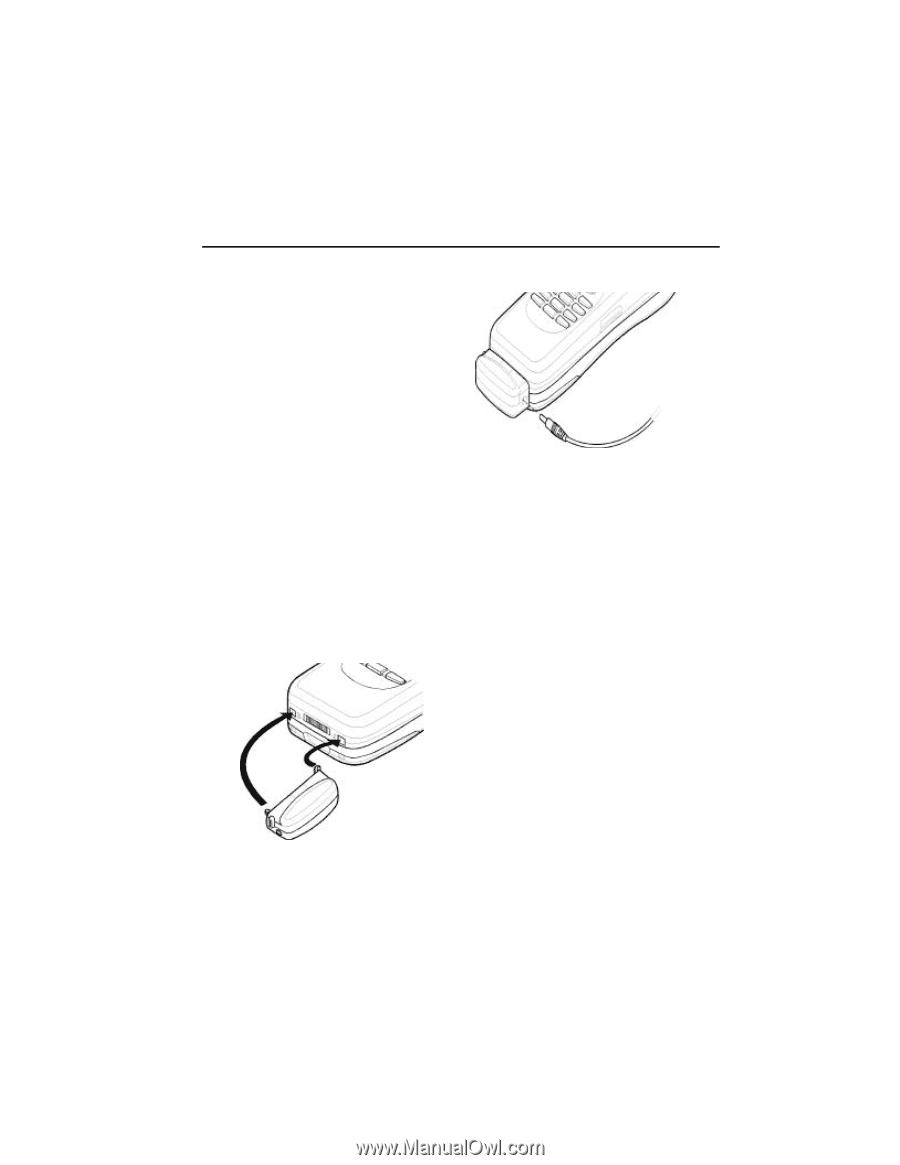
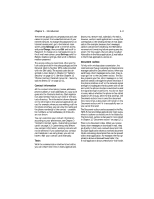
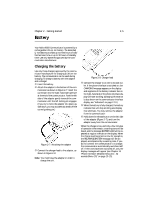
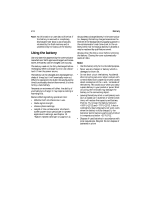
Chapter 2 - Getting started 2-5 Battery Your Nokia 9000i Communicator is powered by a rechargeable Lithium-Ion battery. The Extended Li-Ion Battery provides up to three hours of talk/ fax/terminal time or up to 30 hours of standby time. Use only batteries approved by the communicator manufacturer. Charging the battery Use only those chargers approved by the communicator manufacturer for charging a Lithium-Ion battery. The communicator can be used during charging. To charge a battery with the adapter and a charger: • Insert the battery. , Attach the adapter to the bottom of the com- municator as shown in Figure 2-7. Insert the curved pin into the right-hand side aperture at the end of the communicator. Push the left side of the adapter gently towards the communicator until the left locking pin engages. (If you try to force the adapter into place upside down, you may accidentally break off the curved guiding pin.) Figure 2-7: Attaching the adapter ƒ Connect the charger lead to the adapter, as shown in Figure 2-8. Note: You must have the adapter in order to charge the unit. Figure 2-8: Charger lead „ Connect the charger to an 120 V AC wall outlet. If the phone interface is switched on, the CHARGING message appears on the display and segments of the battery indicator bar on the right-hand side of the phone interface display will start scrolling. (Charging information is also shown on the communicator interface display, see "Indicators" on page 2-10.) ... When the battery is fully charged, the battery indicator bar will stop scrolling and display five solid bars. You may remove the adapter from the communicator: † Hold down the release button on the left side of the adapter (Figure 2-7), and turn the adapter away from the communicator. When the charge is low and only a few minutes of operation time remain, a warning tone will be heard, and the message BATTERY LOW will be repeated at regular intervals on the display. When the charge level becomes too low for operation, the RECHARGE BATTERY message will be displayed, accompanied by a warning tone. If you do not connect the communicator to a charger, the communicator automatically switches itself off. If the tones have been switched off, only the display messages will appear (see Chapter 13 "Phone interface: Detailed menus list - All sounds (Menu 10)" on page 13-15).
-
 1
1 -
2
-
3
-
4
-
5
-
6
-
7
-
8
-
 9
9 -
 10
10 -
 11
11 -
 12
12 -
 13
13 -
 14
14 -
 15
15 -
 16
16 -
 17
17 -
 18
18 -
 19
19 -
20
-
21
-
22
-
23
-
24
-
25
-
26
-
27
-
28
-
29
-
30
-
31
-
32
-
33
-
34
-
35
-
36
-
37
-
38
-
39
-
40
-
41
-
42
-
43
-
44
-
45
-
46
-
47
-
48
-
49
-
50
-
51
-
52
-
53
-
54
-
55
-
56
-
57
-
58
-
59
-
60
-
61
-
62
-
63
-
64
-
65
-
66
-
67
-
68
-
69
-
70
-
71
-
72
-
73
-
74
-
75
-
76
-
77
-
78
-
79
-
80
-
81
-
82
-
83
-
84
-
85
-
86
-
87
-
88
-
89
-
90
-
91
-
92
-
93
-
94
-
95
-
96
-
97
-
98
-
99
-
100
-
101
-
102
-
103
-
104
-
105
-
106
-
107
-
108
-
109
-
110
-
111
-
112
-
113
-
114
-
115
-
116
-
117
-
118
-
119
-
120
-
121
-
122
-
123
-
124
-
125
-
126
-
127
-
128
-
129
-
130
-
131
 |
 |