Nokia 9000i Nokia 9000i User Guide in English - Page 75
Daily schedule
 |
View all Nokia 9000i manuals
Add to My Manuals
Save this manual to your list of manuals |
Page 75 highlights
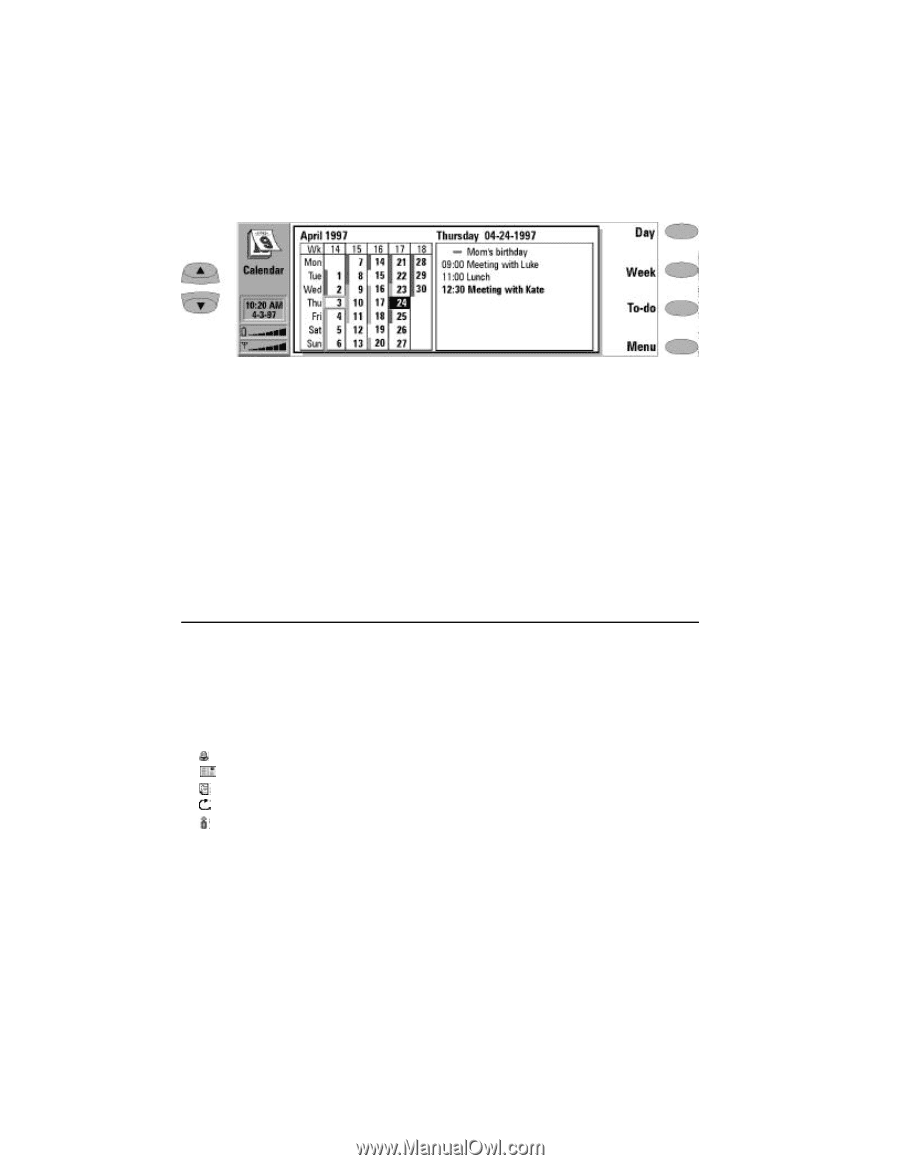
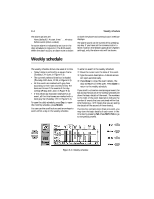
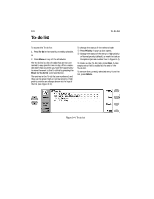
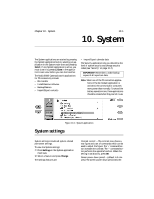
9-2 Daily schedule Figure 9-1: Monthly schedule • Edit the schedule of a day by highlighting the date using the scroll keys and pressing Day. • Events which are not be associated with a specific time are indicated with a horizontal bar in the daily schedule (e.g., Mom's birthday in Figure 9-1). To enter an event in the monthly schedule: • Use the scroll or arrow keys to move the se- lection frame and move the cursor over the date of the event. , Type the event description. A screen for the event details will open automatically. ƒ Press Close to close the event details. The daily schedule screen will then open. Press Close again to return to the monthly schedule. To write yourself reminders of important matters, press To-do. Daily schedule Activate the daily schedule by pressing Day when in the monthly schedule screen. The daily events will be displayed, starting with the first event of the day. Here you may edit the contents of event entries. Calendar icons in the daily schedule: - Attached alarms - Bookings - Memos - Recurring events - Annual events The symbol appears next to the event's name (see Figure 9-2). For each event, only the symbol with the highest priority is shown (the symbols will appear in the order listed above). To add events: • Move the selection frame over the starting time of the event. , Type the event on the dotted line. If you want to add an event without a start time, write the event, press Details and remove the start time. The event will be shown with a hyphen. To delete events: Select the event and press Delete. If you delete (or edit) repeating events, you will be asked if you want to apply the changes to all or only to the current event. To adjust the details of the selected event: Press Details. A new screen opens, allowing you to adjust the following details: Description - The description of the event. Reserve (___ whole day(s)) - Indicates the number of days required for an event. Start date - The date the event starts. The default date is the selected day. The year is always given using two digits.
-
 1
1 -
2
-
3
-
4
-
5
-
6
-
7
-
8
-
9
-
10
-
11
-
12
-
13
-
14
-
15
-
16
-
17
-
18
-
19
-
20
-
21
-
22
-
23
-
24
-
25
-
26
-
27
-
28
-
29
-
30
-
31
-
32
-
33
-
34
-
35
-
36
-
37
-
38
-
39
-
40
-
41
-
42
-
43
-
44
-
45
-
46
-
47
-
48
-
49
-
50
-
51
-
52
-
53
-
54
-
55
-
56
-
57
-
58
-
59
-
60
-
61
-
62
-
63
-
64
-
65
-
66
-
67
-
68
-
69
-
 70
70 -
 71
71 -
 72
72 -
 73
73 -
 74
74 -
 75
75 -
 76
76 -
 77
77 -
 78
78 -
 79
79 -
 80
80 -
81
-
82
-
83
-
84
-
85
-
86
-
87
-
88
-
89
-
90
-
91
-
92
-
93
-
94
-
95
-
96
-
97
-
98
-
99
-
100
-
101
-
102
-
103
-
104
-
105
-
106
-
107
-
108
-
109
-
110
-
111
-
112
-
113
-
114
-
115
-
116
-
117
-
118
-
119
-
120
-
121
-
122
-
123
-
124
-
125
-
126
-
127
-
128
-
129
-
130
-
131
 |
 |