Nokia 9000i Nokia 9000i User Guide in English - Page 27
Customizing contact cards
 |
View all Nokia 9000i manuals
Add to My Manuals
Save this manual to your list of manuals |
Page 27 highlights
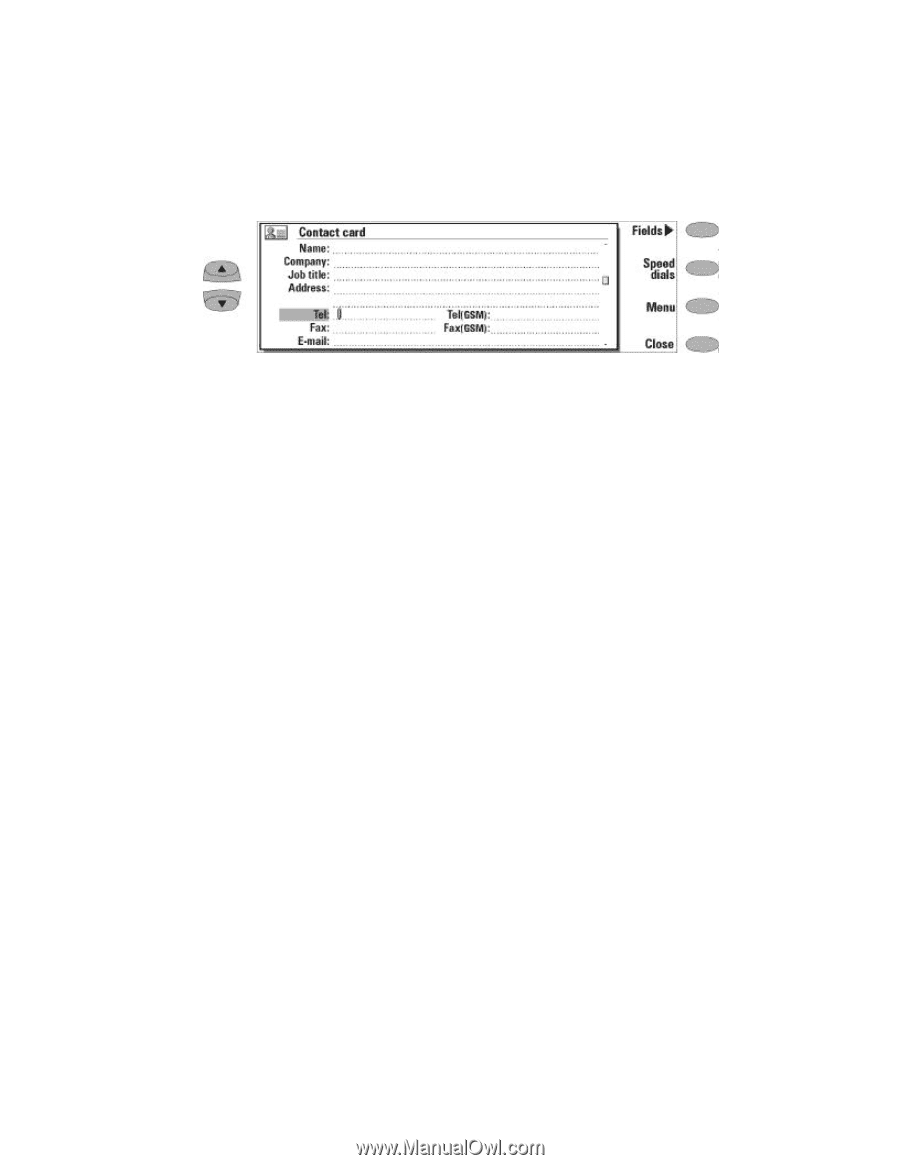
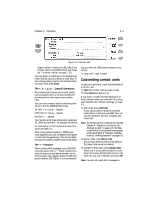
Chapter 3 - Contacts 3-3 Figure 3-1: Contact card Copy to hotlist - Copies the URL field of the contact card to the WWW hotlist (see Chapter 7 "Internet: Hotlist" on page 7-12). You may delete or add lines to the Address and Note fields by using the delete or enter keys. To save changes and go back to the Contacts directory main view, press Close. The +, #, *, p, w, -, [space] characters The communicator allows you to insert special tones or pauses within a string of numbers for communications that require more complex input. You can enter numbers and the following characters in the Tel, DTMF and Fax fields. Tel field: +, #, *, p, w, -, [space] DTMF field: #, *, p, w, -, [space] Fax field: +, -, [space] You may also enter these characters in alternate Tel, DTMF and Fax fields - for example, Tel (office). For information on the functions of these characters see table 3-1. When storing phone numbers or DTMF (touch tone) sequences, you can use hyphens and spaces to customize the appearance. This will not affect the way the numbers or DTMF tones will be dialed. The "+" character When sending SMS messages, some GSM1900 networks require that a "+" (plus) character precede the area code and phone number. As the communicator has a specific place for GSM telephone numbers (Tel (GSM)), it is recommended that you enter all GSM phone numbers in the format: +1-area code-7 digit number. Customizing contact cards To remove or add fields, or edit the field labels of a contact card: • Open the contact card you want to edit. , Press Fields (see Figure 3-1). If you want to modify the field settings of all future contact cards, you must edit the contact card template, see "Contacts settings" on page 3-1. To add a field, press Add field. A pop-up box opens, listing the available fields. Select a field and press OK. There can only be one Name, Job title, Company and Note field. Note: The Tel/Fax field is for alternating calls (see Chapter 4 "Telephone: Conference call Alternating calls" on page 4-8). The Password field is for the calendar booking password (see Chapter 9 "Calendar: Calendar booking - Booking password" on page 9-5). To delete a field, press Delete field The currently selected field will be deleted. The Name field cannot be deleted. To change the field label, press Change label. Select one of the predefined labels or scroll down to the user-defined field and write the label text, e.g., Car or Modem, and press OK Note: You can only send short messages to
-
 1
1 -
2
-
3
-
4
-
5
-
6
-
7
-
8
-
9
-
10
-
11
-
12
-
13
-
14
-
15
-
16
-
17
-
18
-
19
-
20
-
21
-
 22
22 -
 23
23 -
 24
24 -
 25
25 -
 26
26 -
 27
27 -
 28
28 -
 29
29 -
 30
30 -
 31
31 -
 32
32 -
33
-
34
-
35
-
36
-
37
-
38
-
39
-
40
-
41
-
42
-
43
-
44
-
45
-
46
-
47
-
48
-
49
-
50
-
51
-
52
-
53
-
54
-
55
-
56
-
57
-
58
-
59
-
60
-
61
-
62
-
63
-
64
-
65
-
66
-
67
-
68
-
69
-
70
-
71
-
72
-
73
-
74
-
75
-
76
-
77
-
78
-
79
-
80
-
81
-
82
-
83
-
84
-
85
-
86
-
87
-
88
-
89
-
90
-
91
-
92
-
93
-
94
-
95
-
96
-
97
-
98
-
99
-
100
-
101
-
102
-
103
-
104
-
105
-
106
-
107
-
108
-
109
-
110
-
111
-
112
-
113
-
114
-
115
-
116
-
117
-
118
-
119
-
120
-
121
-
122
-
123
-
124
-
125
-
126
-
127
-
128
-
129
-
130
-
131
 |
 |