Samsung SCX-5935NX Quick Guide Easy Manual Ver.1.0 (English) - Page 103
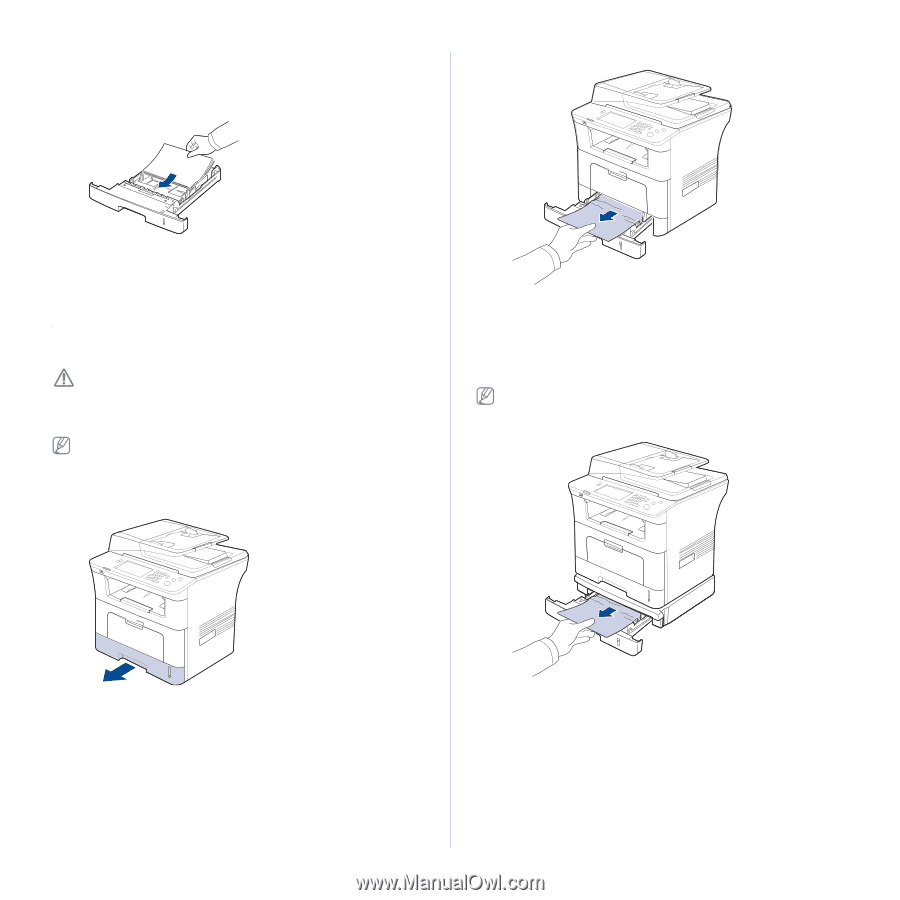
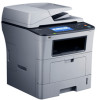
Clearing paper jams, In tray 1, In optional tray 2
 |
View all Samsung SCX-5935NX manuals
Add to My Manuals
Save this manual to your list of manuals |
Page 103 highlights
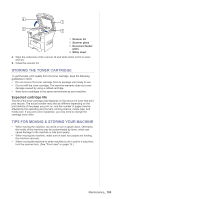
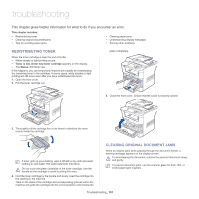
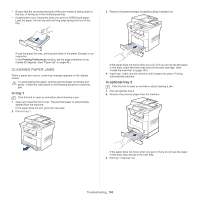
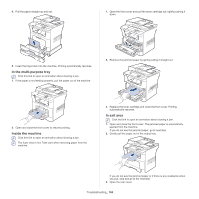
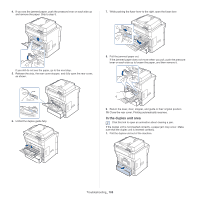
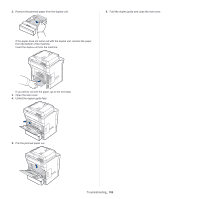
• Ensure that the recommended side of the print media is facing down in the tray, or facing up in the multi-purpose tray. • If paper jams occur frequently when you print on A5/B5-sized paper: Load the paper into the tray with the long edge facing the front of the tray. 3. Remove the jammed paper by gently pulling it straight out. If load the paper this way, printing both sides of the paper (Duplex) is not supported. In the Printing Preferences window, set the page orientation to be rotated 90 degrees. (See "Paper tab" on page 48.) CLEARING PAPER JAMS When a paper jam occurs, a warning message appears on the display screen. To avoid tearing the paper, pull the jammed paper out slowly and gently. Follow the instructions in the following sections to clear the jam. In tray 1 Click this link to open an animation about clearing a jam. 1. Open and close the front cover. The jammed paper is automatically ejected from the machine. If the paper does not exit, go to the next step. 2. Pull out tray 1 . If the paper does not move when you pull, or if you do not see the paper in this area, check the fuser area around the toner cartridge. (See "Inside the machine" on page 104.) 4. Insert tray 1 back into the machine until it snaps into place. Printing automatically resumes. In optional tray 2 Click this link to open an animation about clearing a jam. 1. Pull out optional tray 2. 2. Remove the jammed paper from the machine. If the paper does not move when you pull or if you do not see the paper in this area, stop and go to the next step. 3. Pull tray 1 half-way out. Troubleshooting_ 103
-
 1
1 -
2
-
3
-
4
-
5
-
6
-
7
-
8
-
9
-
10
-
11
-
12
-
13
-
14
-
15
-
16
-
17
-
18
-
19
-
20
-
21
-
22
-
23
-
24
-
25
-
26
-
27
-
28
-
29
-
30
-
31
-
32
-
33
-
34
-
35
-
36
-
37
-
38
-
39
-
40
-
41
-
42
-
43
-
44
-
45
-
46
-
47
-
48
-
49
-
50
-
51
-
52
-
53
-
54
-
55
-
56
-
57
-
58
-
59
-
60
-
61
-
62
-
63
-
64
-
65
-
66
-
67
-
68
-
69
-
70
-
71
-
72
-
73
-
74
-
75
-
76
-
77
-
78
-
79
-
80
-
81
-
82
-
83
-
84
-
85
-
86
-
87
-
88
-
89
-
90
-
91
-
92
-
93
-
94
-
95
-
96
-
97
-
 98
98 -
 99
99 -
 100
100 -
 101
101 -
 102
102 -
 103
103 -
 104
104 -
 105
105 -
 106
106 -
 107
107 -
 108
108 -
109
-
110
-
111
-
112
-
113
-
114
-
115
-
116
-
117
-
118
-
119
-
120
-
121
-
122
-
123
-
124
-
125
-
126
-
127
-
128
-
129
-
130
-
131
-
132
-
133
 |
 |