Samsung SCX-5935NX Quick Guide Easy Manual Ver.1.0 (English) - Page 57
Basic copy, Changing the settings for each copy, Image tab, Selecting the size of originals
 |
View all Samsung SCX-5935NX manuals
Add to My Manuals
Save this manual to your list of manuals |
Page 57 highlights
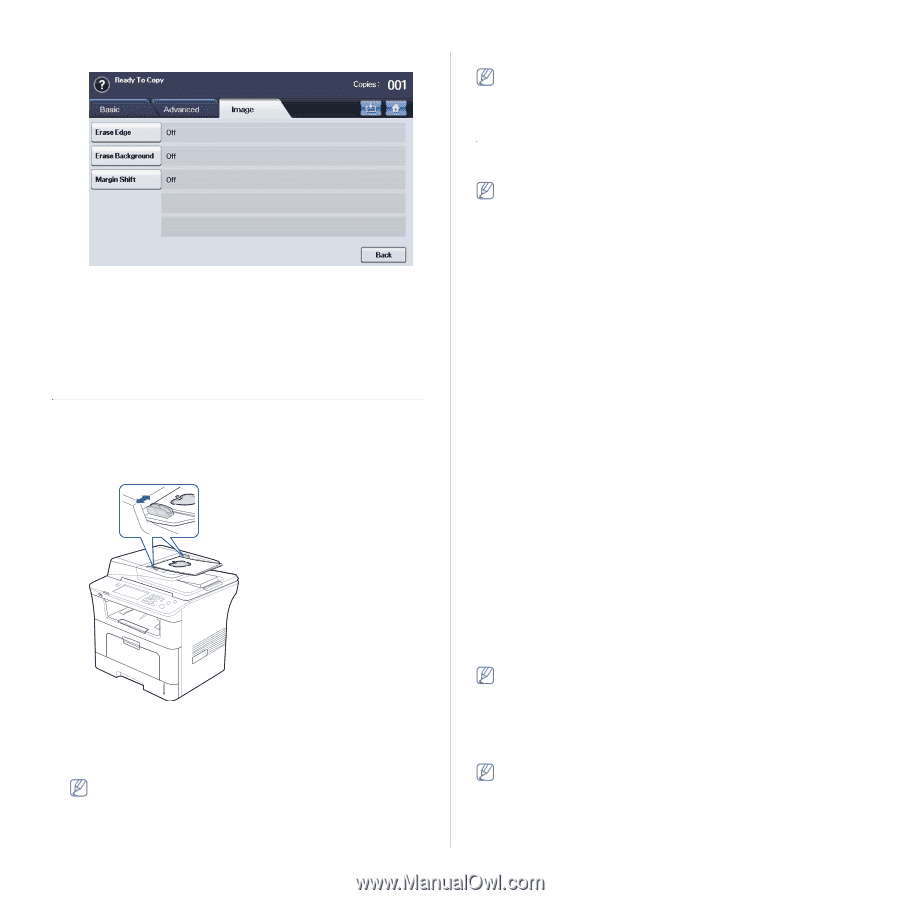
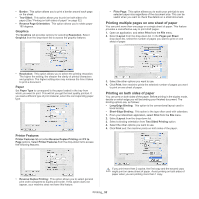
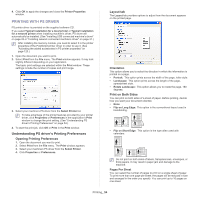
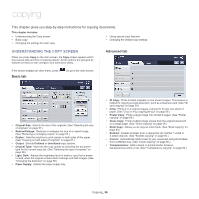
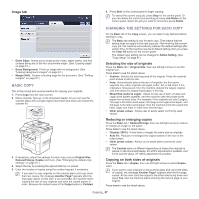
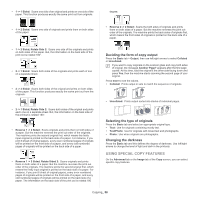
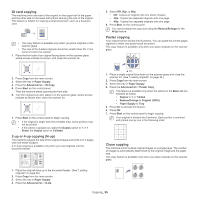
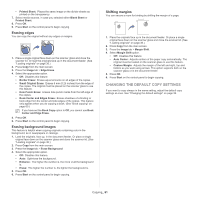
Image tab 6. Press Start on the control panel to begin copying. To cancel the current copy job, press Stop on the control panel. Or you can delete the current and pending job using Job Status on the control panel. Select the job you want to cancel and press Delete. • Erase Edge: Allows you to erase punch holes, staple marks, and fold creases along any of the four documents edges. (See "Erasing edges" on page 61.) • Erase Background: Prints an image with no background. (See "Erasing background images" on page 61.) • Margin Shift: Creates a binding edge for the document. (See "Shifting margins" on page 61.) BASIC COPY This is the normal and usual procedure for copying your originals. 1. Press Copy from the main screen. 2. Place originals, face up, in the document feeder. Or you can use the scanner glass with a single original document face down and closed the scanner lid. 3. If necessary, adjust the settings for each copy such as Original Size, Reduce/Enlarge, Duplex and more. (See "Changing the default copy settings" on page 61.) 4. Select the tray by pressing the appropriate tray on screen. 5. Enter the number of copies using the number keypad, if necessary. If you want to copy originals on the scanner glass and copy more than two copies, the message Another Page? appears after the first page copied. At this time, if you select No, the machine starts copying the rest of your originals and sorts the copied papers in order. Because the default value of the Output option is Collated. CHANGING THE SETTINGS FOR EACH COPY On the Basic tab of the Copy screen, you can select copy features before starting to copy. The Basic tab setting is only for each copy. That means that the setting does not apply to the next copy job. After finishing the current copy job, the machine automatically restores the default settings after certain time. Or the machine resume to default setting when you press the Clear All button on the control panel. The default copy setting can be changed in Admin Setting. (See "Copy Setup" on page 87) Selecting the size of originals Press the Basic tab > Original Size, then use left/right arrows to set the original size. Press more to see the detail values. • Custom: Selects the scanning area of the original. Press the cardinal point arrows to set the size. • Auto: Automatically detects the size of originals, but this option supports only when originals are Legal, Letter, A4, or A5 sized. If the originals is mixed-sized, then the machine detects the largest original size and select the largest-sized paper in the tray. • Mixed Size (Letter & Legal): Allows for the use of both of Letter and Legal sized papers together, and the machine uses the proper-sized paper from several trays. For example, if the originals are total 3 pages, 1st page is the letter-sized paper, 2nd page is the legal-sized paper, and 3rd page is the letter-sized paper, then the machine prints the output first letter, legal, and letter in order from several trays. • Other preset values: Allows user to easily select commonly used values. Reducing or enlarging copies Press the Basic tab > Reduce/Enlarge, then use left/right arrows to reduce or enlarge an image on the paper. Press more to see the detail values. • Original (100%): Prints texts or images the same size as originals. • Auto Fit: Reduces or enlarges the original based on the size of the output paper. • Other preset values: Allows you to easily select commonly used values. The Custom option is different depending on where the originals is placed. In the document feeder, 25~200% adjustment is possible. And in the scanner glass, 25~400% adjustment is possible. Copying on both sides of originals Press the Basic tab > Duplex, then use left/right arrows to select Duplex value. If you want to copy originals on the scanner glass and copy both sides of original, the message Another Page? appears after the first page copied. At this time, load the original's the other side facing down and press Yes, then the machine starts scanning the second page of your original. Press more to see the detail values. Copying_ 57
-
 1
1 -
2
-
3
-
4
-
5
-
6
-
7
-
8
-
9
-
10
-
11
-
12
-
13
-
14
-
15
-
16
-
17
-
18
-
19
-
20
-
21
-
22
-
23
-
24
-
25
-
26
-
27
-
28
-
29
-
30
-
31
-
32
-
33
-
34
-
35
-
36
-
37
-
38
-
39
-
40
-
41
-
42
-
43
-
44
-
45
-
46
-
47
-
48
-
49
-
50
-
51
-
 52
52 -
 53
53 -
 54
54 -
 55
55 -
 56
56 -
 57
57 -
 58
58 -
 59
59 -
 60
60 -
 61
61 -
 62
62 -
63
-
64
-
65
-
66
-
67
-
68
-
69
-
70
-
71
-
72
-
73
-
74
-
75
-
76
-
77
-
78
-
79
-
80
-
81
-
82
-
83
-
84
-
85
-
86
-
87
-
88
-
89
-
90
-
91
-
92
-
93
-
94
-
95
-
96
-
97
-
98
-
99
-
100
-
101
-
102
-
103
-
104
-
105
-
106
-
107
-
108
-
109
-
110
-
111
-
112
-
113
-
114
-
115
-
116
-
117
-
118
-
119
-
120
-
121
-
122
-
123
-
124
-
125
-
126
-
127
-
128
-
129
-
130
-
131
-
132
-
133
 |
 |