Samsung SCX-5935NX Quick Guide Easy Manual Ver.1.0 (English) - Page 68
Using mailbox, Printing a report after sending a fax, Sending a fax in toll save time
 |
View all Samsung SCX-5935NX manuals
Add to My Manuals
Save this manual to your list of manuals |
Page 68 highlights
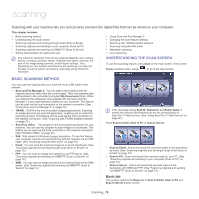
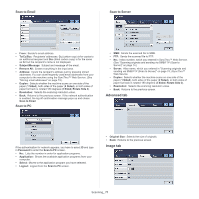
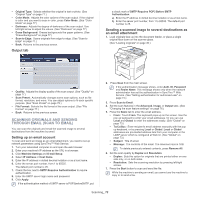
USING MAILBOX You can store the original data in Mailbox, since you are absent and the receiver need to be retrieve a fax from you. This feature allows you to program up to 15 individual Mailbox. Before you store the originals, the Mailbox must be created. Creating Mailbox 1. Press Machine Setup on the control panel. 2. Select Admin Setting. When the login message pops up, then enter the password and press OK. (See "Setting the authentication password" on page 33.) 3. Press the Setup tab > Fax Setup. 4. Press the down arrow to scroll down, if necessary. 5. Press Mailbox Setup. 6. Press Mailbox Configuration. Then the screen displays Mailbox List. 7. Select a Mailbox on the Mailbox List. 8. Press Edit Mailbox. 9. Press Mailbox ID and enter ID with number keypad on the control panel. Up to 20 numbers you can enter. 10. Enter Mailbox Name with the pop up keyboard. It can be either alphabet or number up to 20 digits. 11. Enter Mailbox Passcode with the numeric keypad on the control panel. If you set Mailbox Passcode to number 0000, then the machine does not ask passcode for using Mailbox, such as storing, deleting, printing, receiving. 12. Set Notification option to On, if you want to be notified when a fax is received into Mailbox. 13. Press OK. Storing originals in Mailbox Since you created the mailbox, you can store originals in it. 1. Press Fax from the main screen. 2. Place the originals face up in the document feeder. Or you can use the scanner glass with a single original document faced down. 3. Adjust the document settings in the Image tab and the Basic tab. 4. Press the Advanced tab > Mailbox > Store. 5. Enter Mailbox No. and Passcode. (See "Creating Mailbox" on page 68.) 6. Press OK. Deleting the data in a specific Mailbox a) Press Fax > the Advanced tab > Mailbox > Delete. b) Enter Mailbox No. and Passcode, and then press OK. When the confirmation window appears, press Yes to complete the job. Printing a Mailbox a) Press Fax > the Advanced tab > Mailbox > Print. b) Enter Mailbox No. and Passcode, and press OK. Faxing to a remote Mailbox To fax and store the originals in a recipient's Mailbox in this machine, you can use the Send to Remote feature. 1. Press Fax from the main screen. 2. Place the originals face up in the document feeder. Or you can use the scanner glass with a single original document face down. 3. Adjust the document settings in the Image tab and the Basic tab. 4. Press the Advanced tab > Mailbox > Send to Remote. 5. Enter Remote Fax No, Mailbox No., and Passcode. All these field are filled with information from the receiver. 6. Press OK. PRINTING A REPORT AFTER SENDING A FAX You can set the machine to print a report whether a fax transmission is successfully completed or not. The detailed information is available in advanced setup part. (See "Printing a report" on page 89.) 1. Press Machine Setup on the control panel. 2. Press Admin Setting. When the login message pops up, enter password and press OK. (See "Setting the authentication password" on page 33.) 3. Press the Print/Report tab > Report > Fax Report > Fax Send Report. 4. Press On. 5. Press OK. SENDING A FAX IN TOLL SAVE TIME You can set the machine to send a fax in toll save time to save a telephone fee. If you send a fax after setting this feature, fax data will be stored in machine's memory and the machine will start to send fax in toll save time. 1. Press Machine Setup on the control panel. 2. Press Admin Setting. When the login message pops up, enter password and press OK. (See "Setting the authentication password" on page 33.) 3. Press the Setup tab > Fax Setup. 4. Press down arrow on the right side. 5. Press Toll Save. 6. Press On. 7. Press Start Time and set the start date and time with left/right arrows. 8. Press OK. 9. Press End Time and set the end date and time with left/right arrows. 10. Press OK. 11. Press OK. FORWARDING A FAX TO OTHER DESTINATION You can set the machine to forward the received or sent fax to other destination by a fax or an email. If you are out of office but have to receive the fax, this feature may be useful. • When you forward a fax by an email, you firstly set the mail server and IP address in SyncThru™ Web Service. (See "Using SyncThru™ Web Service" on page 93.) • If this Fax Forward Settings feature to On, you cannot use a fax with the On Hook Dial on the control panel. Forwarding a sent fax to other destination by a fax You can set the machine to forward every fax you sent to other destination by faxing. 1. Press Machine Setup on the control panel. 2. Press Admin Setting. When the login message pops up, enter password and press OK. (See "Setting the authentication password" on page 33.) Faxing_ 68
-
 1
1 -
2
-
3
-
4
-
5
-
6
-
7
-
8
-
9
-
10
-
11
-
12
-
13
-
14
-
15
-
16
-
17
-
18
-
19
-
20
-
21
-
22
-
23
-
24
-
25
-
26
-
27
-
28
-
29
-
30
-
31
-
32
-
33
-
34
-
35
-
36
-
37
-
38
-
39
-
40
-
41
-
42
-
43
-
44
-
45
-
46
-
47
-
48
-
49
-
50
-
51
-
52
-
53
-
54
-
55
-
56
-
57
-
58
-
59
-
60
-
61
-
62
-
 63
63 -
 64
64 -
 65
65 -
 66
66 -
 67
67 -
 68
68 -
 69
69 -
 70
70 -
 71
71 -
 72
72 -
 73
73 -
74
-
75
-
76
-
77
-
78
-
79
-
80
-
81
-
82
-
83
-
84
-
85
-
86
-
87
-
88
-
89
-
90
-
91
-
92
-
93
-
94
-
95
-
96
-
97
-
98
-
99
-
100
-
101
-
102
-
103
-
104
-
105
-
106
-
107
-
108
-
109
-
110
-
111
-
112
-
113
-
114
-
115
-
116
-
117
-
118
-
119
-
120
-
121
-
122
-
123
-
124
-
125
-
126
-
127
-
128
-
129
-
130
-
131
-
132
-
133
 |
 |