Samsung SCX-5935NX Quick Guide Easy Manual Ver.1.0 (English) - Page 45
Printing booklets, Printing on both sides of paper, Change percentage of your document
 |
View all Samsung SCX-5935NX manuals
Add to My Manuals
Save this manual to your list of manuals |
Page 45 highlights
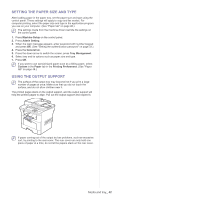
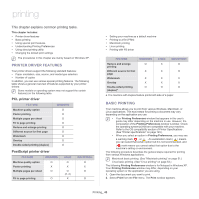
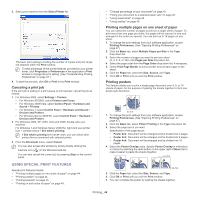
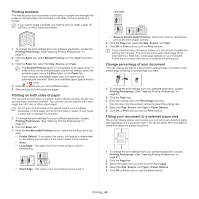
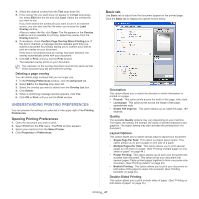
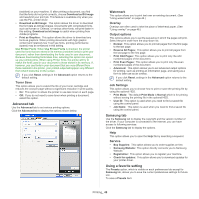
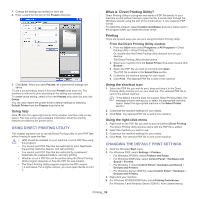
Printing booklets This feature prints your document on both sides of a paper and arranges the pages so that the paper can be folded in half after printing to produce a booklet. If you want to make a booklet, you need to print on Letter, Legal, A4, Us Folio, or Oficio sized print media. 8 9 1. To change the print settings from your software application, access the Printing Preferences. (See "Opening Printing Preferences" on page 47.) 2. Click the Basic tab, select Booklet Printing from the Type drop-down list. 3. Click the Paper tab, select the Size, Source, and Type. The Booklet Printing option is not available for all paper sizes. In order to find out the available paper size for this feature, select the available paper size in the Size option on the Paper tab. If you select an unavailable paper size, this option can be automatically canceled. Select only available paper. (paper without or mark). 4. Click OK or Print until you exit the Print window. 5. After printing, fold and staple the pages. Printing on both sides of paper You can print on both sides of a paper; duplex. Before printing, decide how you want your document oriented. You can only use this feature with Letter, Legal, A4, US Folio, or Oficio sized paper. Do not print on both sides of the special media, such as labels, envelopes, or thick paper to print on both sides of paper. It may cause a paper jam or damage the machine. 1. To change the print settings from your software application, access Printing Preferences. (See "Opening Printing Preferences" on page 47.) 2. Click the Basic tab. 3. From the Double-sided Printing section, select the binding option you want. • Printer Default: If you select this option, this feature is determined by the setting you've made on the control panel of the machine. • None • Long Edge: This option is the conventional layout used in bookbinding. • Short Edge: This option is the conventional layout used in calendars. • Reverse Double-Sided Printing: Check this option to reverse the print order when duplex printing. 4. Click the Paper tab, select the Size, Source, and Type. 5. Click OK or Print until you exit the Print window. If your machine does not have a duplex unit, you should complete the printing job manually. The machine prints every other page of the document first. After that , a message appears on your computer. Follow the on-screen instructions to complete the printing job. Change percentage of your document You can change the size of a document to appear larger or smaller on the printed page by typing in a percentage you want. 1. To change the print settings from your software application, access Printing Preferences. (See "Opening Printing Preferences" on page 47.) 2. Click the Paper tab. 3. Enter the scaling rate in the Percentage input box. You can also click the up/down arrows to select the scaling rate. 4. Select the Size, Source, and Type in Paper Options. 5. Click OK or Print until you exit the Print window. Fitting your document to a selected paper size This printer feature allows you to scale your print job to any selected paper size regardless of the document size. This can be useful when you want to check fine details on a small document. A 1. To change the print settings from your software application, access Printing Preferences. (See "Opening Printing Preferences" on page 47.) 2. Click the Paper tab. 3. Select the paper size you want from the Fit to page . 4. Select the Size, Source, and Type in Paper Options. 5. Click OK or Print until you exit the Print window. Printing_ 45
-
 1
1 -
2
-
3
-
4
-
5
-
6
-
7
-
8
-
9
-
10
-
11
-
12
-
13
-
14
-
15
-
16
-
17
-
18
-
19
-
20
-
21
-
22
-
23
-
24
-
25
-
26
-
27
-
28
-
29
-
30
-
31
-
32
-
33
-
34
-
35
-
36
-
37
-
38
-
39
-
 40
40 -
 41
41 -
 42
42 -
 43
43 -
 44
44 -
 45
45 -
 46
46 -
 47
47 -
 48
48 -
 49
49 -
 50
50 -
51
-
52
-
53
-
54
-
55
-
56
-
57
-
58
-
59
-
60
-
61
-
62
-
63
-
64
-
65
-
66
-
67
-
68
-
69
-
70
-
71
-
72
-
73
-
74
-
75
-
76
-
77
-
78
-
79
-
80
-
81
-
82
-
83
-
84
-
85
-
86
-
87
-
88
-
89
-
90
-
91
-
92
-
93
-
94
-
95
-
96
-
97
-
98
-
99
-
100
-
101
-
102
-
103
-
104
-
105
-
106
-
107
-
108
-
109
-
110
-
111
-
112
-
113
-
114
-
115
-
116
-
117
-
118
-
119
-
120
-
121
-
122
-
123
-
124
-
125
-
126
-
127
-
128
-
129
-
130
-
131
-
132
-
133
 |
 |
