Samsung SCX-5935NX Quick Guide Easy Manual Ver.1.0 (English) - Page 84
Printing from a USB memory device, Scan to Edge, Quality, Scan Preset, File Format, File Policy
 |
View all Samsung SCX-5935NX manuals
Add to My Manuals
Save this manual to your list of manuals |
Page 84 highlights
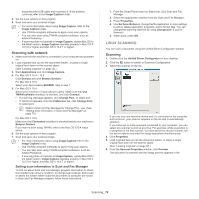
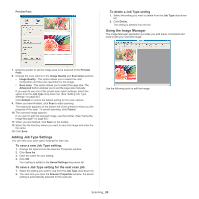
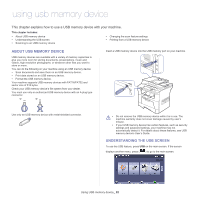
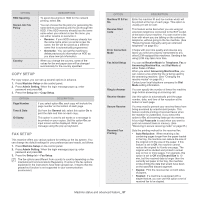
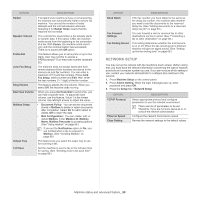
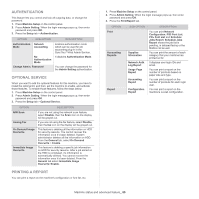
Scan to Edge You can set the machine to scan full size of a page as it is. Usually, the machine scans a page except edges, which means the margin, especially when you do the copy job with certain sized paper in the tray. But if you scan and sent it right away via the network, as the file, the machine does not need to exclude the edges from the originals. Press USB > Scan to USB > the Image tab > Scan to Edge. Select On and press OK. Quality You can use this option to produce a high quality document. Higher quality you select a larger file size you get. Press USB > Scan to USB > the Output tab > Quality. Select the appropriate option and press OK. When you set Color Mode to Mono, the Quality option is grayed out. Scan Preset This feature allows you to use optimized settings for your specific scan job. Press USB > Scan to USB > the Output tab >Scan Preset. Select the appropriate option and press OK. • Sharing and Printing: Produces a small-sized file for normal quality documents. • High Quality Printing: Produces a high quality output with the largest file size. • Archival Record: For the electronic file which is of the smallest file size of the output. • OCR: Produces scanned output for OCR software. You can expect the highest quality images. • Simple Scan: Used for a simple document with text only. The file size of output is small. • Custom: Applies the current scan settings that you have chosen. File Format You can select the file format before you proceed with the scanning job. Press USB > Scan to USB > the Output tab > File Format. Select the appropriate option and press OK. • PDF: Scans originals in PDF format. • Single-Page TIFF: Scans originals in TIFF (Tagged Image File Format), but several originals are scanned as one file. • Multi-Page TIFF: Scans the originals in TIFF (Tagged Image File Format), and several originals are scanned as several file. • JPEG: Scans original in JPEG format. • BMP: Scans original in BMP format. The file format JPEG cannot be selected in the File Format option, if Mono has been selected for Color Mode. File Policy You can choose the policy for generating file name before you proceed with the scan job through USB. If the USB memory already has the same name when you entered a new file name, you can rename or overwrite it. Press USB > Scan to USB > the Output tab > File Policy. Select the appropriate option and press OK. • Rename: If the USB memory already has the same name when you enter a new file name, the file will be saved as a different name which is automatically programmed. • Overwrite: You can set the machine to delete previous job information on USB as you store new job information. PRINTING FROM A USB MEMORY DEVICE You can directly print files stored on a USB memory device. You can print TIFF, BMP, JPEG, and PRN files. Direct Print option supported file types: • PRN: Only files created by provided driver with your machine are compatible. PRN files can be created by selecting the Print to file check box when you print a document. The document will be saved as a PRN file, rather than printed on paper. Only PRN files created in this fashion can be printed directly from USB memory device. (See "Printing to a file (PRN)" on page 51.) • BMP: BMP Uncompressed • TIFF: TIFF 6.0 Baseline • JPEG: JPEG Baseline • PDF: PDF 1.4 and below To print a document from a USB memory device: 1. Insert a USB memory device into the USB memory port on your machine. Your machine automatically detects the device and reads data stored on it. (See "About USB memory device" on page 82.) 2. Press USB from the main screen. 3. Use up/down arrows until the file you want appears. Select the file name. If the file is in a folder, select the folder name. Press Select. 4. Press USB Print. 5. Press the Start button on the control panel. Using USB memory device_ 84
-
 1
1 -
2
-
3
-
4
-
5
-
6
-
7
-
8
-
9
-
10
-
11
-
12
-
13
-
14
-
15
-
16
-
17
-
18
-
19
-
20
-
21
-
22
-
23
-
24
-
25
-
26
-
27
-
28
-
29
-
30
-
31
-
32
-
33
-
34
-
35
-
36
-
37
-
38
-
39
-
40
-
41
-
42
-
43
-
44
-
45
-
46
-
47
-
48
-
49
-
50
-
51
-
52
-
53
-
54
-
55
-
56
-
57
-
58
-
59
-
60
-
61
-
62
-
63
-
64
-
65
-
66
-
67
-
68
-
69
-
70
-
71
-
72
-
73
-
74
-
75
-
76
-
77
-
78
-
 79
79 -
 80
80 -
 81
81 -
 82
82 -
 83
83 -
 84
84 -
 85
85 -
 86
86 -
 87
87 -
 88
88 -
 89
89 -
90
-
91
-
92
-
93
-
94
-
95
-
96
-
97
-
98
-
99
-
100
-
101
-
102
-
103
-
104
-
105
-
106
-
107
-
108
-
109
-
110
-
111
-
112
-
113
-
114
-
115
-
116
-
117
-
118
-
119
-
120
-
121
-
122
-
123
-
124
-
125
-
126
-
127
-
128
-
129
-
130
-
131
-
132
-
133
 |
 |
