Dell PowerVault MD3200 CLI Guide - Page 65
Enabling the Snapshot Virtual Disk Feature
 |
View all Dell PowerVault MD3200 manuals
Add to My Manuals
Save this manual to your list of manuals |
Page 65 highlights
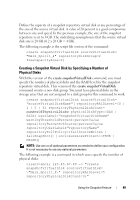
Enabling the Snapshot Virtual Disk Feature The first step in creating a snapshot virtual disk is to make sure the feature is enabled on the storage array. You need a feature key to enable the feature. The command for enabling the feature key file is: enable storageArray feature file="filename" where, the file parameter is the complete file path and file name of a valid feature key file. Enclose the file path and file name in quotation marks (" "). Valid file names for feature key files usually end with .key extension. Creating a Snapshot Virtual Disk with User-Assigned Physical Disks Creating a snapshot virtual disk by assigning the physical disks allows you to choose from the available physical disks when defining your storage array configuration. When you choose the physical disks for your snapshot virtual disk, you automatically create a new disk group. You can specify which physical disks to use and the RAID level for the new disk group. Preparing Host Servers to Create an Initial Snapshot Virtual Disk CAUTION: Before you create a new point-in-time image of a source virtual disk, stop any data access (I/O) activity or suspend data transfer to the source virtual disk to ensure that you capture an accurate point-in-time image of the source virtual disk. Close all applications, including Windows Internet Explorer, to make sure all I/O activity has stopped. NOTE: Removing the drive letter of the associated virtual disk(s) in Windows or unmounting the virtual drive in Linux helps to guarantee a stable copy of the drive for the Snapshot. Before creating a snapshot virtual disk, the server has to be in the proper state. To ensure that the host server is properly prepared to create a snapshot virtual disk, you can either use an application to carry out this task, or you can perform the following steps: 1 Stop all I/O activity to the source. 2 Using your Windows system, flush the cache to the source. At the host prompt, type SMrepassist -f and press . See "SMrepassist Utility" in the Owner's Manual for more information. Using the Snapshot Feature 65
-
 1
1 -
2
-
3
-
4
-
5
-
6
-
7
-
8
-
9
-
10
-
11
-
12
-
13
-
14
-
15
-
16
-
17
-
18
-
19
-
20
-
21
-
22
-
23
-
24
-
25
-
26
-
27
-
28
-
29
-
30
-
31
-
32
-
33
-
34
-
35
-
36
-
37
-
38
-
39
-
40
-
41
-
42
-
43
-
44
-
45
-
46
-
47
-
48
-
49
-
50
-
51
-
52
-
53
-
54
-
55
-
56
-
57
-
58
-
59
-
 60
60 -
 61
61 -
 62
62 -
 63
63 -
 64
64 -
 65
65 -
 66
66 -
 67
67 -
 68
68 -
 69
69 -
 70
70 -
71
-
72
-
73
-
74
-
75
-
76
-
77
-
78
-
79
-
80
-
81
-
82
-
83
-
84
-
85
-
86
-
87
-
88
-
89
-
90
-
91
-
92
-
93
-
94
-
95
-
96
-
97
-
98
-
99
-
100
-
101
-
102
-
103
-
104
-
105
-
106
-
107
-
108
-
109
-
110
-
111
-
112
-
113
-
114
-
115
-
116
-
117
-
118
-
119
-
120
-
121
-
122
-
123
-
124
-
125
-
126
-
127
-
128
-
129
-
130
-
131
-
132
-
133
-
134
-
135
-
136
-
137
-
138
-
139
-
140
-
141
-
142
-
143
-
144
-
145
-
146
-
147
-
148
-
149
-
150
-
151
-
152
-
153
-
154
-
155
-
156
-
157
-
158
-
159
-
160
-
161
-
162
-
163
-
164
-
165
-
166
-
167
-
168
-
169
-
170
-
171
-
172
-
173
-
174
-
175
-
176
-
177
-
178
-
179
-
180
-
181
-
182
-
183
-
184
-
185
-
186
-
187
-
188
-
189
-
190
-
191
-
192
-
193
-
194
-
195
-
196
-
197
-
198
-
199
-
200
-
201
-
202
-
203
-
204
-
205
-
206
-
207
-
208
-
209
-
210
-
211
-
212
-
213
-
214
-
215
-
216
-
217
-
218
-
219
-
220
-
221
-
222
-
223
-
224
-
225
-
226
-
227
-
228
-
229
-
230
-
231
-
232
-
233
-
234
-
235
-
236
-
237
-
238
-
239
-
240
-
241
-
242
-
243
-
244
-
245
-
246
-
247
-
248
-
249
-
250
-
251
-
252
-
253
-
254
-
255
-
256
-
257
-
258
-
259
-
260
-
261
-
262
-
263
-
264
-
265
-
266
-
267
-
268
-
269
-
270
-
271
-
272
-
273
-
274
-
275
-
276
-
277
-
278
-
279
 |
 |