Kyocera KM-C2030 FieryX3e+ User Software Install Guide - Page 35
Configuration Guide, Setting up PostScript or PCL printing with Windows NT 4.0
 |
View all Kyocera KM-C2030 manuals
Add to My Manuals
Save this manual to your list of manuals |
Page 35 highlights
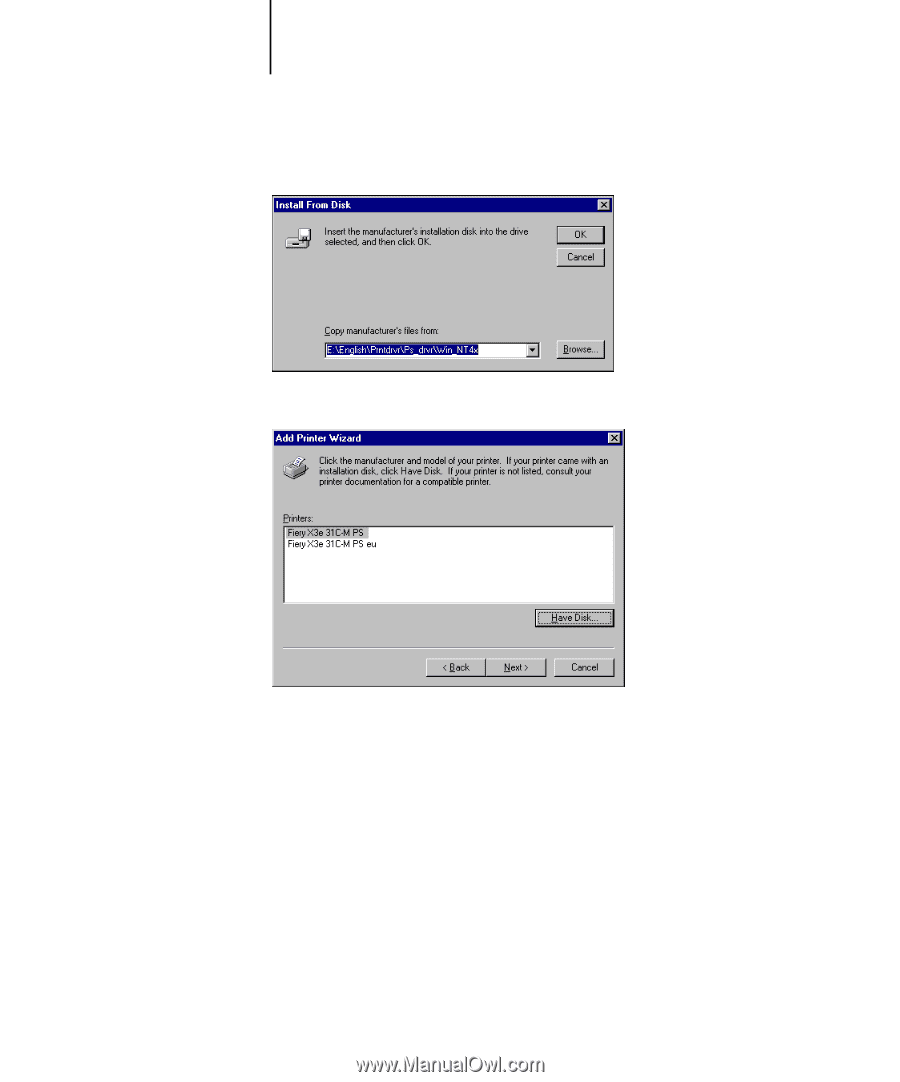
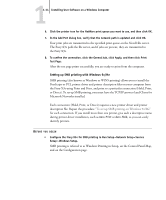
11-19 Setting up PostScript or PCL printing with Windows NT 4.0 9. Verify that the path is correct and click OK. 10. In the Printers list, select the Fiery X3e printer driver and click Next. 11. Type a name for the Fiery X3e in the Printer name field and indicate whether you want to make it the default printer. Click Next. 12. Indicate whether you want the printer installed as a shared printer, and click Next. If you select Shared, enter a Share Name for the printer and select the operating systems used by client computers. For information on shared printers, see the Configuration Guide. 13. Click No to postpone printing a test page and click Finish. When installation is complete, the Printers window is displayed with an icon for the newly installed printer.
-
 1
1 -
2
-
3
-
4
-
5
-
6
-
7
-
8
-
9
-
10
-
11
-
12
-
13
-
14
-
15
-
16
-
17
-
18
-
19
-
20
-
21
-
22
-
23
-
24
-
25
-
26
-
27
-
28
-
29
-
 30
30 -
 31
31 -
 32
32 -
 33
33 -
 34
34 -
 35
35 -
 36
36 -
 37
37 -
 38
38 -
 39
39 -
 40
40 -
41
-
42
-
43
-
44
-
45
-
46
-
47
-
48
-
49
-
50
-
51
-
52
-
53
-
54
-
55
-
56
-
57
-
58
-
59
-
60
-
61
-
62
-
63
-
64
-
65
-
66
-
67
-
68
-
69
-
70
-
71
-
72
-
73
-
74
-
75
-
76
-
77
-
78
-
79
-
80
-
81
-
82
-
83
-
84
-
85
-
86
-
87
-
88
-
89
-
90
-
91
-
92
-
93
-
94
-
95
-
96
-
97
-
98
-
99
-
100
-
101
-
102
-
103
-
104
-
105
-
106
-
107
-
108
-
109
-
110
-
111
-
112
-
113
-
114
-
115
-
116
 |
 |