Motorola i365 User Guide - Nextel - Page 115
Storing Numbers Faster, Viewing Contacts
 |
View all Motorola i365 manuals
Add to My Manuals
Save this manual to your list of manuals |
Page 115 highlights
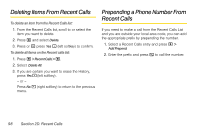
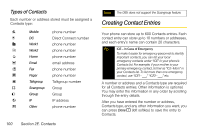
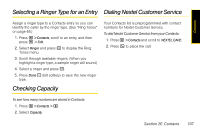
Contacts Storing Numbers Faster To store numbers to Contacts from standby mode: 1. Use the keypad to enter the number you want to store. 2. Press M. 3. Select Store Number. 4. To store the number as a new entry, select [New Contact]. - or - To store the number to an existing entry, select the entry. 5. With the Contacts type field highlighted, scroll left or right to display the Contacts type you want to assign the number. 6. If you want to add more information to the entry, follow the applicable instructions in "Creating Contact Entries" on page 100. 7. Press Done - (left softkey). Viewing Contacts 1. Press M > Contacts, and then scroll to the entry you want to view. - or - Enter the first letter of a name (such as "d" for "Dave"). - or - Press Search - (left softkey), and enter the name you want to see. (Your phone finds the name you entered or the nearest match.) 2. If an entry has more than one number or address stored, surrounds the Contacts type icon. Scroll left or right to view the icon for each number stored in the entry. 3. Press r to view the entry. 4. Scroll to view the other numbers and addresses stored for the entry. Tip To view more entries, continue scrolling. Section 2E. Contacts 103
-
 1
1 -
2
-
3
-
4
-
5
-
6
-
7
-
8
-
9
-
10
-
11
-
12
-
13
-
14
-
15
-
16
-
17
-
18
-
19
-
20
-
21
-
22
-
23
-
24
-
25
-
26
-
27
-
28
-
29
-
30
-
31
-
32
-
33
-
34
-
35
-
36
-
37
-
38
-
39
-
40
-
41
-
42
-
43
-
44
-
45
-
46
-
47
-
48
-
49
-
50
-
51
-
52
-
53
-
54
-
55
-
56
-
57
-
58
-
59
-
60
-
61
-
62
-
63
-
64
-
65
-
66
-
67
-
68
-
69
-
70
-
71
-
72
-
73
-
74
-
75
-
76
-
77
-
78
-
79
-
80
-
81
-
82
-
83
-
84
-
85
-
86
-
87
-
88
-
89
-
90
-
91
-
92
-
93
-
94
-
95
-
96
-
97
-
98
-
99
-
100
-
101
-
102
-
103
-
104
-
105
-
106
-
107
-
108
-
109
-
 110
110 -
 111
111 -
 112
112 -
 113
113 -
 114
114 -
 115
115 -
 116
116 -
 117
117 -
 118
118 -
 119
119 -
 120
120 -
121
-
122
-
123
-
124
-
125
-
126
-
127
-
128
-
129
-
130
-
131
-
132
-
133
-
134
-
135
-
136
-
137
-
138
-
139
-
140
-
141
-
142
-
143
-
144
-
145
-
146
-
147
-
148
-
149
-
150
-
151
-
152
-
153
-
154
-
155
-
156
-
157
-
158
-
159
-
160
-
161
-
162
-
163
-
164
-
165
-
166
-
167
-
168
-
169
-
170
-
171
-
172
-
173
-
174
-
175
-
176
-
177
-
178
-
179
-
180
-
181
-
182
-
183
-
184
-
185
-
186
-
187
-
188
-
189
-
190
-
191
-
192
-
193
-
194
-
195
-
196
-
197
-
198
-
199
-
200
-
201
-
202
-
203
-
204
-
205
-
206
-
207
-
208
-
209
-
210
-
211
-
212
-
213
-
214
-
215
-
216
-
217
-
218
-
219
-
220
-
221
-
222
-
223
-
224
-
225
-
226
-
227
-
228
-
229
-
230
-
231
-
232
-
233
-
234
-
235
-
236
-
237
-
238
-
239
 |
 |