Motorola i365 User Guide - Nextel - Page 178
Quick Notes, Inserting Pictures, Ring Tones, and Voice, Records
 |
View all Motorola i365 manuals
Add to My Manuals
Save this manual to your list of manuals |
Page 178 highlights
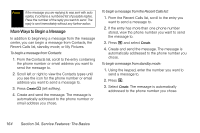
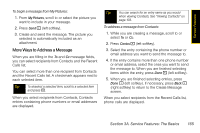
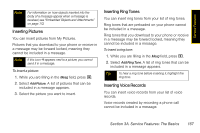
Direct Connect calls are displayed only if the Direct Connect number is stored in Contacts and its Contacts entry also contains a phone number or email address. To address a message from the Recent Calls list: 1. While you are creating a message, scroll to or select To or Cc. 2. Press M and select Recent Calls. 3. Select the entry containing the phone number or email address you want to send the message to. 4. If the entry contains more than one phone number or email address, select the ones you want to send the message to. When you are finished selecting items within the entry, press Done - (left softkey). 5. When you are finished selecting entries, press Done - (left softkey). If necessary, press Back (right softkey) to return to the Create Message screen. Quick Notes When you are filling in the Mesg and Subject message fields, you can add ready-made words or short phrases called Quick Notes. After you add these words or phrases, you can edit them as you would any other text. To insert a quick note: 1. While you are creating a message, scroll to or select Mesg or Subject. 2. Press QNotes - (left softkey) or press M > Add QNotes. 3. Select the Quick Note you want to insert into the message. Tip To create new Quick Notes to use in later messages, see "Customizing MMS" on page 178. Inserting Pictures, Ring Tones, and Voice Records When you are filling in the Mesg field, you can insert pictures, ring tones, and voice records into the body of the message. You can insert more than one of these objects into a message. You may include text in the body of your message in addition to these objects. 166 Section 3A. Service Features: The Basics
-
 1
1 -
2
-
3
-
4
-
5
-
6
-
7
-
8
-
9
-
10
-
11
-
12
-
13
-
14
-
15
-
16
-
17
-
18
-
19
-
20
-
21
-
22
-
23
-
24
-
25
-
26
-
27
-
28
-
29
-
30
-
31
-
32
-
33
-
34
-
35
-
36
-
37
-
38
-
39
-
40
-
41
-
42
-
43
-
44
-
45
-
46
-
47
-
48
-
49
-
50
-
51
-
52
-
53
-
54
-
55
-
56
-
57
-
58
-
59
-
60
-
61
-
62
-
63
-
64
-
65
-
66
-
67
-
68
-
69
-
70
-
71
-
72
-
73
-
74
-
75
-
76
-
77
-
78
-
79
-
80
-
81
-
82
-
83
-
84
-
85
-
86
-
87
-
88
-
89
-
90
-
91
-
92
-
93
-
94
-
95
-
96
-
97
-
98
-
99
-
100
-
101
-
102
-
103
-
104
-
105
-
106
-
107
-
108
-
109
-
110
-
111
-
112
-
113
-
114
-
115
-
116
-
117
-
118
-
119
-
120
-
121
-
122
-
123
-
124
-
125
-
126
-
127
-
128
-
129
-
130
-
131
-
132
-
133
-
134
-
135
-
136
-
137
-
138
-
139
-
140
-
141
-
142
-
143
-
144
-
145
-
146
-
147
-
148
-
149
-
150
-
151
-
152
-
153
-
154
-
155
-
156
-
157
-
158
-
159
-
160
-
161
-
162
-
163
-
164
-
165
-
166
-
167
-
168
-
169
-
170
-
171
-
172
-
 173
173 -
 174
174 -
 175
175 -
 176
176 -
 177
177 -
 178
178 -
 179
179 -
 180
180 -
 181
181 -
 182
182 -
 183
183 -
184
-
185
-
186
-
187
-
188
-
189
-
190
-
191
-
192
-
193
-
194
-
195
-
196
-
197
-
198
-
199
-
200
-
201
-
202
-
203
-
204
-
205
-
206
-
207
-
208
-
209
-
210
-
211
-
212
-
213
-
214
-
215
-
216
-
217
-
218
-
219
-
220
-
221
-
222
-
223
-
224
-
225
-
226
-
227
-
228
-
229
-
230
-
231
-
232
-
233
-
234
-
235
-
236
-
237
-
238
-
239
 |
 |