Motorola i365 User Guide - Nextel - Page 174
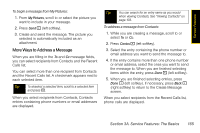
A. Service Features: The Basics, Calls list. See More Ways to Address a Message
 |
View all Motorola i365 manuals
Add to My Manuals
Save this manual to your list of manuals |
Page 174 highlights
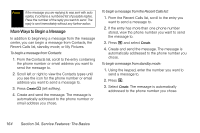
2. If you want to create or edit the subject line: Ⅲ Select Subject. Enter text from the keypad. Ⅲ Select a Quick Note. See "Quick Notes" on page 166. When you are finished, press r. 3. If you want to attach a picture, a ring tone, or a voice record, see "Attaching Pictures" on page 168. When you are finished, press Done (left softkey). 4. If you want to add more recipients in addition to those in the To field: Ⅲ Select Cc. Enter the phone number or email address from the keypad and press r. Repeat this action to enter more phone numbers or email addresses. Ⅲ Select recipients from Contacts or the Recent Calls list. See "More Ways to Address a Message" on page 165. When you are finished addressing the message, press Back - (right softkey). 5. If you want to insert replies the recipient can choose from when replying to your message, select Auto Replies. Ⅲ Enter text from the keypad or select a Quick Note (see "Quick Notes" on page 166). When you are finished creating your list of replies, press Back (right softkey). 6. If you want to set the priority of the message, select Priority and then select a setting. 7. If you want to receive a report confirming that your message was delivered: Select Report > On Delivery. 8. If you want to set a date after which attempts to deliver the message end: Ⅲ Select Valid Until, select a date by scrolling or entering numbers, and press r. Ⅲ To set no date, press No Date - (left softkey). 9. To send the message, press Send - (left softkey). - or - If Send is not one of your options, press M and then select Send. 162 Section 3A. Service Features: The Basics
-
 1
1 -
2
-
3
-
4
-
5
-
6
-
7
-
8
-
9
-
10
-
11
-
12
-
13
-
14
-
15
-
16
-
17
-
18
-
19
-
20
-
21
-
22
-
23
-
24
-
25
-
26
-
27
-
28
-
29
-
30
-
31
-
32
-
33
-
34
-
35
-
36
-
37
-
38
-
39
-
40
-
41
-
42
-
43
-
44
-
45
-
46
-
47
-
48
-
49
-
50
-
51
-
52
-
53
-
54
-
55
-
56
-
57
-
58
-
59
-
60
-
61
-
62
-
63
-
64
-
65
-
66
-
67
-
68
-
69
-
70
-
71
-
72
-
73
-
74
-
75
-
76
-
77
-
78
-
79
-
80
-
81
-
82
-
83
-
84
-
85
-
86
-
87
-
88
-
89
-
90
-
91
-
92
-
93
-
94
-
95
-
96
-
97
-
98
-
99
-
100
-
101
-
102
-
103
-
104
-
105
-
106
-
107
-
108
-
109
-
110
-
111
-
112
-
113
-
114
-
115
-
116
-
117
-
118
-
119
-
120
-
121
-
122
-
123
-
124
-
125
-
126
-
127
-
128
-
129
-
130
-
131
-
132
-
133
-
134
-
135
-
136
-
137
-
138
-
139
-
140
-
141
-
142
-
143
-
144
-
145
-
146
-
147
-
148
-
149
-
150
-
151
-
152
-
153
-
154
-
155
-
156
-
157
-
158
-
159
-
160
-
161
-
162
-
163
-
164
-
165
-
166
-
167
-
168
-
 169
169 -
 170
170 -
 171
171 -
 172
172 -
 173
173 -
 174
174 -
 175
175 -
 176
176 -
 177
177 -
 178
178 -
 179
179 -
180
-
181
-
182
-
183
-
184
-
185
-
186
-
187
-
188
-
189
-
190
-
191
-
192
-
193
-
194
-
195
-
196
-
197
-
198
-
199
-
200
-
201
-
202
-
203
-
204
-
205
-
206
-
207
-
208
-
209
-
210
-
211
-
212
-
213
-
214
-
215
-
216
-
217
-
218
-
219
-
220
-
221
-
222
-
223
-
224
-
225
-
226
-
227
-
228
-
229
-
230
-
231
-
232
-
233
-
234
-
235
-
236
-
237
-
238
-
239
 |
 |