Ricoh SP4100N User Manual - Page 24
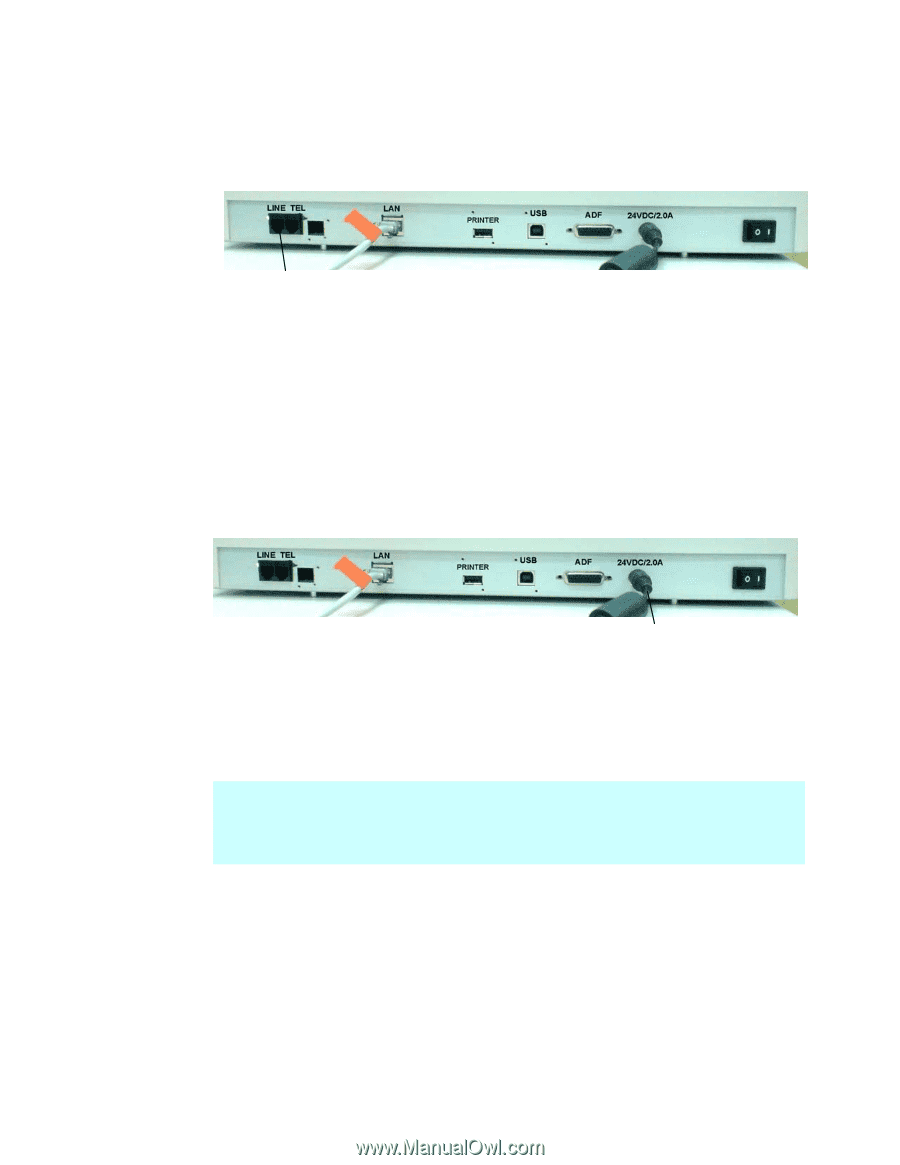
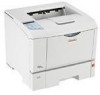
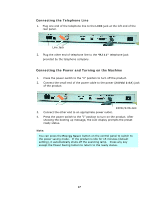
Connecting the Telephone Line, Connecting the Power and Turning on the Machine, RJ-11, 24Vdc/2.0A
 |
UPC - 026649027994
View all Ricoh SP4100N manuals
Add to My Manuals
Save this manual to your list of manuals |
Page 24 highlights
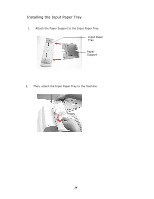
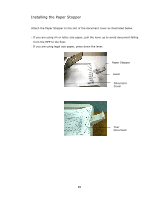
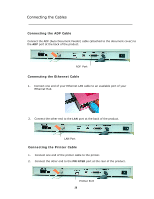
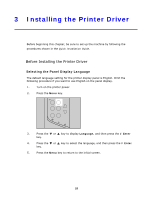
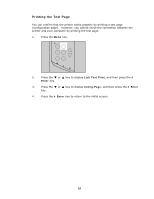
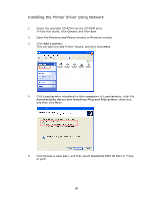
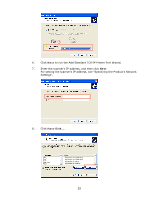
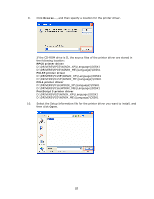
Connecting the Telephone Line 1. Plug one end of the telephone line to the LINE jack at the left end of the rear panel. Line Jack 2. Plug the other end of telephone line to the "RJ-11" telephone jack provided by the telephone company. Connecting the Power and Turning on the Machine 1. Press the power switch to the "0" position to turn off the product. 2. Connect the small end of the power cable to the power (24Vdc/2.0A) jack of the product. 24Vdc/2.0A Jack 3. Connect the other end to an appropriate power outlet. 4. Press the power switch to the "I" position to turn on the product. After showing the booting up message, the LCD display prompts the preset ready status. Note: You can press the Energy Saver button on the control panel to switch to the power saving mode. If the product is idle for 15 minutes (default setting), it automatically shuts off the scanning lamp. Press any key except the Power Saving button to return to the ready status. 17
-
 1
1 -
2
-
3
-
4
-
5
-
6
-
7
-
8
-
9
-
10
-
11
-
12
-
13
-
14
-
15
-
16
-
17
-
18
-
 19
19 -
 20
20 -
 21
21 -
 22
22 -
 23
23 -
 24
24 -
 25
25 -
 26
26 -
 27
27 -
 28
28 -
 29
29 -
30
-
31
-
32
-
33
-
34
-
35
-
36
-
37
-
38
-
39
-
40
-
41
-
42
-
43
-
44
-
45
-
46
-
47
-
48
-
49
-
50
-
51
-
52
-
53
-
54
-
55
-
56
-
57
-
58
-
59
-
60
-
61
-
62
-
63
-
64
-
65
-
66
-
67
-
68
-
69
-
70
-
71
-
72
-
73
-
74
-
75
-
76
-
77
-
78
-
79
-
80
-
81
-
82
-
83
-
84
-
85
-
86
-
87
-
88
-
89
-
90
-
91
-
92
-
93
-
94
-
95
-
96
-
97
-
98
-
99
-
100
-
101
-
102
-
103
-
104
-
105
-
106
-
107
-
108
-
109
-
110
-
111
-
112
-
113
-
114
-
115
-
116
-
117
-
118
-
119
-
120
-
121
-
122
-
123
-
124
-
125
-
126
-
127
-
128
-
129
-
130
-
131
-
132
-
133
-
134
-
135
-
136
-
137
-
138
-
139
-
140
-
141
-
142
-
143
-
144
-
145
-
146
-
147
-
148
-
149
-
150
-
151
-
152
-
153
-
154
-
155
-
156
-
157
-
158
-
159
-
160
-
161
-
162
-
163
-
164
 |
 |