Epson 9880 Printer Guide - Page 102
paper. You can use the slider to control the amount of expansion.
 |
UPC - 010343866843
View all Epson 9880 manuals
Add to My Manuals
Save this manual to your list of manuals |
Page 102 highlights
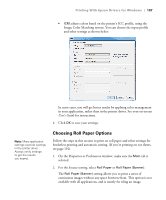
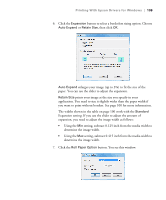
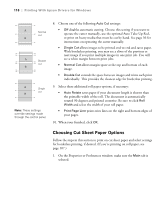
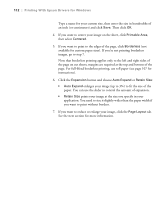
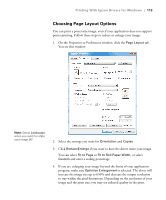
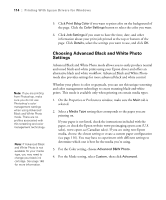
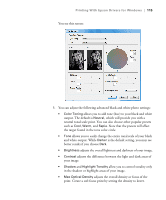
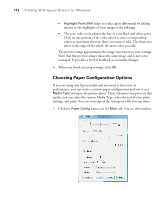
112 | Printing With Epson Drivers for Windows Type a name for your custom size, then enter the size in hundredths of an inch (or centimeters) and click Save. Then click OK. 4. If you want to center your image on the sheet, click Printable Area, then select Centered. 5. If you want to print to the edges of the page, click Borderless (not available for custom paper sizes). If you're not printing borderless images, go to step 7. Note that borderless printing applies only to the left and right sides of the page on cut sheets; margins are required at the top and bottom of the page. For full-bleed borderless printing, use roll paper (see page 107 for instructions). 6. Click the Expansion button and choose Auto Expand or Retain Size: • Auto Expand enlarges your image (up to 3%) to fit the size of the paper. You can use the slider to control the amount of expansion. • Retain Size prints your image at the size you specify in your application. You need to size it slightly wider than the paper width if you want to print without borders. 7. If you want to reduce or enlarge your image, click the Page Layout tab. See the next section for more information. 112
-
 1
1 -
2
-
3
-
4
-
5
-
6
-
7
-
8
-
9
-
10
-
11
-
12
-
13
-
14
-
15
-
16
-
17
-
18
-
19
-
20
-
21
-
22
-
23
-
24
-
25
-
26
-
27
-
28
-
29
-
30
-
31
-
32
-
33
-
34
-
35
-
36
-
37
-
38
-
39
-
40
-
41
-
42
-
43
-
44
-
45
-
46
-
47
-
48
-
49
-
50
-
51
-
52
-
53
-
54
-
55
-
56
-
57
-
58
-
59
-
60
-
61
-
62
-
63
-
64
-
65
-
66
-
67
-
68
-
69
-
70
-
71
-
72
-
73
-
74
-
75
-
76
-
77
-
78
-
79
-
80
-
81
-
82
-
83
-
84
-
85
-
86
-
87
-
88
-
89
-
90
-
91
-
92
-
93
-
94
-
95
-
96
-
 97
97 -
 98
98 -
 99
99 -
 100
100 -
 101
101 -
 102
102 -
 103
103 -
 104
104 -
 105
105 -
 106
106 -
 107
107 -
108
-
109
-
110
-
111
-
112
-
113
-
114
-
115
-
116
-
117
-
118
-
119
-
120
-
121
-
122
-
123
-
124
-
125
-
126
-
127
-
128
-
129
-
130
-
131
-
132
-
133
-
134
-
135
-
136
-
137
-
138
-
139
-
140
-
141
-
142
-
143
-
144
-
145
-
146
-
147
-
148
-
149
-
150
-
151
-
152
-
153
-
154
-
155
-
156
-
157
-
158
-
159
-
160
-
161
-
162
-
163
-
164
-
165
-
166
-
167
-
168
-
169
-
170
-
171
-
172
-
173
-
174
-
175
-
176
 |
 |