Epson 9880 Printer Guide - Page 130
Switching Black Ink Cartridges, Draining the Old Ink
 |
UPC - 010343866843
View all Epson 9880 manuals
Add to My Manuals
Save this manual to your list of manuals |
Page 130 highlights
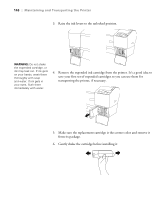
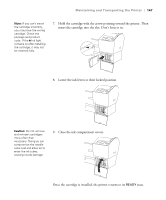
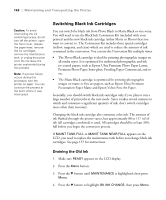
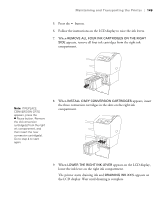
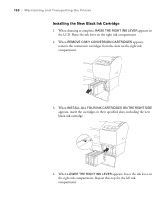
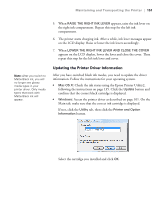
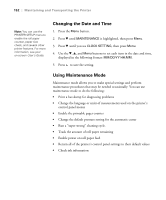
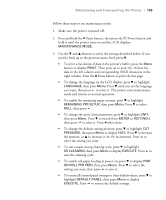
148 | Maintaining and Transporting the Printer Caution: To avoid interrupting the ink switching process, do not turn off the printer, open the front cover, release the paper lever, remove the ink cartridges, remove the maintenance tank, or unplug the power cord. Do not leave the printer unattended during this process. Note: If a power failure occurs during this procedure, turn the printer on again. You can continue the process at the point where it was interrupted. Switching Black Ink Cartridges You can switch the black ink from Photo Black to Matte Black or vice-versa. You will need to use the Black Ink Conversion Kit (included with your printer) and the new black ink cartridge (either Matte or Photo) that you want to convert to. The Conversion Kit includes three special cartridges (yellow, magenta, and cyan) which are used to reduce the amount of ink consumed in the conversion. You can use the Conversion Kit multiple times. • The Photo Black cartridge is ideal for printing photographic images on all media types. It is optimized for traditional photographic and ink jet-coated papers, such as Epson Ultra Premium Photo Paper Luster, Premium Photo Paper Semi-gloss, Proofing Paper Commercial, and so on. • The Matte Black cartridge is optimized for printing photographic images on matte or fine art papers, such as Epson Ultra Premium Presentation Paper Matte and Epson Velvet Fine Art Paper. Generally, you should switch black ink cartridges only if you plan to run a large number of print jobs in the new mode. Since it takes several minutes to switch and consumes a significant quantity of ink, don't switch cartridges more often than necessary. Changing the black ink cartridge also consumes color ink. The amount of ink flushed through the printer varies, but approximately 88 to 117 ml of ink (all cartridges combined) is used. All cartridges should be at least 30% full before you begin the conversion process. If MAINT TANK FULL or MAINT TANK NEAR FULL appears on the LCD, you need to replace the maintenance tank before you change black ink cartridges. See page 157 for instructions. Draining the Old Ink 1. Make sure READY appears on the LCD display. 2. Press the Menu button. 3. Press the d button until MAINTENANCE is highlighted, then press Menu. 4. Press the d button to highlight BK INK CHANGE, then press Menu. 148
-
 1
1 -
2
-
3
-
4
-
5
-
6
-
7
-
8
-
9
-
10
-
11
-
12
-
13
-
14
-
15
-
16
-
17
-
18
-
19
-
20
-
21
-
22
-
23
-
24
-
25
-
26
-
27
-
28
-
29
-
30
-
31
-
32
-
33
-
34
-
35
-
36
-
37
-
38
-
39
-
40
-
41
-
42
-
43
-
44
-
45
-
46
-
47
-
48
-
49
-
50
-
51
-
52
-
53
-
54
-
55
-
56
-
57
-
58
-
59
-
60
-
61
-
62
-
63
-
64
-
65
-
66
-
67
-
68
-
69
-
70
-
71
-
72
-
73
-
74
-
75
-
76
-
77
-
78
-
79
-
80
-
81
-
82
-
83
-
84
-
85
-
86
-
87
-
88
-
89
-
90
-
91
-
92
-
93
-
94
-
95
-
96
-
97
-
98
-
99
-
100
-
101
-
102
-
103
-
104
-
105
-
106
-
107
-
108
-
109
-
110
-
111
-
112
-
113
-
114
-
115
-
116
-
117
-
118
-
119
-
120
-
121
-
122
-
123
-
124
-
 125
125 -
 126
126 -
 127
127 -
 128
128 -
 129
129 -
 130
130 -
 131
131 -
 132
132 -
 133
133 -
 134
134 -
 135
135 -
136
-
137
-
138
-
139
-
140
-
141
-
142
-
143
-
144
-
145
-
146
-
147
-
148
-
149
-
150
-
151
-
152
-
153
-
154
-
155
-
156
-
157
-
158
-
159
-
160
-
161
-
162
-
163
-
164
-
165
-
166
-
167
-
168
-
169
-
170
-
171
-
172
-
173
-
174
-
175
-
176
 |
 |
