Epson 9880 Printer Guide - Page 24
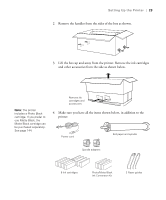
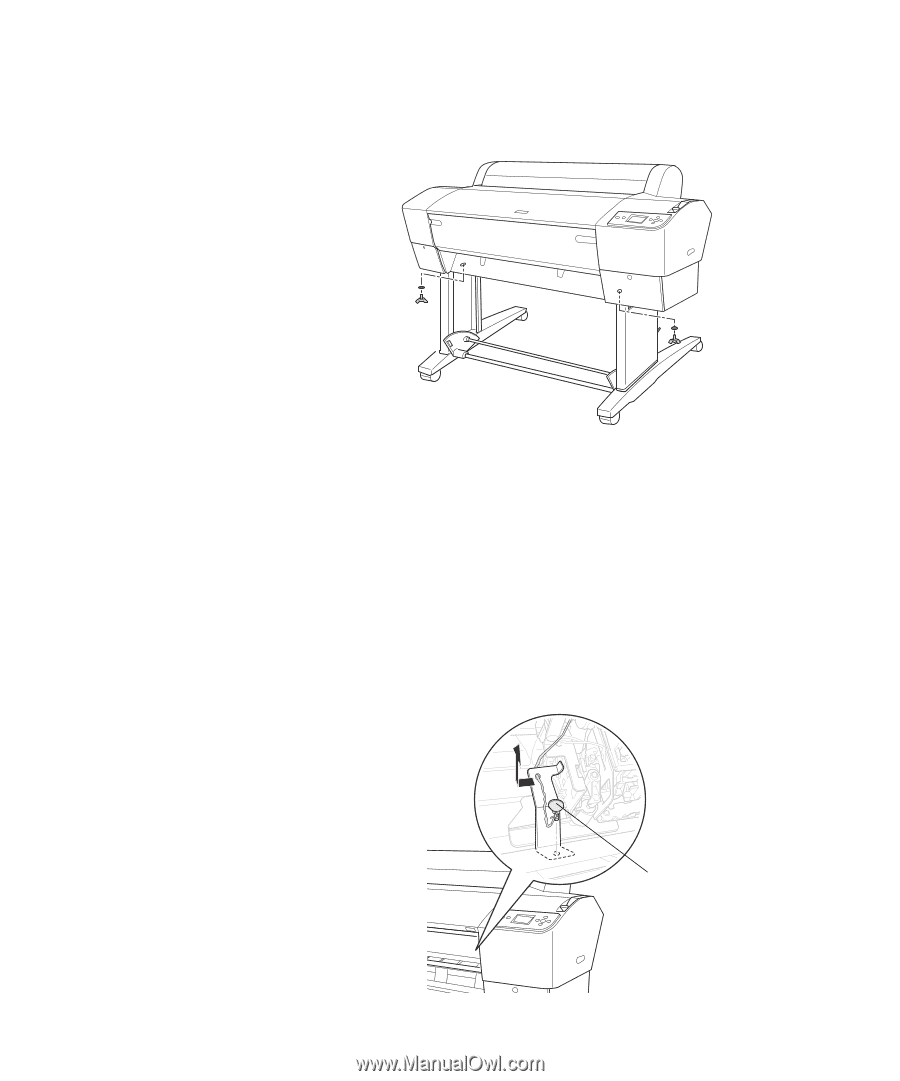
Open the front cover. Follow the red wire to locate the bolt and bracket - maintenance tank
 |
UPC - 010343866843
View all Epson 9880 manuals
Add to My Manuals
Save this manual to your list of manuals |
Page 24 highlights
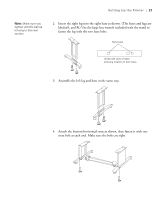
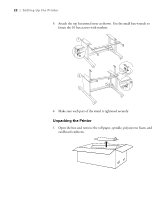
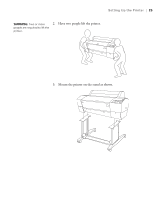
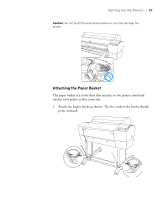
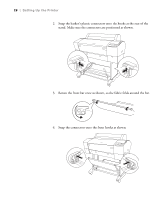
26 | Setting Up the Printer 4. Fasten the printer to the stand with the wing screws and washers. Note: To prevent paper jams, don't place the bolt back in the printer. 5. Remove any packing tape. Check these areas: • the front cover • the ink compartment covers • the maintenance tank (on the right side near the bottom) 6. Open the front cover. Follow the red wire to locate the bolt and bracket securing the print head. Then unscrew the bolt and remove the bracket as shown. Save the bolt and bracket in case you need to ship the printer. Bolt 26
-
 1
1 -
2
-
3
-
4
-
5
-
6
-
7
-
8
-
9
-
10
-
11
-
12
-
13
-
14
-
15
-
16
-
17
-
18
-
 19
19 -
 20
20 -
 21
21 -
 22
22 -
 23
23 -
 24
24 -
 25
25 -
 26
26 -
 27
27 -
 28
28 -
 29
29 -
30
-
31
-
32
-
33
-
34
-
35
-
36
-
37
-
38
-
39
-
40
-
41
-
42
-
43
-
44
-
45
-
46
-
47
-
48
-
49
-
50
-
51
-
52
-
53
-
54
-
55
-
56
-
57
-
58
-
59
-
60
-
61
-
62
-
63
-
64
-
65
-
66
-
67
-
68
-
69
-
70
-
71
-
72
-
73
-
74
-
75
-
76
-
77
-
78
-
79
-
80
-
81
-
82
-
83
-
84
-
85
-
86
-
87
-
88
-
89
-
90
-
91
-
92
-
93
-
94
-
95
-
96
-
97
-
98
-
99
-
100
-
101
-
102
-
103
-
104
-
105
-
106
-
107
-
108
-
109
-
110
-
111
-
112
-
113
-
114
-
115
-
116
-
117
-
118
-
119
-
120
-
121
-
122
-
123
-
124
-
125
-
126
-
127
-
128
-
129
-
130
-
131
-
132
-
133
-
134
-
135
-
136
-
137
-
138
-
139
-
140
-
141
-
142
-
143
-
144
-
145
-
146
-
147
-
148
-
149
-
150
-
151
-
152
-
153
-
154
-
155
-
156
-
157
-
158
-
159
-
160
-
161
-
162
-
163
-
164
-
165
-
166
-
167
-
168
-
169
-
170
-
171
-
172
-
173
-
174
-
175
-
176
 |
 |
26
26
|
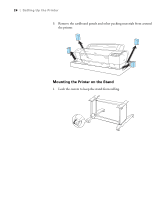
Setting Up the Printer
4.
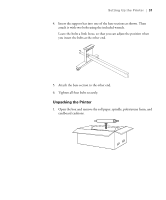
Fasten the printer to the stand with the wing screws and washers.
5.
Remove any packing tape. Check these areas:
•
the front cover
•
the ink compartment covers
•
the maintenance tank (on the right side near the bottom)
6.
Open the front cover. Follow the red wire to locate the bolt and bracket
securing the print head. Then unscrew the bolt and remove the bracket
as shown.
Save the bolt and bracket in case you need to ship the printer.
Note:
To prevent paper
jams, don’t place the bolt
back in the printer.
Bolt