Epson 9880 Printer Guide - Page 46
Configuring the Printer for Your Network, Epson LFP Remote window. - print head
 |
UPC - 010343866843
View all Epson 9880 manuals
Add to My Manuals
Save this manual to your list of manuals |
Page 46 highlights
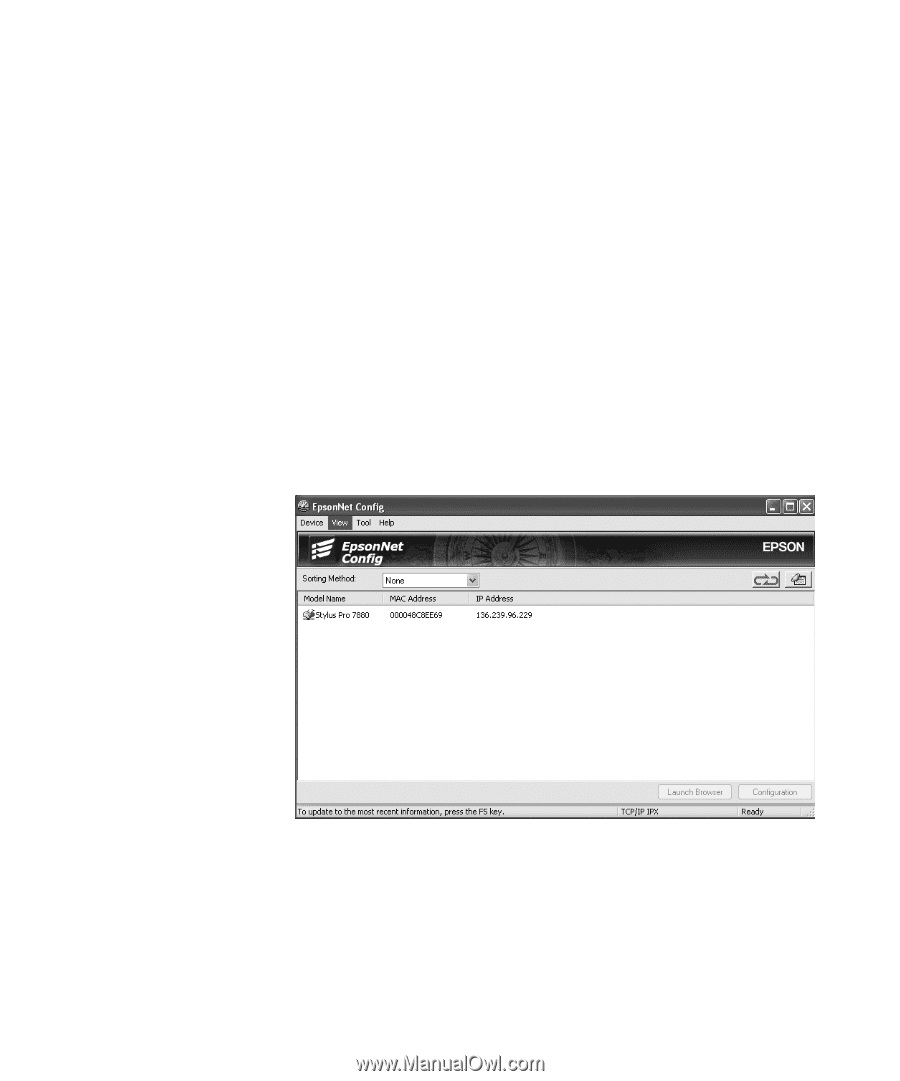
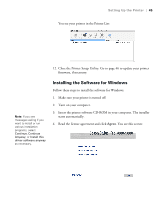
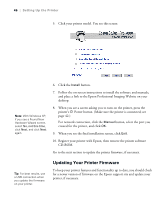
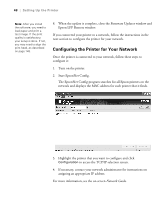
48 | Setting Up the Printer Note: After you install the software, you need to load paper and print a test image. If the print quality is satisfactory, your setup is done. If not, you may need to align the print head, as described on page 143. 8. When the update is complete, close the Firmware Updater window and Epson LFP Remote window. If you connected your printer to a network, follow the instructions in the next section to configure the printer for your network. Configuring the Printer for Your Network Once the printer is connected to your network, follow these steps to configure it: 1. Turn on the printer. 2. Start EpsonNet Config. The EpsonNet Config program searches for all Epson printers on the network and displays the MAC address for each printer that it finds. 3. Highlight the printer that you want to configure and click Configuration to access the TCP/IP selection screen. 4. If necessary, contact your network administrator for instructions on assigning an appropriate IP address. For more information, see the on-screen Network Guide. 48
-
 1
1 -
2
-
3
-
4
-
5
-
6
-
7
-
8
-
9
-
10
-
11
-
12
-
13
-
14
-
15
-
16
-
17
-
18
-
19
-
20
-
21
-
22
-
23
-
24
-
25
-
26
-
27
-
28
-
29
-
30
-
31
-
32
-
33
-
34
-
35
-
36
-
37
-
38
-
39
-
40
-
 41
41 -
 42
42 -
 43
43 -
 44
44 -
 45
45 -
 46
46 -
 47
47 -
 48
48 -
 49
49 -
 50
50 -
 51
51 -
52
-
53
-
54
-
55
-
56
-
57
-
58
-
59
-
60
-
61
-
62
-
63
-
64
-
65
-
66
-
67
-
68
-
69
-
70
-
71
-
72
-
73
-
74
-
75
-
76
-
77
-
78
-
79
-
80
-
81
-
82
-
83
-
84
-
85
-
86
-
87
-
88
-
89
-
90
-
91
-
92
-
93
-
94
-
95
-
96
-
97
-
98
-
99
-
100
-
101
-
102
-
103
-
104
-
105
-
106
-
107
-
108
-
109
-
110
-
111
-
112
-
113
-
114
-
115
-
116
-
117
-
118
-
119
-
120
-
121
-
122
-
123
-
124
-
125
-
126
-
127
-
128
-
129
-
130
-
131
-
132
-
133
-
134
-
135
-
136
-
137
-
138
-
139
-
140
-
141
-
142
-
143
-
144
-
145
-
146
-
147
-
148
-
149
-
150
-
151
-
152
-
153
-
154
-
155
-
156
-
157
-
158
-
159
-
160
-
161
-
162
-
163
-
164
-
165
-
166
-
167
-
168
-
169
-
170
-
171
-
172
-
173
-
174
-
175
-
176
 |
 |