Epson 9880 Printer Guide - Page 125
Aligning the Print Head, then press
 |
UPC - 010343866843
View all Epson 9880 manuals
Add to My Manuals
Save this manual to your list of manuals |
Page 125 highlights
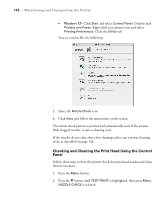
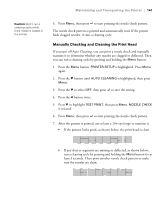
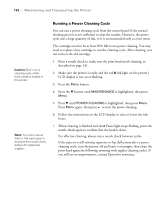
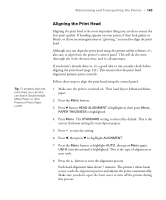
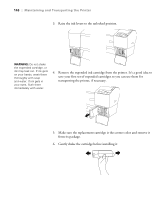
Maintaining and Transporting the Printer | 143 Tip: To properly align the print head, you can also use Epson Doubleweight Matte Paper or Ultra Premium Photo Paper Luster. Aligning the Print Head Aligning the print head is the most important thing you can do to ensure the best print quality. If banding appears on your prints, if they look grainy or blurry, or if you see misregistration or "ghosting," you need to align the print head. Although you can align the print head using the printer utility software, it's also easy to align from the printer's control panel. This will do the most thorough job in the shortest time, and it's all automatic. If you haven't already done so, it's a good idea to run a nozzle check before aligning the print head (page 141). This ensures that the print head alignment patterns print correctly. Follow these steps to align the print head using the control panel: 1. Make sure the printer is turned on. Then load Epson Enhanced Matte paper. 2. Press the Menu button. 3. Press d button HEAD ALIGNMENT is highlighted, then press Menu. PAPER THICKNESS is highlighted. 4. Press Menu. The STANDARD setting is selected by default. This is the correct thickness setting for most Epson papers. 5. Press to save the setting. 6. Press l, then press d to highlight ALIGNMENT. 7. Press the Menu button to highlight AUTO, then press Menu again. UNI-D (uni-directional) is highlighted. This is the type of alignment to start with. 8. Press the button to start the alignment process. Each head alignment takes about 7 minutes. The printer's white beam sensor reads the alignment pattern and adjusts the printer automatically. Make sure you don't open the front cover or turn off the printer during this process. 143
-
 1
1 -
2
-
3
-
4
-
5
-
6
-
7
-
8
-
9
-
10
-
11
-
12
-
13
-
14
-
15
-
16
-
17
-
18
-
19
-
20
-
21
-
22
-
23
-
24
-
25
-
26
-
27
-
28
-
29
-
30
-
31
-
32
-
33
-
34
-
35
-
36
-
37
-
38
-
39
-
40
-
41
-
42
-
43
-
44
-
45
-
46
-
47
-
48
-
49
-
50
-
51
-
52
-
53
-
54
-
55
-
56
-
57
-
58
-
59
-
60
-
61
-
62
-
63
-
64
-
65
-
66
-
67
-
68
-
69
-
70
-
71
-
72
-
73
-
74
-
75
-
76
-
77
-
78
-
79
-
80
-
81
-
82
-
83
-
84
-
85
-
86
-
87
-
88
-
89
-
90
-
91
-
92
-
93
-
94
-
95
-
96
-
97
-
98
-
99
-
100
-
101
-
102
-
103
-
104
-
105
-
106
-
107
-
108
-
109
-
110
-
111
-
112
-
113
-
114
-
115
-
116
-
117
-
118
-
119
-
 120
120 -
 121
121 -
 122
122 -
 123
123 -
 124
124 -
 125
125 -
 126
126 -
 127
127 -
 128
128 -
 129
129 -
 130
130 -
131
-
132
-
133
-
134
-
135
-
136
-
137
-
138
-
139
-
140
-
141
-
142
-
143
-
144
-
145
-
146
-
147
-
148
-
149
-
150
-
151
-
152
-
153
-
154
-
155
-
156
-
157
-
158
-
159
-
160
-
161
-
162
-
163
-
164
-
165
-
166
-
167
-
168
-
169
-
170
-
171
-
172
-
173
-
174
-
175
-
176
 |
 |