Epson 9880 Printer Guide - Page 143
Preparing the Printer for Shipment, Raise the ink levers.
 |
UPC - 010343866843
View all Epson 9880 manuals
Add to My Manuals
Save this manual to your list of manuals |
Page 143 highlights
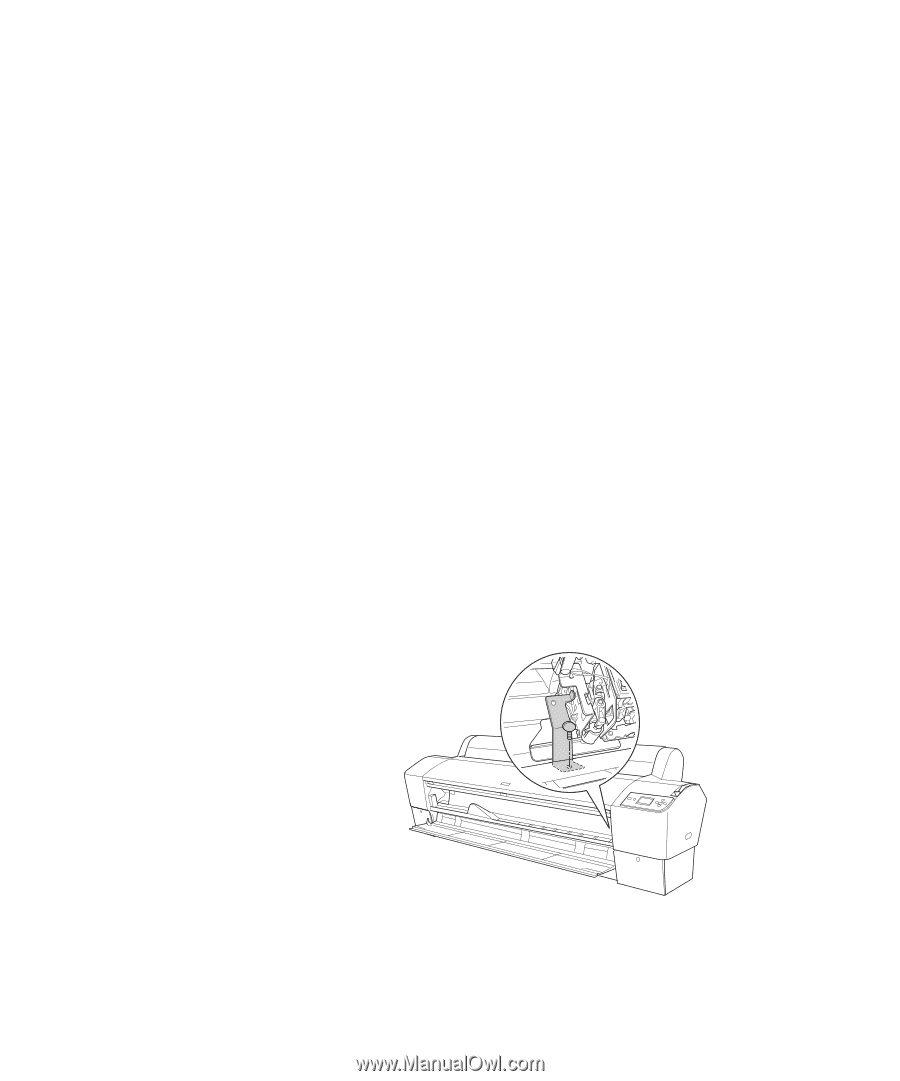
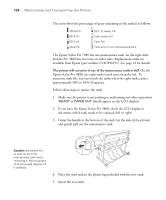
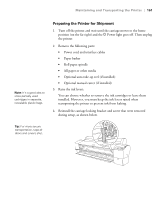
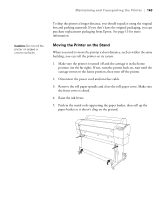
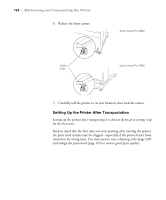
Maintaining and Transporting the Printer | 161 Note: It's a good idea to store partially used cartridges in separate, resealable plastic bags. Preparing the Printer for Shipment 1. Turn off the printer and wait until the carriage moves to the home position (on the far right) and the P Power light goes off. Then unplug the printer. 2. Remove the following parts: • Power cord and interface cables • Paper basket • Roll paper spindle • All paper or other media • Optional auto take-up reel (if installed) • Optional manual cutter (if installed) 3. Raise the ink levers. You can choose whether to remove the ink cartridges or leave them installed. However, you must keep the ink levers raised when transporting the printer to prevent ink from leaking. 4. Reinstall the carriage locking bracket and screw that were removed during setup, as shown below. Tip: For more secure transportation, tape all doors and covers shut. 161
-
 1
1 -
2
-
3
-
4
-
5
-
6
-
7
-
8
-
9
-
10
-
11
-
12
-
13
-
14
-
15
-
16
-
17
-
18
-
19
-
20
-
21
-
22
-
23
-
24
-
25
-
26
-
27
-
28
-
29
-
30
-
31
-
32
-
33
-
34
-
35
-
36
-
37
-
38
-
39
-
40
-
41
-
42
-
43
-
44
-
45
-
46
-
47
-
48
-
49
-
50
-
51
-
52
-
53
-
54
-
55
-
56
-
57
-
58
-
59
-
60
-
61
-
62
-
63
-
64
-
65
-
66
-
67
-
68
-
69
-
70
-
71
-
72
-
73
-
74
-
75
-
76
-
77
-
78
-
79
-
80
-
81
-
82
-
83
-
84
-
85
-
86
-
87
-
88
-
89
-
90
-
91
-
92
-
93
-
94
-
95
-
96
-
97
-
98
-
99
-
100
-
101
-
102
-
103
-
104
-
105
-
106
-
107
-
108
-
109
-
110
-
111
-
112
-
113
-
114
-
115
-
116
-
117
-
118
-
119
-
120
-
121
-
122
-
123
-
124
-
125
-
126
-
127
-
128
-
129
-
130
-
131
-
132
-
133
-
134
-
135
-
136
-
137
-
 138
138 -
 139
139 -
 140
140 -
 141
141 -
 142
142 -
 143
143 -
 144
144 -
 145
145 -
 146
146 -
 147
147 -
 148
148 -
149
-
150
-
151
-
152
-
153
-
154
-
155
-
156
-
157
-
158
-
159
-
160
-
161
-
162
-
163
-
164
-
165
-
166
-
167
-
168
-
169
-
170
-
171
-
172
-
173
-
174
-
175
-
176
 |
 |