Epson SureColor S70675 User Manual - Page 113
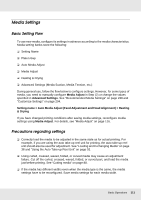
Auto Media Adjust, Feed Adjustment, Alignment, Platen Gap, Advanced Settings
 |
View all Epson SureColor S70675 manuals
Add to My Manuals
Save this manual to your list of manuals |
Page 113 highlights
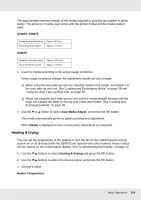
Mistakes can be erased by pressing the l button to delete the previous character and move the cursor back one spot. 3. After entering the name, press the Z button. Auto Media Adjust When this menu is executed, the printer automatically reads adjustment patterns using the sensor while printing the patterns, and continuously performs Feed Adjustment and Head Alignment. Change the setting values of the following items before executing this menu: ❏ Platen Gap ❏ Advanced Settings See "Customize Settings" on page 204. Important: ❏ In the following cases, Auto Media Adjust may not be executed. Take the appropriate action, and re-execute the job: ❏ The printer is exposed to direct sunlight or interference from other ambient light sources. Shade the printer from sources of interference. ❏ Nozzles are clogged. Perform Head Cleaning to remove any clogs. ❏ In the following cases, Auto Media Adjust is not available. In Media Adjust, execute the manual menu for each item. ❏ The media is transparent or colored. ❏ Platen Gap is set to 2.5. ❏ After Auto Media Adjust is performed, banding or graininess is found. See "Media Adjust" on page 116. Basic Operations 113
-
 1
1 -
2
-
3
-
4
-
5
-
6
-
7
-
8
-
9
-
10
-
11
-
12
-
13
-
14
-
15
-
16
-
17
-
18
-
19
-
20
-
21
-
22
-
23
-
24
-
25
-
26
-
27
-
28
-
29
-
30
-
31
-
32
-
33
-
34
-
35
-
36
-
37
-
38
-
39
-
40
-
41
-
42
-
43
-
44
-
45
-
46
-
47
-
48
-
49
-
50
-
51
-
52
-
53
-
54
-
55
-
56
-
57
-
58
-
59
-
60
-
61
-
62
-
63
-
64
-
65
-
66
-
67
-
68
-
69
-
70
-
71
-
72
-
73
-
74
-
75
-
76
-
77
-
78
-
79
-
80
-
81
-
82
-
83
-
84
-
85
-
86
-
87
-
88
-
89
-
90
-
91
-
92
-
93
-
94
-
95
-
96
-
97
-
98
-
99
-
100
-
101
-
102
-
103
-
104
-
105
-
106
-
107
-
 108
108 -
 109
109 -
 110
110 -
 111
111 -
 112
112 -
 113
113 -
 114
114 -
 115
115 -
 116
116 -
 117
117 -
 118
118 -
119
-
120
-
121
-
122
-
123
-
124
-
125
-
126
-
127
-
128
-
129
-
130
-
131
-
132
-
133
-
134
-
135
-
136
-
137
-
138
-
139
-
140
-
141
-
142
-
143
-
144
-
145
-
146
-
147
-
148
-
149
-
150
-
151
-
152
-
153
-
154
-
155
-
156
-
157
-
158
-
159
-
160
-
161
-
162
-
163
-
164
-
165
-
166
-
167
-
168
-
169
-
170
-
171
-
172
-
173
-
174
-
175
-
176
-
177
-
178
-
179
-
180
-
181
-
182
-
183
-
184
-
185
-
186
-
187
-
188
-
189
-
190
-
191
-
192
-
193
-
194
-
195
-
196
-
197
-
198
-
199
-
200
-
201
-
202
-
203
-
204
-
205
-
206
-
207
-
208
-
209
-
210
-
211
-
212
-
213
-
214
-
215
-
216
-
217
-
218
-
219
-
220
-
221
-
222
-
223
-
224
-
225
-
226
-
227
-
228
-
229
-
230
-
231
-
232
-
233
-
234
-
235
-
236
-
237
-
238
-
239
-
240
-
241
-
242
-
243
-
244
-
245
-
246
-
247
-
248
-
249
-
250
-
251
-
252
-
253
-
254
-
255
 |
 |