Epson SureColor S70675 User Manual - Page 136
Using Ink Cleaner, cleaner into the cup.
 |
View all Epson SureColor S70675 manuals
Add to My Manuals
Save this manual to your list of manuals |
Page 136 highlights
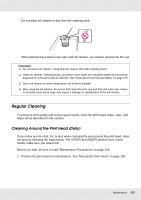
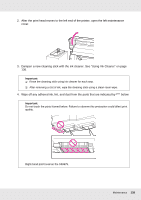
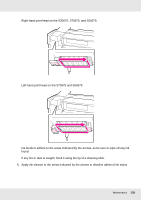
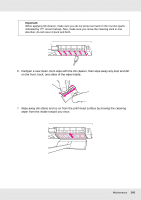
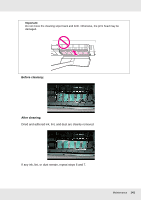
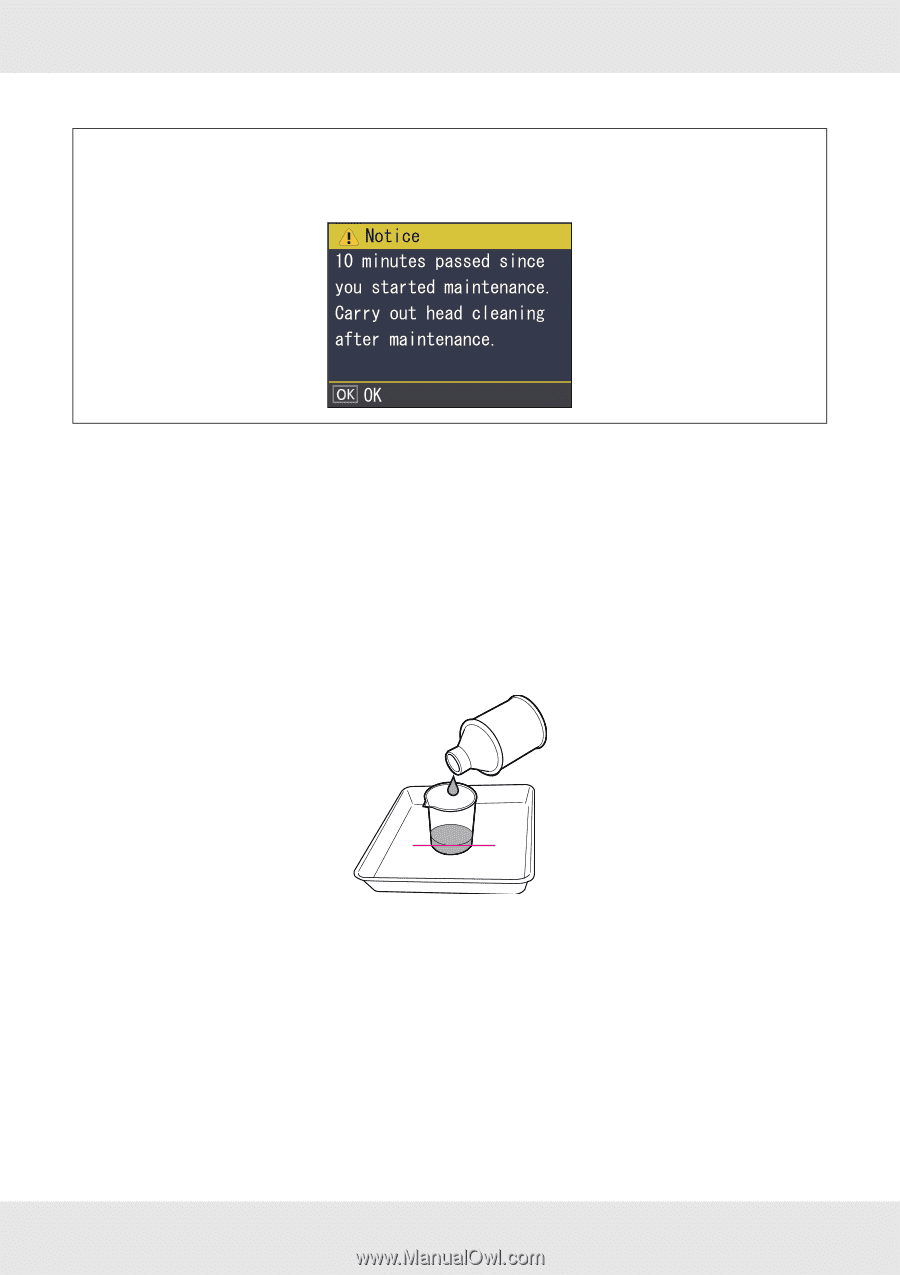
Note: The alarm sounds 10 minutes after the print head is moved (default setting). Press the Z button to continue the cleaning process. After 10 more minutes have passed, the alarm sounds again. Using Ink Cleaner Use ink cleaner to clean around the print head, around the caps, and the flushing pad only. Using ink cleaner on other parts of the printer could damage the product. Before starting this procedure, be sure to read "Maintenance Precautions" on page 134. 1. Put the cup supplied with the ink cleaner on the metal tray and pour about 10 ml of ink cleaner into the cup. 2. Dampen the cleaning stick with ink cleaner. Maintenance 136
-
 1
1 -
2
-
3
-
4
-
5
-
6
-
7
-
8
-
9
-
10
-
11
-
12
-
13
-
14
-
15
-
16
-
17
-
18
-
19
-
20
-
21
-
22
-
23
-
24
-
25
-
26
-
27
-
28
-
29
-
30
-
31
-
32
-
33
-
34
-
35
-
36
-
37
-
38
-
39
-
40
-
41
-
42
-
43
-
44
-
45
-
46
-
47
-
48
-
49
-
50
-
51
-
52
-
53
-
54
-
55
-
56
-
57
-
58
-
59
-
60
-
61
-
62
-
63
-
64
-
65
-
66
-
67
-
68
-
69
-
70
-
71
-
72
-
73
-
74
-
75
-
76
-
77
-
78
-
79
-
80
-
81
-
82
-
83
-
84
-
85
-
86
-
87
-
88
-
89
-
90
-
91
-
92
-
93
-
94
-
95
-
96
-
97
-
98
-
99
-
100
-
101
-
102
-
103
-
104
-
105
-
106
-
107
-
108
-
109
-
110
-
111
-
112
-
113
-
114
-
115
-
116
-
117
-
118
-
119
-
120
-
121
-
122
-
123
-
124
-
125
-
126
-
127
-
128
-
129
-
130
-
 131
131 -
 132
132 -
 133
133 -
 134
134 -
 135
135 -
 136
136 -
 137
137 -
 138
138 -
 139
139 -
 140
140 -
 141
141 -
142
-
143
-
144
-
145
-
146
-
147
-
148
-
149
-
150
-
151
-
152
-
153
-
154
-
155
-
156
-
157
-
158
-
159
-
160
-
161
-
162
-
163
-
164
-
165
-
166
-
167
-
168
-
169
-
170
-
171
-
172
-
173
-
174
-
175
-
176
-
177
-
178
-
179
-
180
-
181
-
182
-
183
-
184
-
185
-
186
-
187
-
188
-
189
-
190
-
191
-
192
-
193
-
194
-
195
-
196
-
197
-
198
-
199
-
200
-
201
-
202
-
203
-
204
-
205
-
206
-
207
-
208
-
209
-
210
-
211
-
212
-
213
-
214
-
215
-
216
-
217
-
218
-
219
-
220
-
221
-
222
-
223
-
224
-
225
-
226
-
227
-
228
-
229
-
230
-
231
-
232
-
233
-
234
-
235
-
236
-
237
-
238
-
239
-
240
-
241
-
242
-
243
-
244
-
245
-
246
-
247
-
248
-
249
-
250
-
251
-
252
-
253
-
254
-
255
 |
 |
Maintenance
136
Using Ink Cleaner
Use ink cleaner to clean around the print head, around the caps, and the flushing pad only.
Using ink cleaner on other parts of the printer could damage the product.
Before starting this procedure, be sure to read “Maintenance Precautions” on page 134.
1.
Put the cup supplied with the ink cleaner on the metal tray and pour about 10 ml of ink
cleaner into the cup.
2.
Dampen the cleaning stick with ink cleaner.
Note:
The alarm sounds 10 minutes after the print head is moved (default setting). Press the
Z
button
to continue the cleaning process. After 10 more minutes have passed, the alarm sounds again.