HP 6125XLG R2306-HP 6125XLG Blade Switch Fundamentals Configuration Guide - Page 47
Configuring command accounting, Configuration procedure
 |
View all HP 6125XLG manuals
Add to My Manuals
Save this manual to your list of manuals |
Page 47 highlights
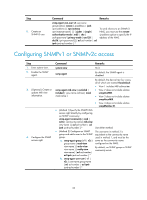
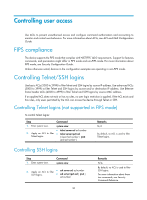
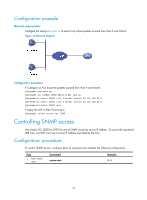
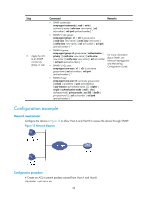
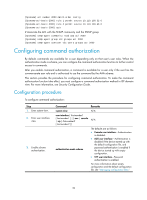
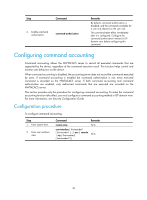
Step Command 4. Enable command authorization. command authorization Remarks By default, command authorization is disabled, and the commands available for a user only depend on the user role. This command takes effect immediately after it is configured. Configure the command authorization method in ISP domain view before configuring this command. Configuring command accounting Command accounting allows the HWTACACS server to record all executed commands that are supported by the device, regardless of the command execution result. This function helps control and monitor user behaviors on the device. When command accounting is disabled, the accounting server does not record the commands executed by users. If command accounting is enabled but command authorization is not, every executed command is recorded on the HWTACACS server. If both command accounting and command authorization are enabled, only authorized commands that are executed are recorded on the HWTACACS server. This section provides only the procedure for configuring command accounting. To make the command accounting function take effect, you must configure a command accounting method in ISP domain view. For more information, see Security Configuration Guide. Configuration procedure To configure command accounting: Step 1. Enter system view. 2. Enter user interface view. Command Remarks system-view N/A user-interface { first-number1 [ last-number1 ] | { aux | console | vty } first-number2 [ last-number2 ] } N/A 40
-
 1
1 -
2
-
3
-
4
-
5
-
6
-
7
-
8
-
9
-
10
-
11
-
12
-
13
-
14
-
15
-
16
-
17
-
18
-
19
-
20
-
21
-
22
-
23
-
24
-
25
-
26
-
27
-
28
-
29
-
30
-
31
-
32
-
33
-
34
-
35
-
36
-
37
-
38
-
39
-
40
-
41
-
 42
42 -
 43
43 -
 44
44 -
 45
45 -
 46
46 -
 47
47 -
 48
48 -
 49
49 -
 50
50 -
 51
51 -
 52
52 -
53
-
54
-
55
-
56
-
57
-
58
-
59
-
60
-
61
-
62
-
63
-
64
-
65
-
66
-
67
-
68
-
69
-
70
-
71
-
72
-
73
-
74
-
75
-
76
-
77
-
78
-
79
-
80
-
81
-
82
-
83
-
84
-
85
-
86
-
87
-
88
-
89
-
90
-
91
-
92
-
93
-
94
-
95
-
96
-
97
-
98
-
99
-
100
-
101
-
102
-
103
-
104
-
105
-
106
-
107
-
108
-
109
-
110
-
111
-
112
-
113
-
114
-
115
-
116
-
117
-
118
-
119
-
120
-
121
-
122
-
123
-
124
-
125
-
126
-
127
-
128
-
129
-
130
-
131
-
132
-
133
-
134
-
135
-
136
-
137
-
138
-
139
-
140
-
141
-
142
-
143
-
144
-
145
-
146
-
147
-
148
-
149
-
150
-
151
-
152
-
153
-
154
-
155
 |
 |