HP LaserJet 5si HP LaserJet 5Si user guide - Page 106
Print Density - cartridge
 |
View all HP LaserJet 5si manuals
Add to My Manuals
Save this manual to your list of manuals |
Page 106 highlights
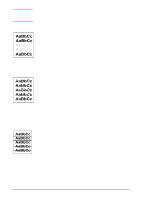
6 Print Quality Note Print Density Print density is a measure of the darkness of the print on the page. The degree of darkness depends on how much toner is applied to the paper while printing. Print density adjustments are made through the control panel. Settings range from Print Density = 1 to Print Density = 5, with 5 being the darkest setting. See the procedure below to change the print density setting from the control panel. Changes to this setting are effective during a printed job within one or two pages. The higher the print density setting, the more toner the printer uses. To extend the life of your toner cartridge, choose lighter print density settings. If available, you can change this setting through your software application; otherwise, use the control panel. Adjusting Print Density from the Control Panel 5 Press [Menus] repeatedly until PRINT QUALITY MENU appears. 6 Press [Items] repeatedly until PRINT DENSITY=3* appears. 7 Press [+] repeatedly until the desired setting appears. Your choices are 1-5; 1 = the lightest; 5 = darkest. 8 Press [Select *] to save the setting. EN Print Quality 6-3
-
 1
1 -
2
-
3
-
4
-
5
-
6
-
7
-
8
-
9
-
10
-
11
-
12
-
13
-
14
-
15
-
16
-
17
-
18
-
19
-
20
-
21
-
22
-
23
-
24
-
25
-
26
-
27
-
28
-
29
-
30
-
31
-
32
-
33
-
34
-
35
-
36
-
37
-
38
-
39
-
40
-
41
-
42
-
43
-
44
-
45
-
46
-
47
-
48
-
49
-
50
-
51
-
52
-
53
-
54
-
55
-
56
-
57
-
58
-
59
-
60
-
61
-
62
-
63
-
64
-
65
-
66
-
67
-
68
-
69
-
70
-
71
-
72
-
73
-
74
-
75
-
76
-
77
-
78
-
79
-
80
-
81
-
82
-
83
-
84
-
85
-
86
-
87
-
88
-
89
-
90
-
91
-
92
-
93
-
94
-
95
-
96
-
97
-
98
-
99
-
100
-
 101
101 -
 102
102 -
 103
103 -
 104
104 -
 105
105 -
 106
106 -
 107
107 -
 108
108 -
 109
109 -
 110
110 -
 111
111 -
112
-
113
-
114
-
115
-
116
-
117
-
118
-
119
-
120
-
121
-
122
-
123
-
124
-
125
-
126
-
127
-
128
-
129
-
130
-
131
-
132
-
133
-
134
-
135
-
136
-
137
-
138
-
139
-
140
-
141
-
142
-
143
-
144
-
145
-
146
-
147
-
148
-
149
-
150
-
151
-
152
-
153
-
154
-
155
-
156
-
157
-
158
-
159
-
160
-
161
-
162
-
163
-
164
-
165
-
166
-
167
-
168
-
169
-
170
-
171
-
172
-
173
-
174
-
175
-
176
-
177
-
178
-
179
-
180
-
181
-
182
-
183
-
184
-
185
-
186
-
187
-
188
-
189
-
190
-
191
-
192
-
193
-
194
-
195
-
196
-
197
-
198
-
199
-
200
-
201
-
202
-
203
 |
 |
